
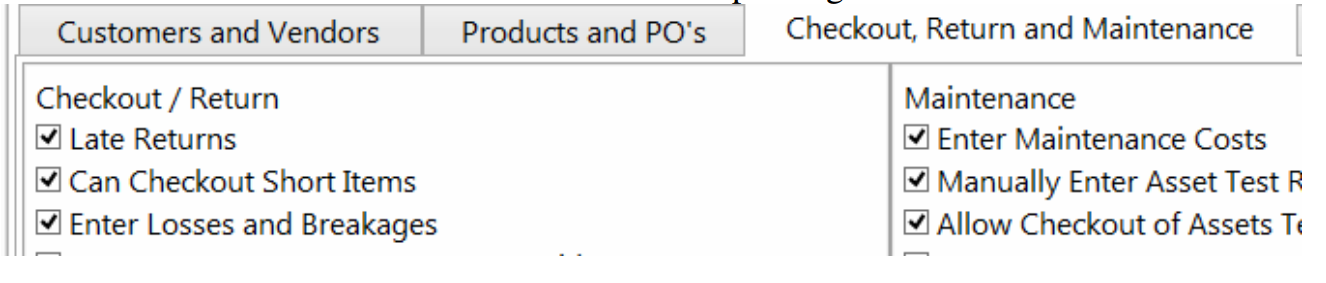
When the user has the 'Can Checkout Short items' privilege
If a barcoded item is short and appears in the cross rental grid in the checkout window.....
Scenario 1
If a barcode is scanned for that item anyway.

The short item will be removed from the cross rental grid and it will allow the checkout
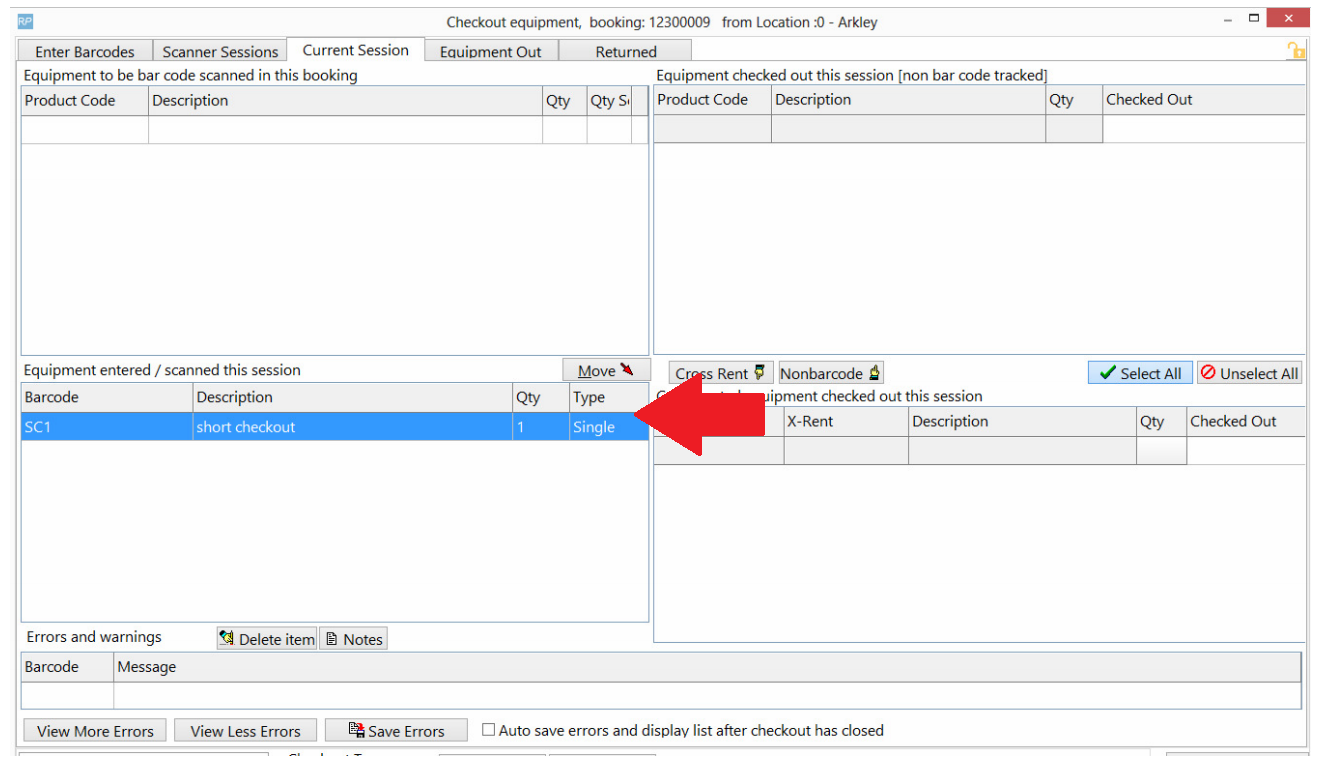
The item will still appear on the shortage report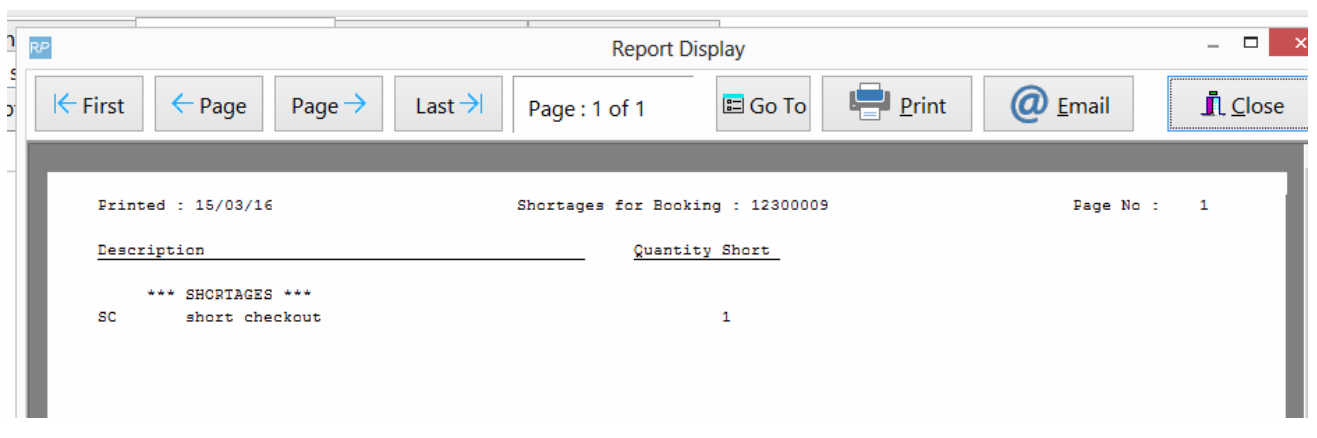
Scenario 2
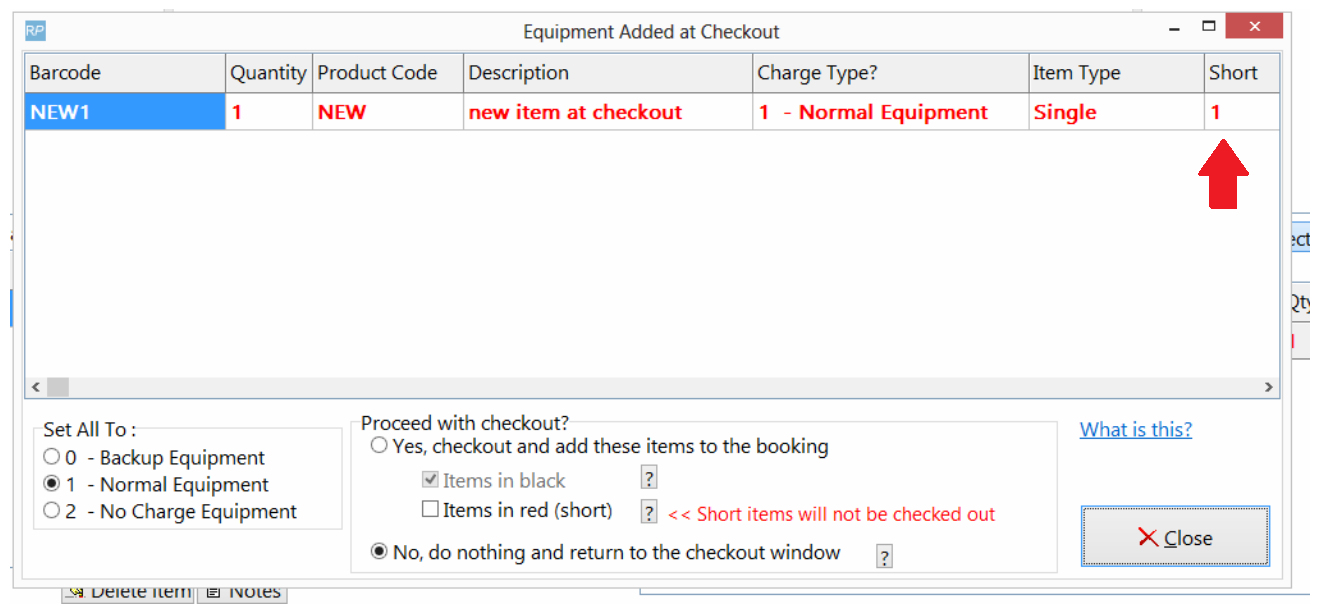
If a new item is scanned instead of the booked item
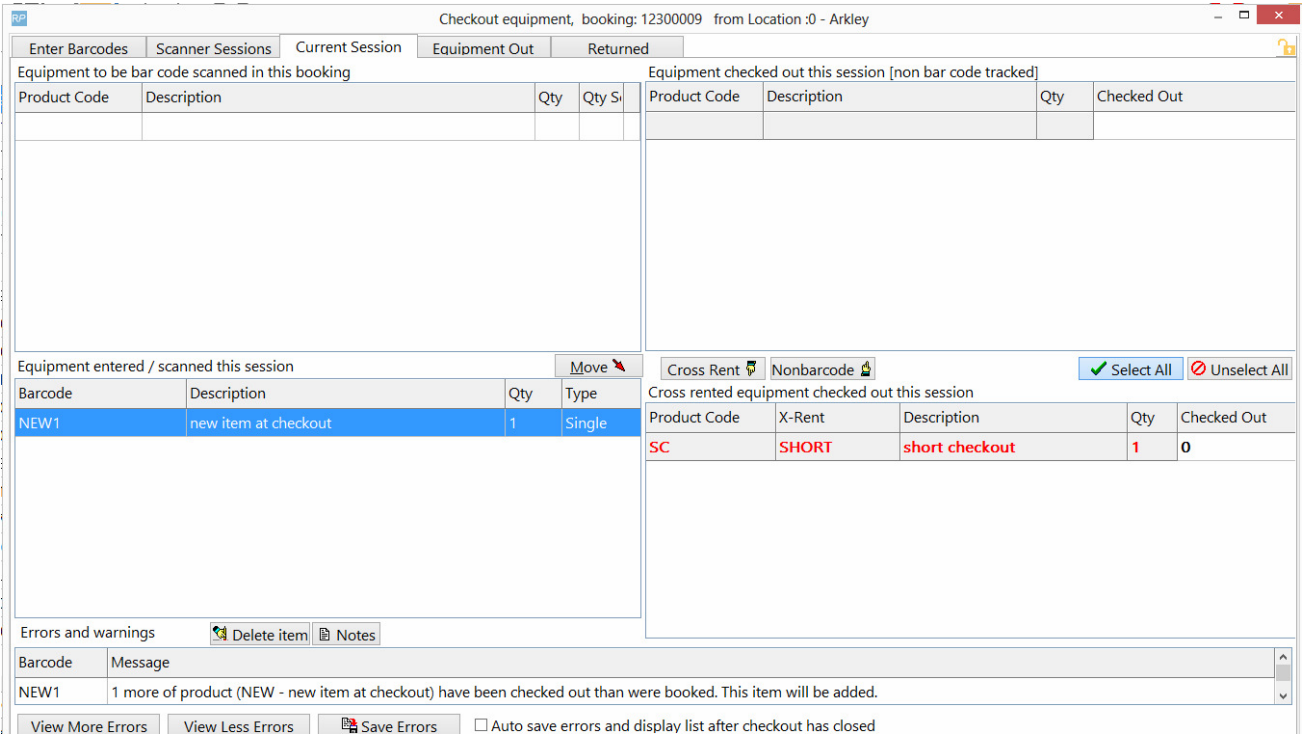
And the new item is also short, it will show up in the added at checkout window
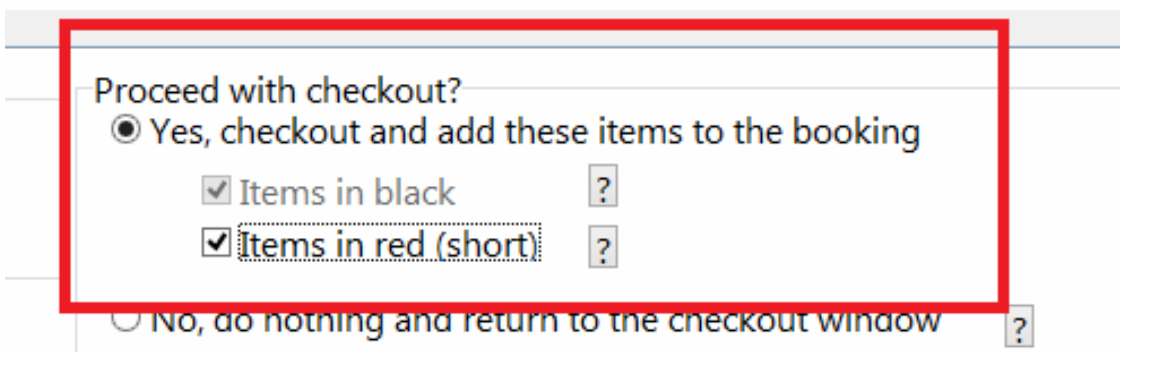
At this point the user should check the 'Items in red (short)' in addition to 'Yes, checkout and add these items to the booking'
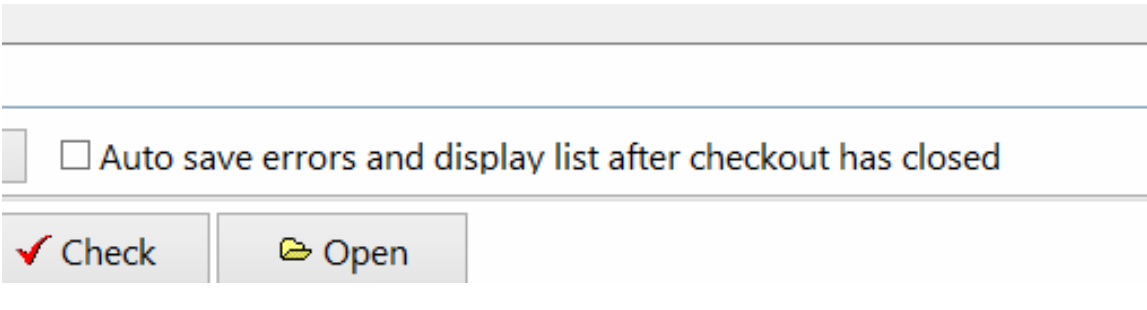
Checkout will proceed and the error list will not pop-up afterwards unless the 'auto save and display errors' checkbox is selected.
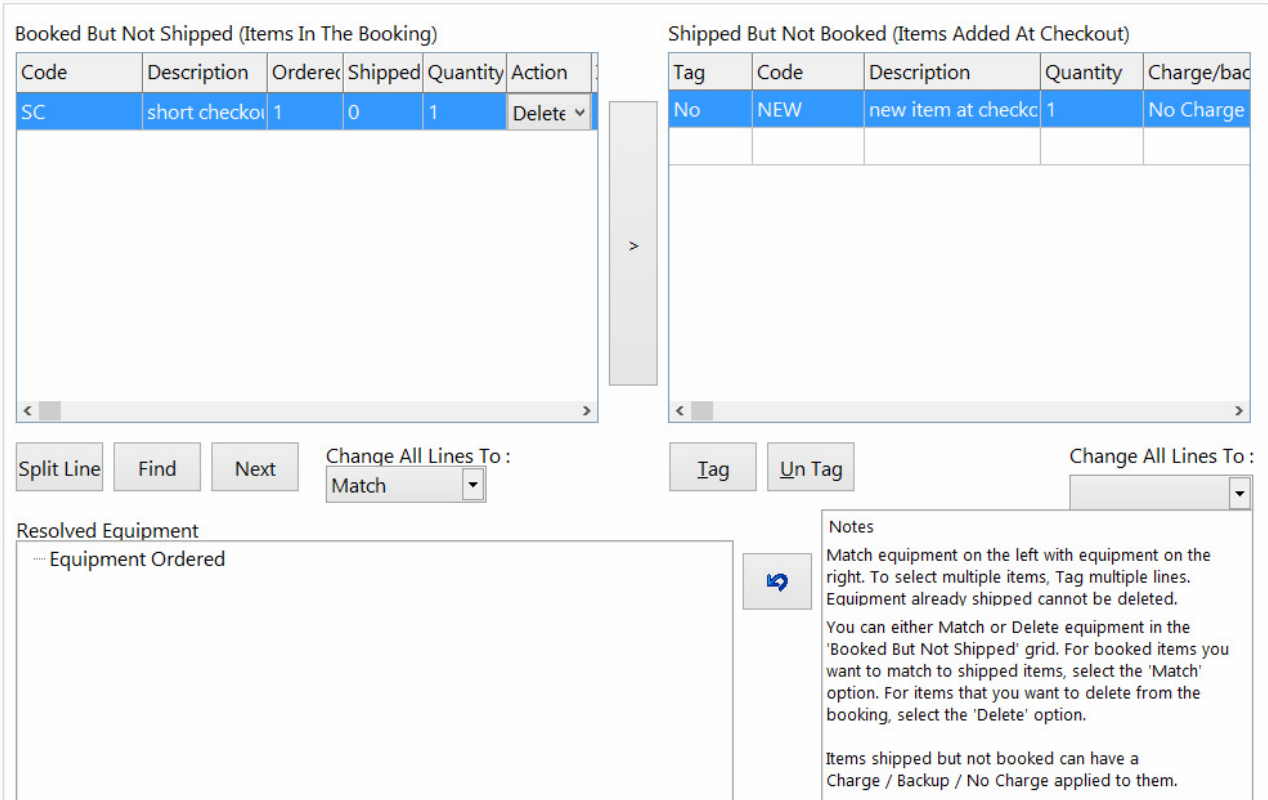
Items can either be matched with a shipped item or just deleted by changing the action drop-down on the line.
Also there is a parameter that automatically opens the resolve discrepancies window on final checkout as needed
Using a barcode for each item ensures you can track that exact items whereabouts. There will be some items like cables or cones that you don't need to know the whereabouts for each individual item.
For scanning purposes though, you may still want to give your non barcode tracked items a 'non tracked barcode'. This will make it easier to scan items in bulk when checking out.
In Inventory Setup, give your non barcoded item a 'Non tracked Barcode', then use that code to scan the non barcoded items as follows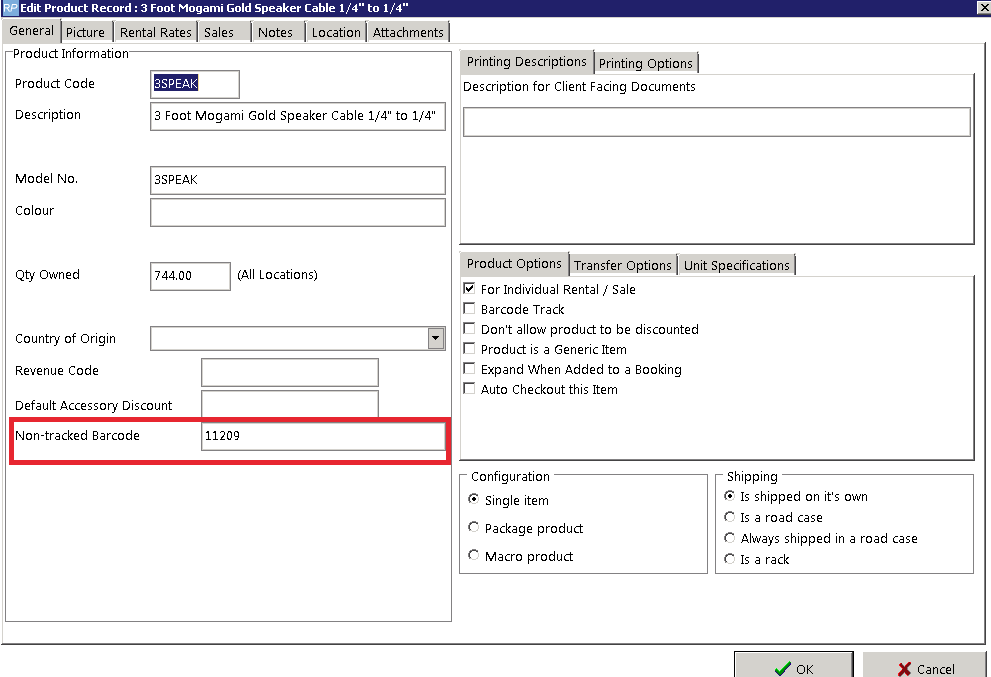
Scan the full quantity of the non barcode tracked item that you are shipping on this booking. So if 1 is booked and 4 are extras, then you would scan 5 below.
Enter your non tracked barcode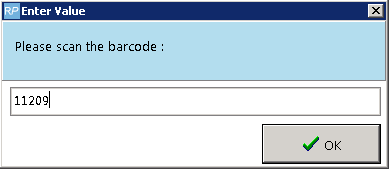
You can continue to scan other items or just hit checkout barcodes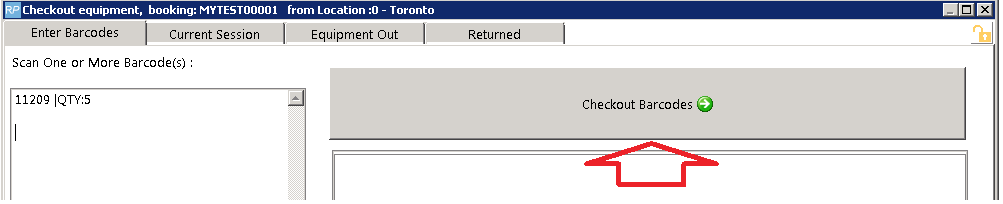
Notice Rentalpoint will count one of the items towards what was booked and the others as 'added at checkout'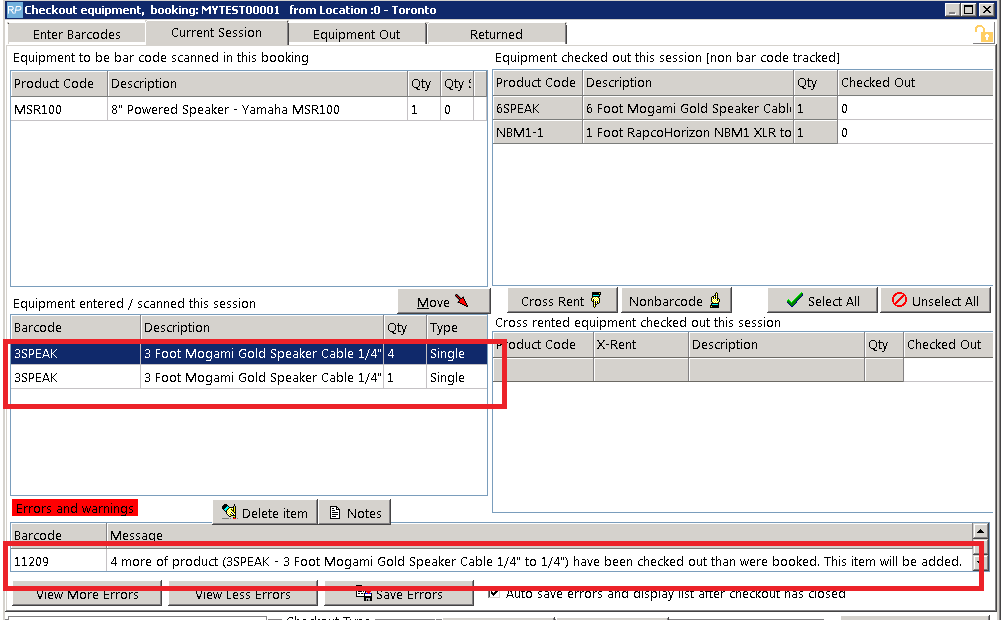
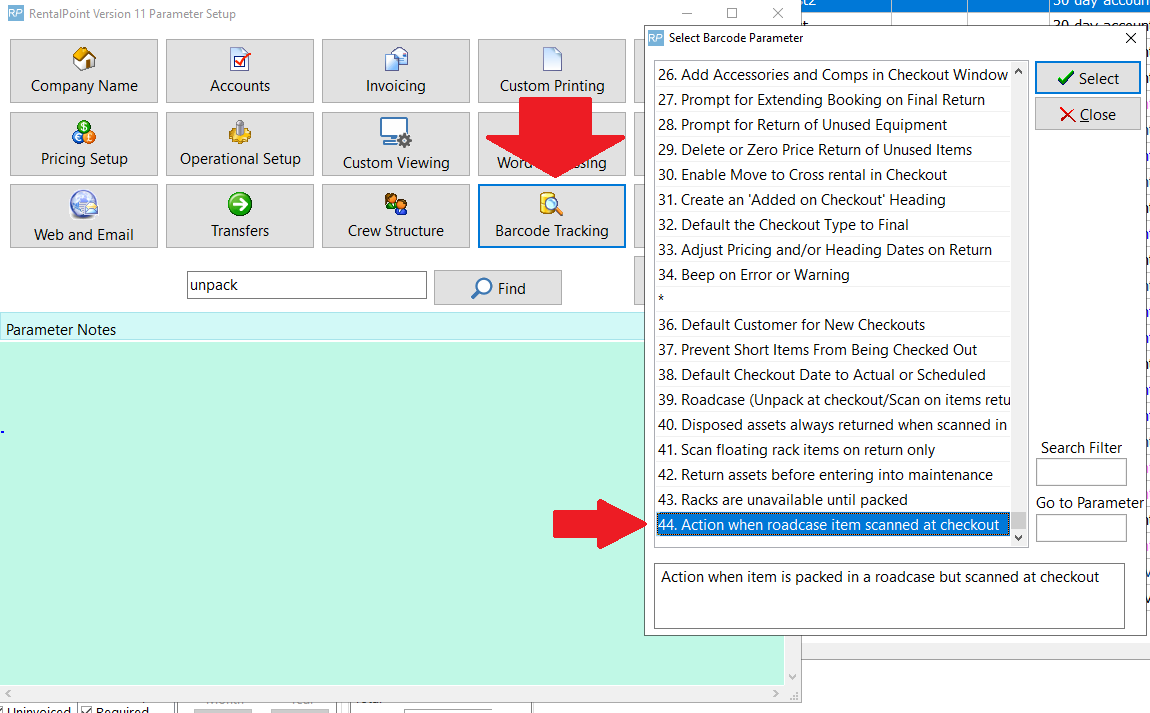
Available in RentalPoint Version 12
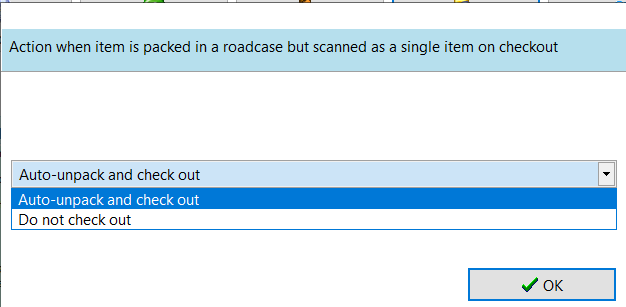
Predetermine how RentalPoint should handle items that are packed in a roadcase, but scanned out as a single item during checked session!
Exceptions:
- When RFID is in use, the action is set to 'Do not check out' to ensure that scans of single items by the reader don't unpack the roadcase
- This parameter does not affect racks
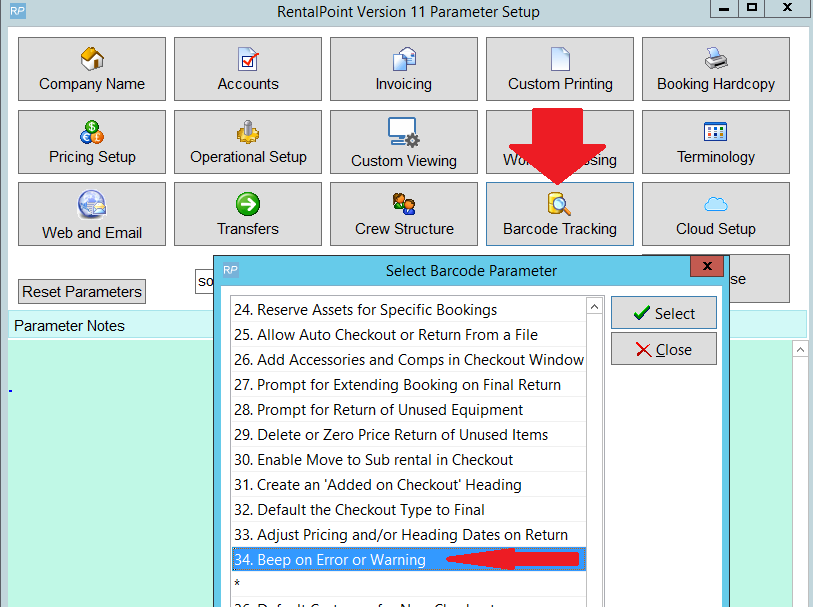
Goto Setup-->Parameters-->Barcode Tracking-->44
- Auto-unpack and check out: when an item that is packed in a roadcase is scanned as a single item, it is unpacked from the roadcase and checked out
- Do not check out: Shows an error message and prevents the roadcase item from being checked out
Note: If your video shows a black screen but audio still plays
- Goto chrome://flags/#disable-accelerated-video-decode
- Disable Hardware-accelerated video decode and relaunch Chrome
 Resolve Discrepancies (Pre v12)
 Rentalpoint offers the ability to resolve discrepancies on bookings, ie. when gear that has been scanned out/checked out and shipped for a booking, is different to what was originally booked. This article covers resolving discrepancies only, for details on how to check out a booking click this link
For Parameters needed for this functionality, see 'Parameters in Use' section at the end of this article.Parameters in use
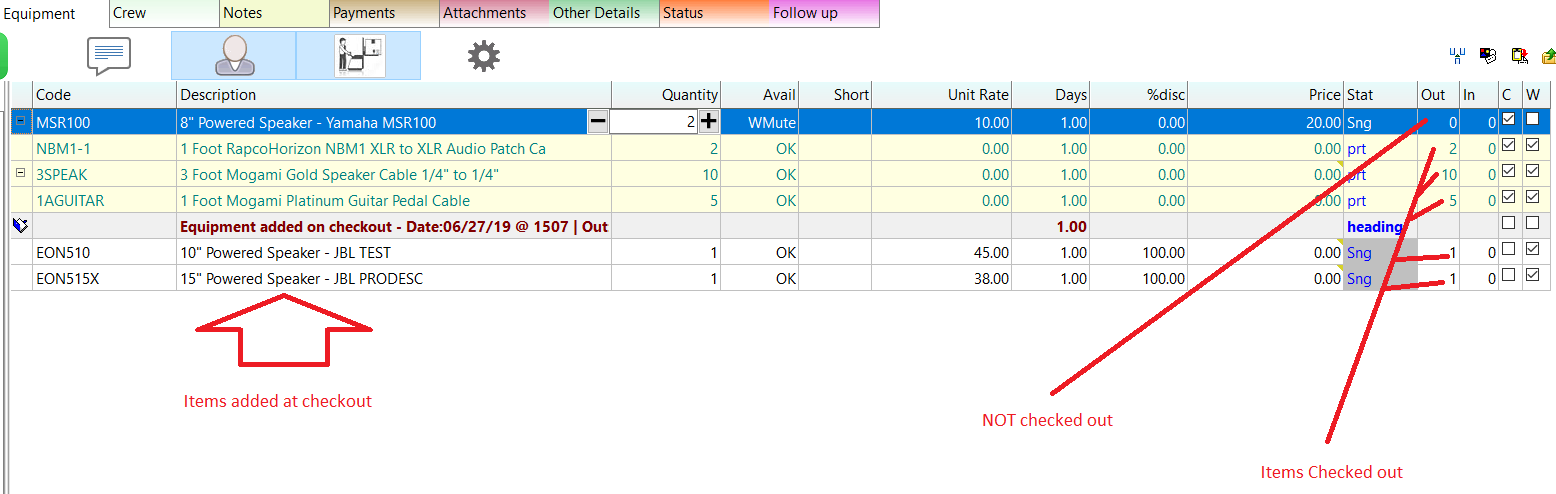
Identifying Checked out Items on a Booking
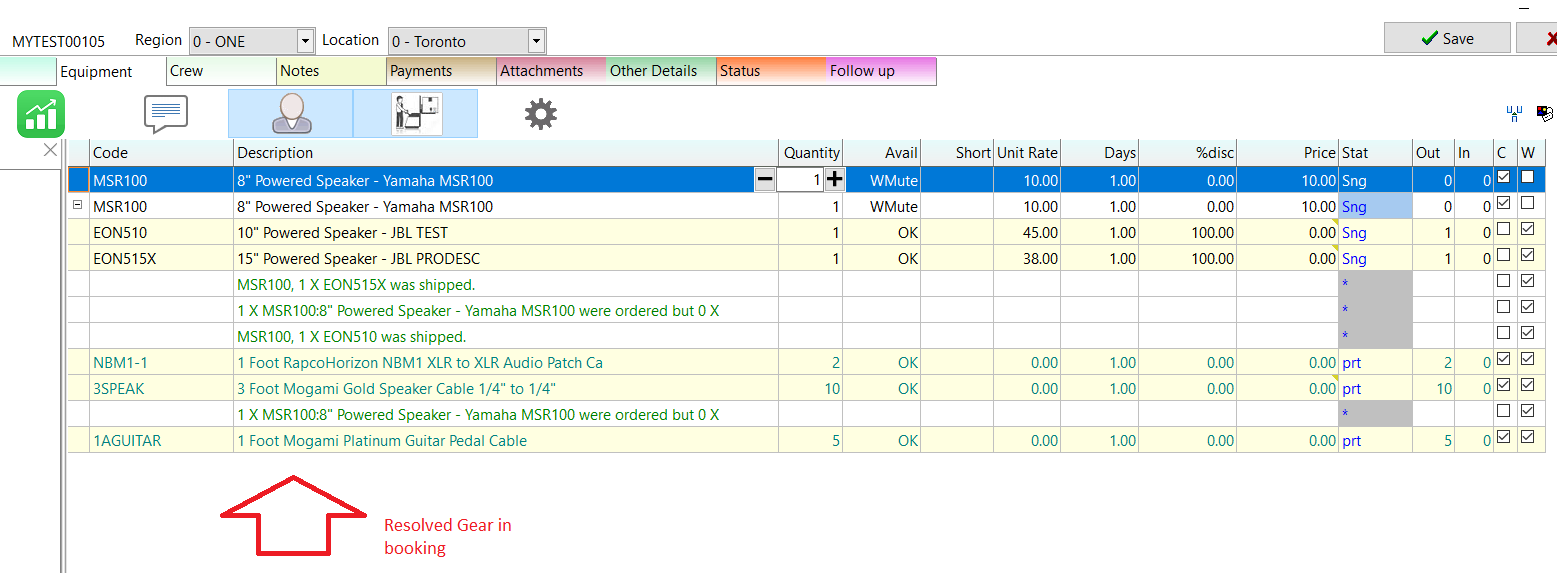
The screenshot below illustrates the use of ‘Equipment Added at Checkout’ heading and shows how to identify items on a booking that have NOT been checked out.
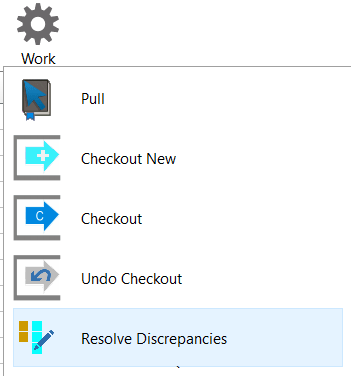
Resolving the Discrepancy
If Resolve Discrepancy was not automatically launched after final checkout (see parameters in use) then right click on the booking-->work-->resolve discrepancies, or highlight the booking and clickmenu option below
 The Resolve Discrepancy menu option will only show IF there are discrepancies to resolve.
Resolve Discrepancy Example
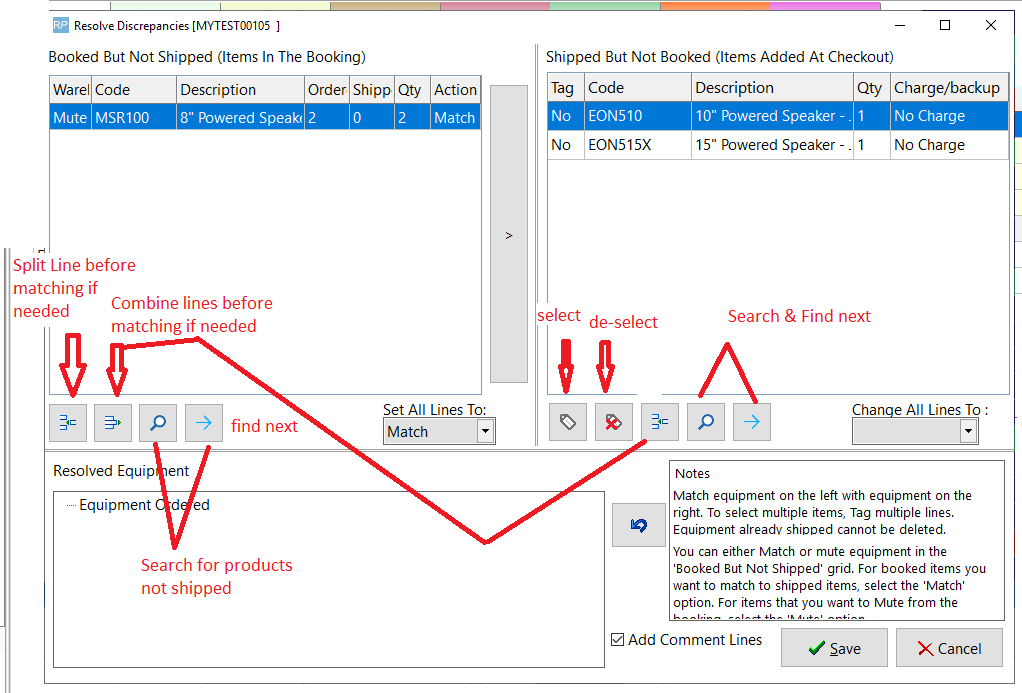
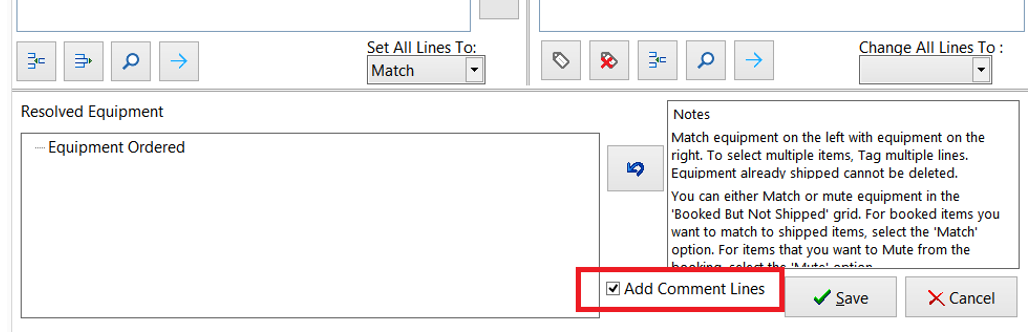
Gear is displayed in the Resolve Discrepancy window as below:
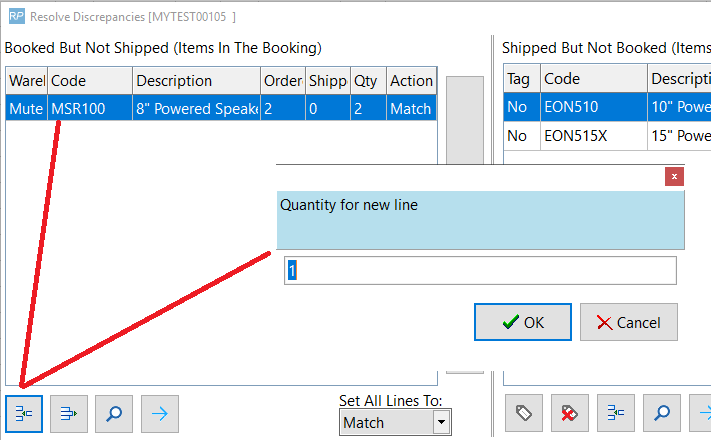
- Split the Booked but not shipped line so as to match with separate shipped but not booked items
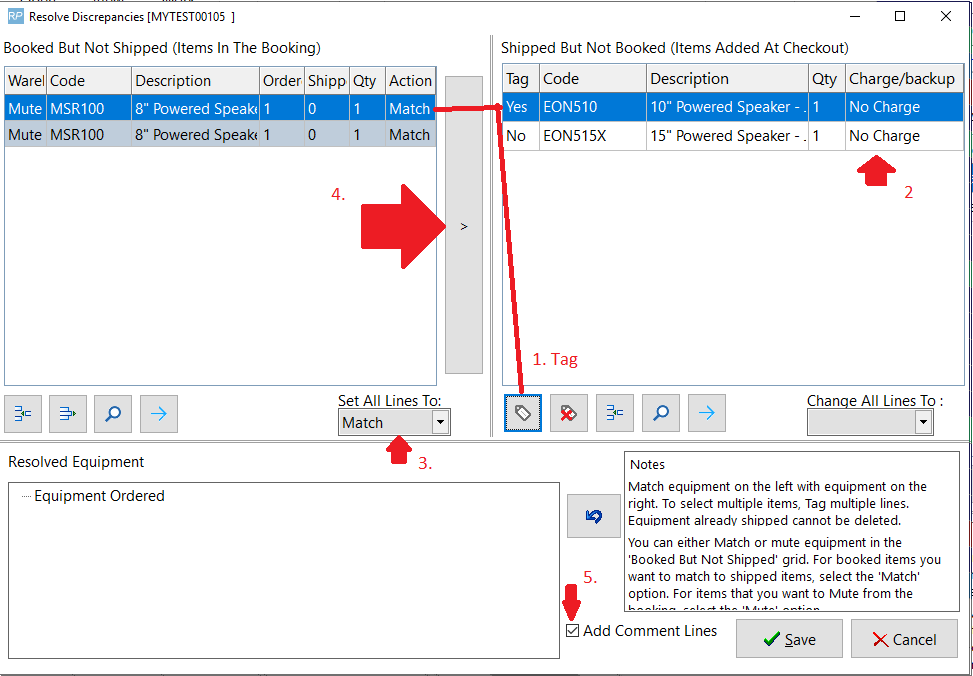
- Highlight the unshipped item(s) and TAG the shipped items that should be resolved together.
- There is a ‘down arrow’ available beside the ‘no charge’ option to charge extra or charge as backup equipment
- Choose to MATCH or DELETE Booked but not shipped with Shipped but not booked items.
- Click the Arrow to RESOLVE
- If ‘Add Comment Lines’ is checked, Rentalpoint will automatically add a comment for the resolution into the equipment grid of the order.
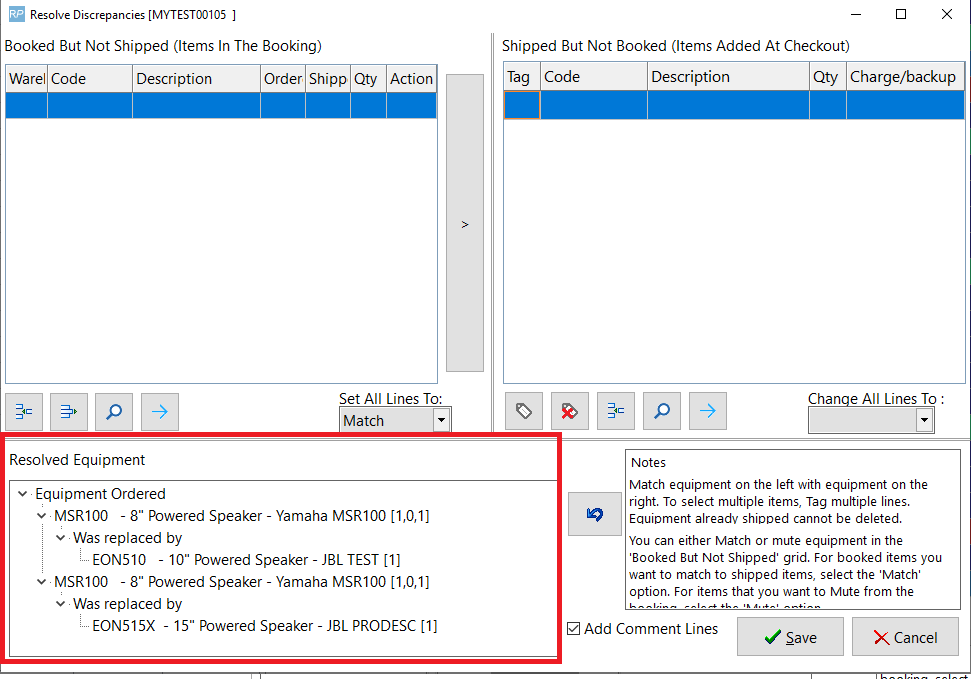
Resolved Gear is re-located to the 'Resolved Equipment' window
Parameters in use
Rentalpoint is parameter driven; functionality described in this document is dependent on the following parameters:
- Barcode Parameter #22 ‘Resolve Discrepancies on Final Checkout’ - Setting this parameter will automatically launch the Resolve Discrepancy Feature once a Final Checkout is processed on the booking.
- Barcode Parameter #23 ‘Resolve Discrepancy Default Action’ – The resolve discrepancy window gives the user two options. The first option gives the user ability to match items that were booked but not shipped with items that were added at checkout. The second option allows the user to delete items from the booking that were booked but not shipped out on the order.
- Barcode Parameter #31 ‘Create an Added at Checkout Heading’ – Setting this parameter will ensure that all items added at checkout appear on the order under their own heading and therefore are easier to identify.


Set Barcode parameter #34 to enable notification sounds - used when errors or warnings occur while scanning barcodes in the checkout and return windows.
There are two different types of sounds available. Both sounds can be enabled if needed, but most of the time only one or the other should be chosen, they are:
- The built in 'windows beep'
- Playing a sound file
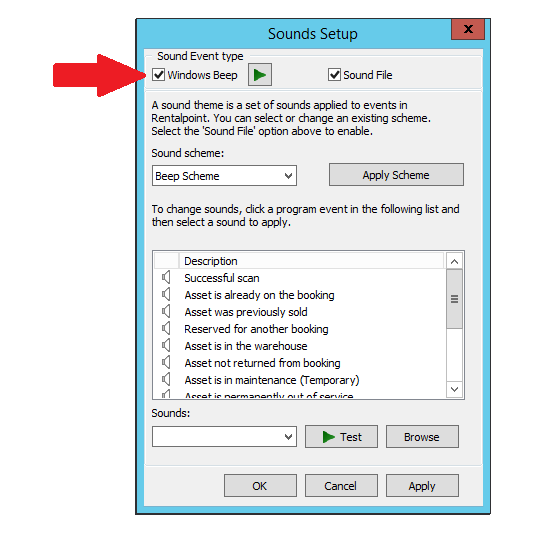
Windows Beep
1. Enable 'Windows beep' simply by checking the 'windows beep' checkbox, per the screenshot below.
The Beep Scheme default (used in conjunction with 'windows beep' setting), applies two different sounds to events; one for errors and one for warnings.
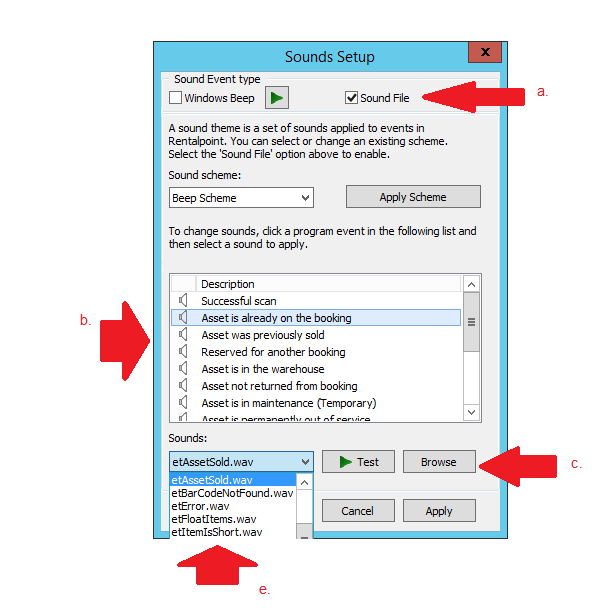
Use of Sound Files
2. Enabling the sound file option allows either the default sounds or custom .wav files to be used.
- a - Click the sound file check box to enable use of sound files
- b - Click on the event you want to test/change the sound for
- c - To install a custom .wav file click the browse button near the bottom of the screen and search for it’s file location. The file will be moved to the common data folder and can then be chosen for any of the sound events (or skip this option to work with the list of RentalPoint sounds provided)
- d - Click Test to hear the sound that will play when this event occurs in RentalPoint
- e - Sounds can be adjusted for each event type in the list by clicking on an item in the list, and selecting a different sound from the drop down list.

Auto-resolve option for alternatives, allows an additional item scanned at check-out to automatically replace an unshipped item. <more information on alternatives>
Set Up
Items must be set up to auto resolve in Inventory Setup.
- Ensure the possible replacement product is listed as an alternative in Inventory Setup <more information on alternatives>
- Check the 'auto resolve' box in the alternative window for an existing alternative (see Fig A below)
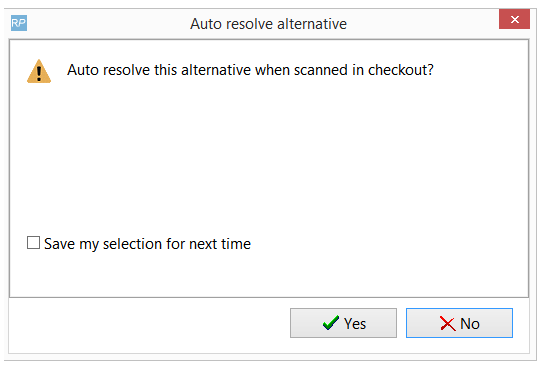
- OR drag a new alternative into the folder and you’ll be prompt to set the auto-resolve setting. (See Fig B below)
- Ensure required parameters are set per 'Parameters' section at the end of this article.
Fig A
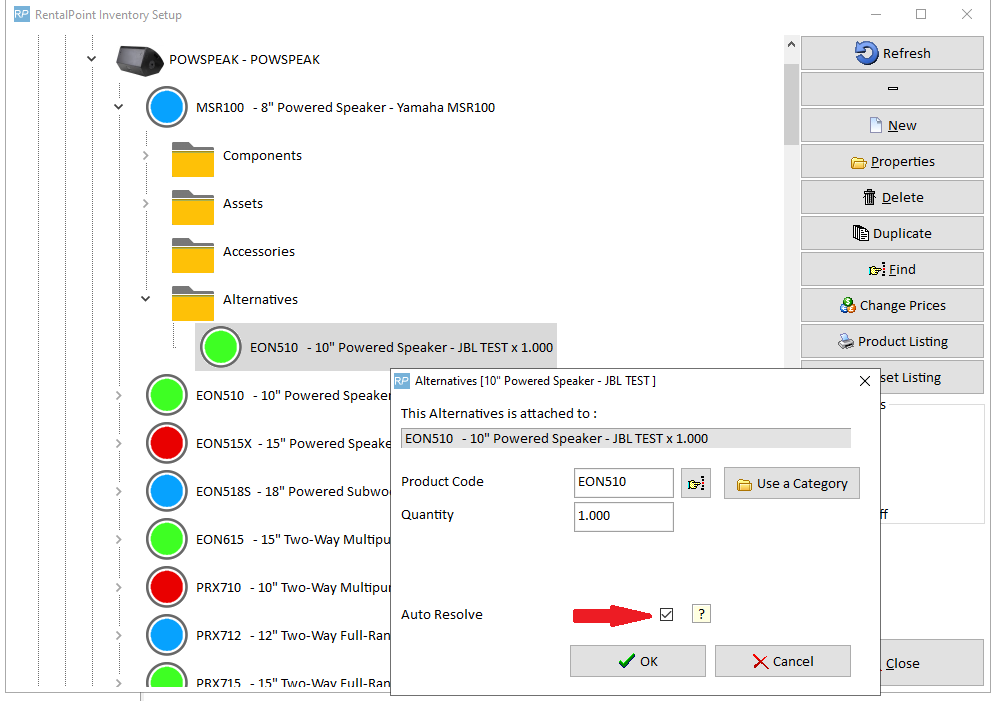
Fig B
Using Auto Resolve
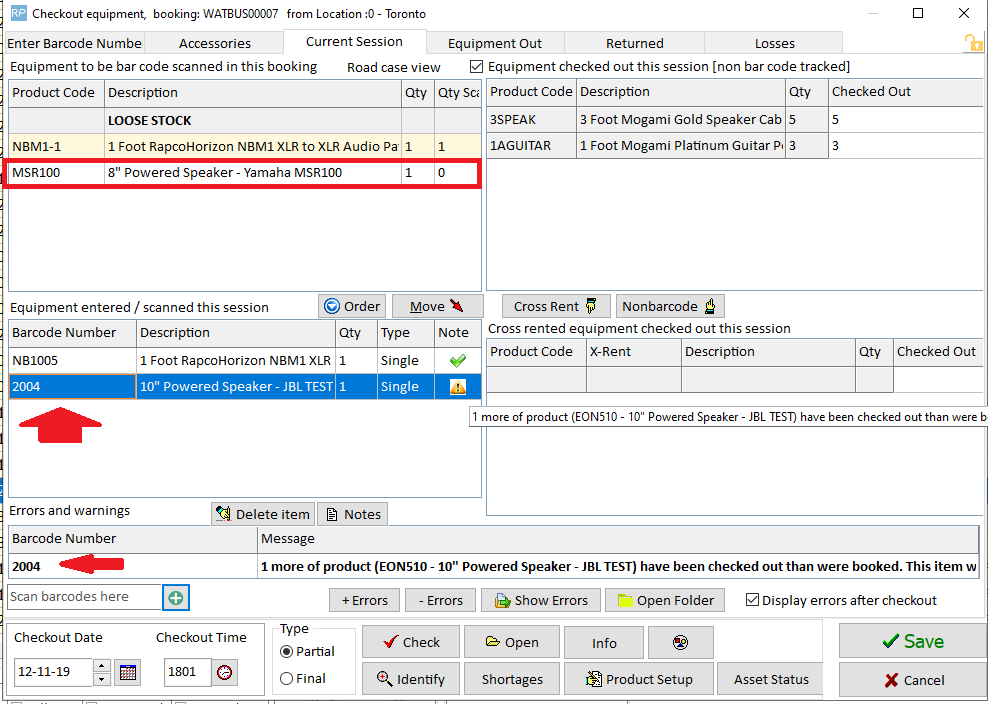
In the Checkout Window, scan the alternative instead of the main item - the example below shows the 10" Powered Speaker scanned out in place of the 8" Speaker that was booked. (note, the 10" Speaker is set up as an 'auto resolve' alternative for the 8" Speaker in Inventory Setup. See 'set up' section for more details.
Option 1: Barcode 13 is DISABLED - No pricing options at checkout
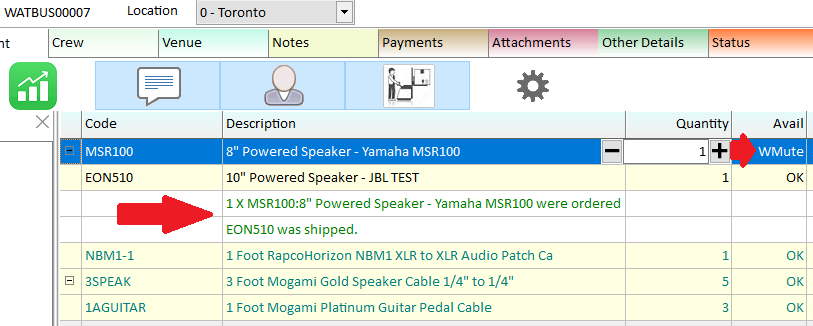
The discrepancy is immediately resolved on booking save.
- Original item is set to 'warehouse mute' hiding it from all warehouse documentation
- The shipped alternative is added to the booking under the original item
- A comment is added under the shipped alternative describing the resolution
Option 2: Barcode 13 ENABLED - pricing options at checkout
Equipment Added at Checkout Window provides options to
- Leave the resolve to go ahead Or change to 'no resolve' in the Auto Resolve Column OR right click on the Auto resolve column to 'Set all to No Resolve'
- Change the Charge Type for the item

Other Considerations:
- If there is more than one type of unshipped item that matches the auto-resolve alternative, the user will be provided with an option to choose between available 'auto resolve' alternatives
- If the selected product has already been completely resolved by other items added at checkout, auto-resolve will attempt to resolve other valid unshipped products in the booking.
- User preferences in the 'Resolve Discrepancy' window will determine if a comment is added for Auto Resolve alternatives
Parameters
This feature is available when the following parameters are enabled
- Barcode #10 - Equipment can be added at checkout
- Operational #44 - Client Warehouse Active/Mute <more information on this functionality>
The feature behaves differently depending on settings for the following parameters
- Barcode #13 - Checkout Additional Equipment prompt (for charging options at checkout)