 For a larger view of screenshots, zoom your Google Browser to 150%
Booking Grid Tabs
Scope
Restrict user access to bookings via the Booking Scope tab in Operator Setup
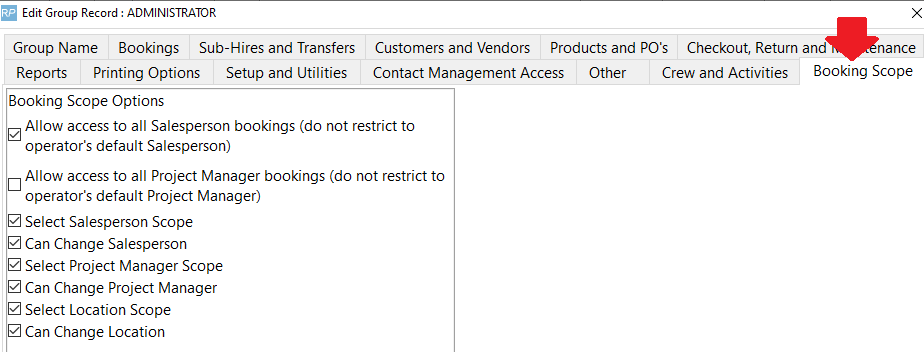
The bookings visible in the grid and the scope buttons (in the red box below) will depend on the Booking Scope operator privileges. If the user doesn't have ALL access under the Booking Scope operator privileges tab then they won't have the ALL access button on the booking grid.

List Tab
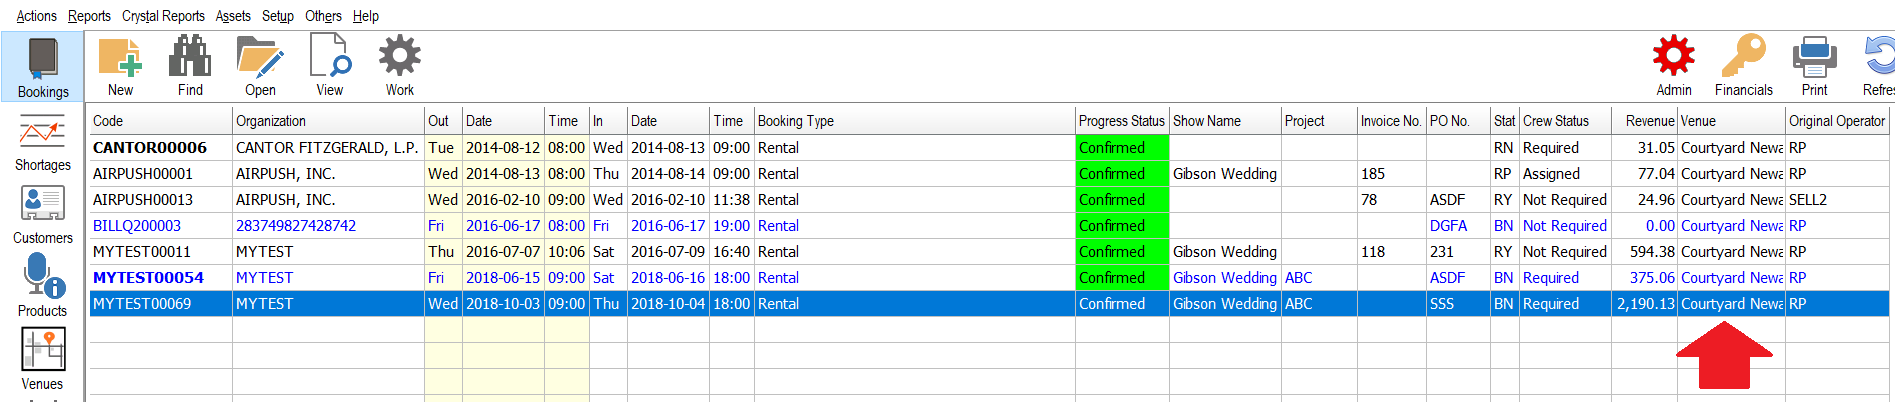
The first tab for the Booking module is the Booking Summary/List Tab. Each line represents a booking. The number of bookings shown are based on the default scope criteria. The criteria can be changed at any time to display a new list.
There are three main tabs in the Booking Summary. The tabs are located just above the scope bar at the bottom of the window. The first tab, List, has many options to sort and find bookings. See Fig. 1.0 - Example of Booking Summary. The summary can be sorted by column headings by simply clicking on the column heading or selecting from the dropdown box that is labelled Sequence. See Fig. 1.0 - Part A. To find a particular booking, enter search criteria in the dropdown box. See Fig. 1.0 - Part B (see further explanation under Booking Grid Search below). By changing the scope parameters at the bottom of the Summary, allows the operator to narrow the search. See Fig. 1.0 - Part C.
Fig. 1.0 — Example of Booking Summary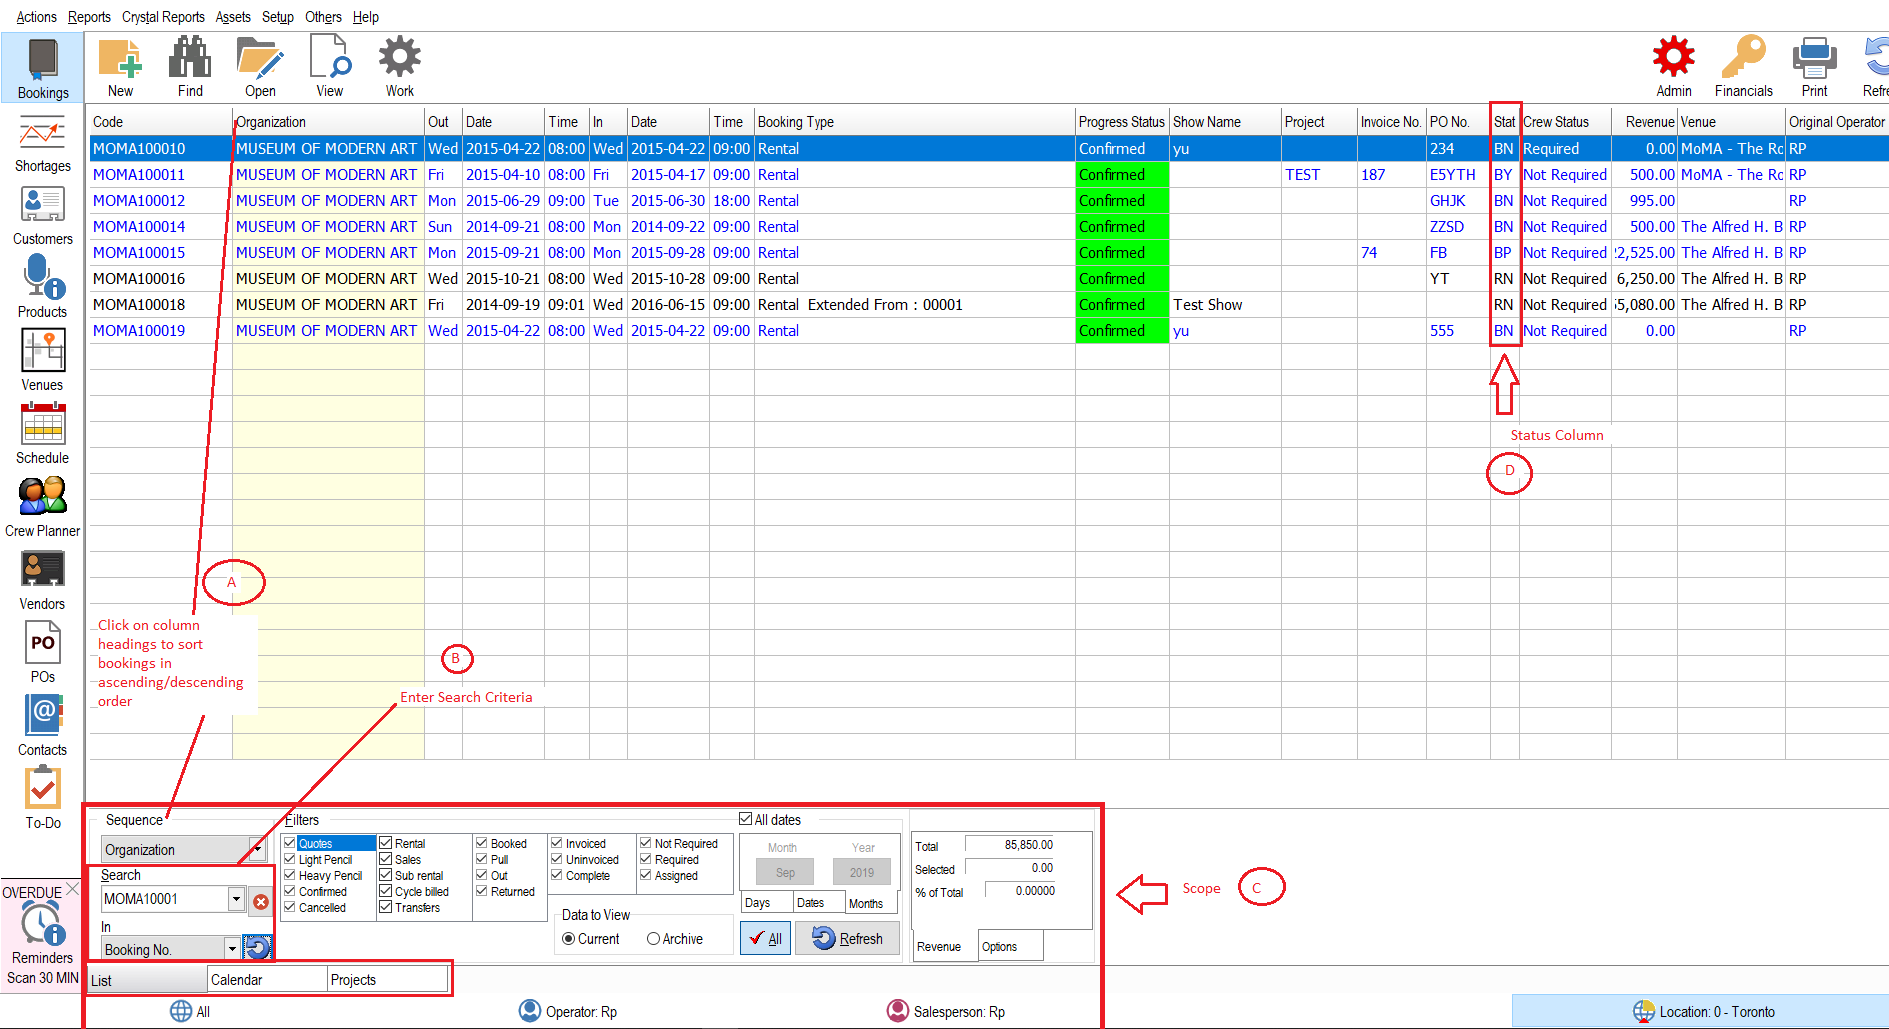
Status Codes
Columns can be enabled or disabled on the List tab by selecting corresponding options in Operational Setup Parameter #183 (setup-->parameters-->operational).
The Stat column is short for Status. Fig. 1.1 Below is a list of the different status codes and definition.
- The first character describes the bookings warehouse status as B = Booked, O = Out or R = Returned
- The second character describes the bookings invoice status as
- N = Not Invoiced
- Y = Fully Invoiced
- P = Partially Invoiced (for bookings that have multiple invoices being created for it)
- C = The booking has been labelled as 'Complete' on the status tab in the booking record, and is ready for invoicing.
- The 'C' status is optional and can be used for example by the salesperson who can label a booking as ready for invoicing. This informs the finance team that they can can invoice the booking.
- The finance team can scope only those 'Complete' bookings via the booking filters at the bottom of the booking window (see section C on Fig 1.0 above) thus providing a list of bookings to invoice.
Fig 1.1
| Status Codes and Definitions | ||
| Code | Status | Definition |
| BN | Booked and Not Invoiced | A confirmed booking has been made, but a delivery sheet or invoice has not been printed for the booking. |
| BC | Booked and Completed | A confirmed booking has been made, and is ready for invoicing. |
| BY | Booked and Invoiced | A confirmed booking has been made, and a delivery sheet or invoice has been printed for the booking. |
| ON | Out and Not Invoiced | The booking has been checked out, but a delivery sheet or invoice has not been printed for the booking. |
| OY | Out and Invoiced | The booking has been checked out and a delivery sheet or invoice has been printed for the booking. |
| RN | Returned and Not Invoiced | The booking has been returned, but a delivery sheet or invoice has not been printed for the booking. |
| RC | Represents Returned and Complete. | The booking has been returned, and is ready for invoicing. |
| RY | Represents Returned and Invoiced. | The booking has been returned. The delivery sheet or invoice has been printed for the booking. |
Colour Coding
Each booking from the Booking Summary can be colour coded based on the status of the booking. This feature can be enabled in the Operational Setup Parameter #183 - System Display Options and Configuration. This helps to locate and organize all the bookings in the Booking Summary more efficiently.
By default, the RentalPoint software will colour code bookings:
1. Status B for Booked will have a colour of blue
2. Status O for Out will have a colour of maroon
3. Status of R for Returned will have a colour of black
At any time, the colours for each status can be changed through the Operational Setup Parameter #183.
Booking Grid Search
The Booking Grid Search option allows for further narrowing of the scope of bookings displayed on screen.
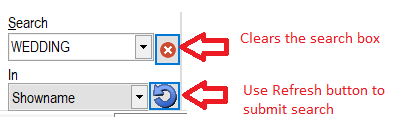
Use the 'Search' and 'In' columns together to search the database for particular records...
For Example, search for the word 'Courtyard' used in Booking Venue
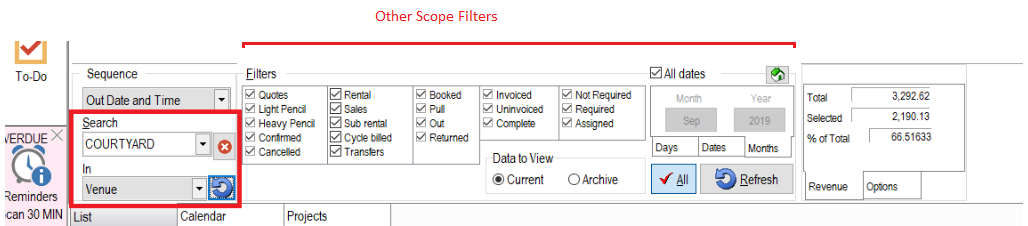
Returns only those records within the 'Other Scope Filters' that have the word 'Courtyard' in the venue field
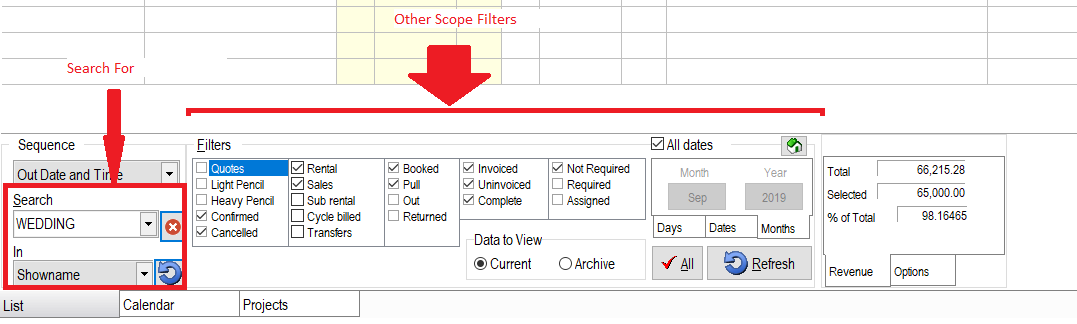
Search for 'Wedding' in Showname to list all shownames with the word 'Wedding' in them.
Use the 'Other Scope Filters' to narrow your search further

Plot Sheet/Calendar Tab
The Plot Sheet Tab shows all bookings that are scheduled for a specific period.
There are three main tabs in the Booking Summary. The tabs are located just above the scope bar at the bottom of the window. The second tab, Plot, displays all bookings that are scheduled for a specific period.
How to Change the Date Range?
The date range can be changed in the scope criteria section. See Fig. 1.0 - Part C. By clicking on the Start Date dropdown, it allows the user to select a specific starting date, and by clicking on the End Date dropdown to select the appropriate ending date range. The operator can also use the Skip buttons to adjust the starting and ending periods.
How to Include/Exclude Bookings with a Specific Status?
1. To include or exclude Bookings from the Plot Sheet, select or unselect the status checkbox. See Fig. 1.0 - Part A.
2. Click on the Refresh button if necessary to refresh the form.
How to Change the View of the Plot Sheet?
For convenience, the operator can view the plot listing by the standard working hours of 9–5 or the more lengthy 24 hours in the Main View section. Display Size section adjusts the width and height of each rows. The smaller the column size, the more information that is able to fit into the screen. See Fig. 1.0 - Part B.
How to Open a Booking from the Plot Sheet?
1. Select a line. On the right, the Booking summary information is displayed. See Fig. 1.0 - Part D.
2. Double click the line.
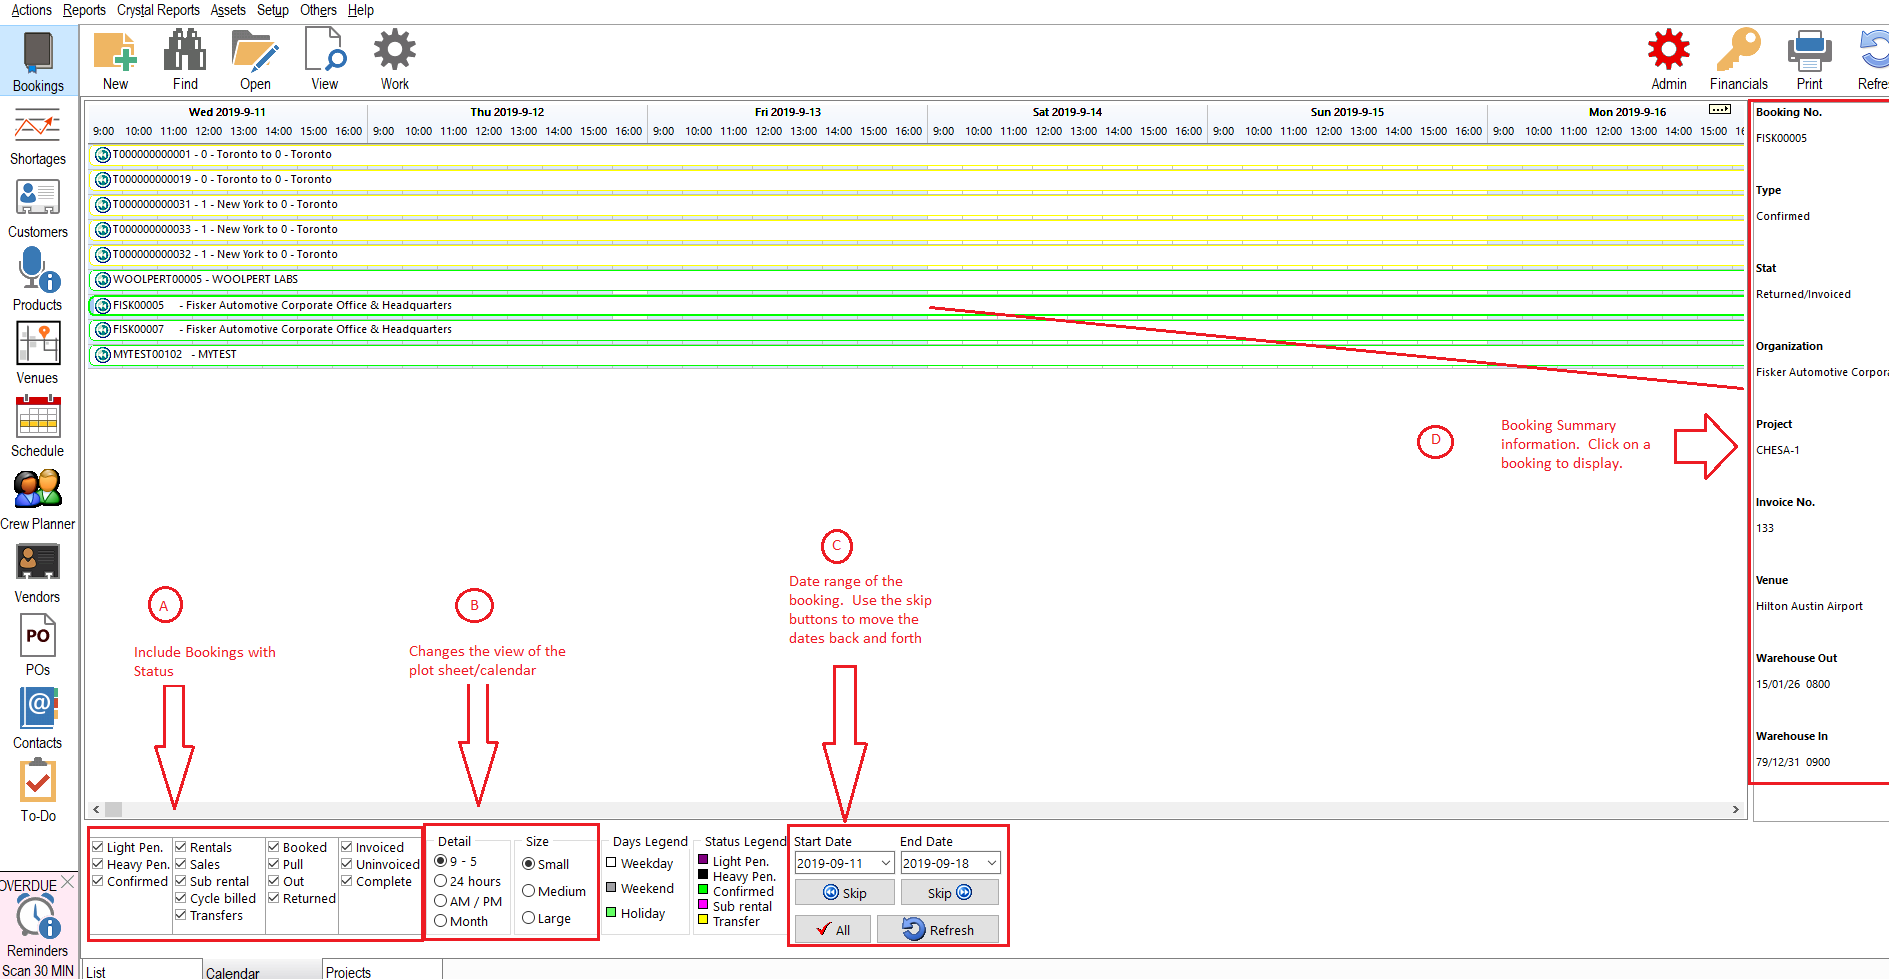
Fig. 1.0 — Example of Plot Sheet from the Booking Summary
Projects Tab
Customizing the Booking Grid
Download Booking Grid Customization PDF
Customizing the Booking Grid Video