Standard documents are built into the system. Unlike custom documents a standard document cannot be modified. There are several documents which will modify the look of a standard document with limited flexibility.
Standard documents are available for the following;
- Invoicing
- Booking Hardcopy / Pick List
- Delivery Sheet
- Collection Docket
Any of the above mentioned options can be selected to print using a standard document though there is more than one way of accessing them.
A shortcut to the standard documents is available by pressing F6 on your keyboard. This will display the invoicing window.
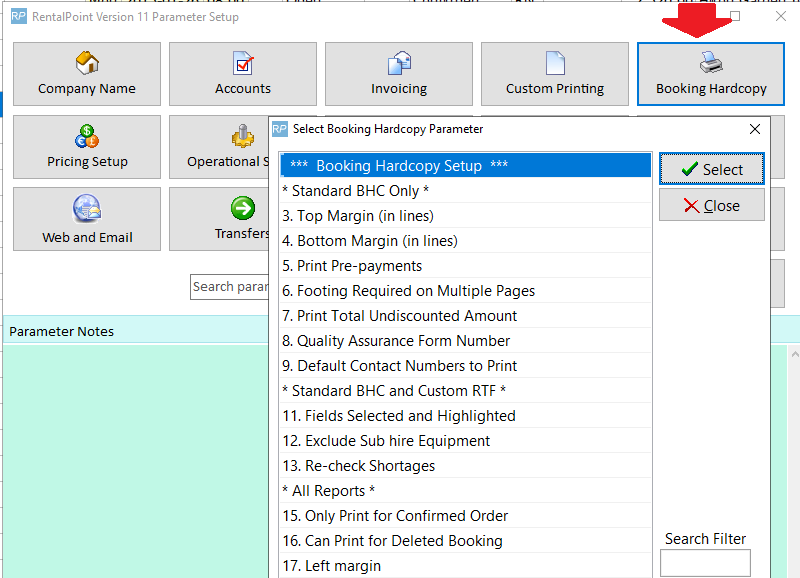
Booking Hardcopy.
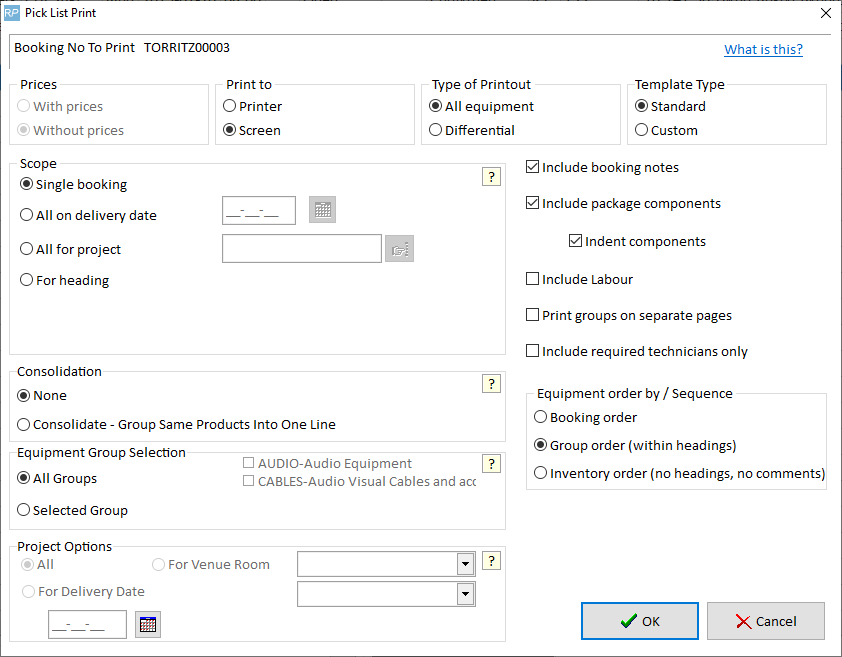
This report can also be called a Pick List. There are several options available for this report which includes the Consolidated version. This option will group same products into one line and provide totals for equipment groups.
Delivery Sheet documents
By default 3 there are 3 copies of the Delivery sheet that get printed out. Each has a separate title. This is controlled by parameter Invoicing #21. Removing a title by prevent the report from printing out.
Custom documents have the flexibility to be edited in Microsoft Word. Custom templates are rich text files (.rtf) that contain regular text as well as RentalPoint insert fields. These codes are read by RentalPoint and allow it to pull information from the database directly into the document. This provides the ability to produce highly customized paperwork.
Custom documents must be saved as a rich text file (.rtf) and NOT a word document file (.doc). A .doc file is not compatible with the RentalPoint insert fields and will not print information correctly.
Since these documents can be edited in Microsoft Word, RentalPoint provides you with an insert module that you can install in your Word add-in area. With this module it is possible to create the templates to your specifications and layout.
RentalPoint suggests that users take the default templates that are shipped with the system and create copies of them for editing and testing.
Select the booking the custom document needs to be printed for. From the Right click menu select Print and Custom Using a Template Option. A selection screen will display so you can select the custom document you want to print.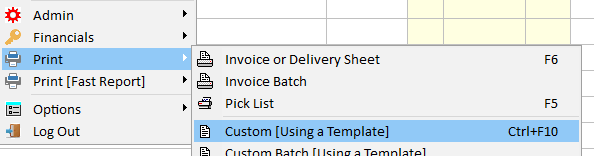
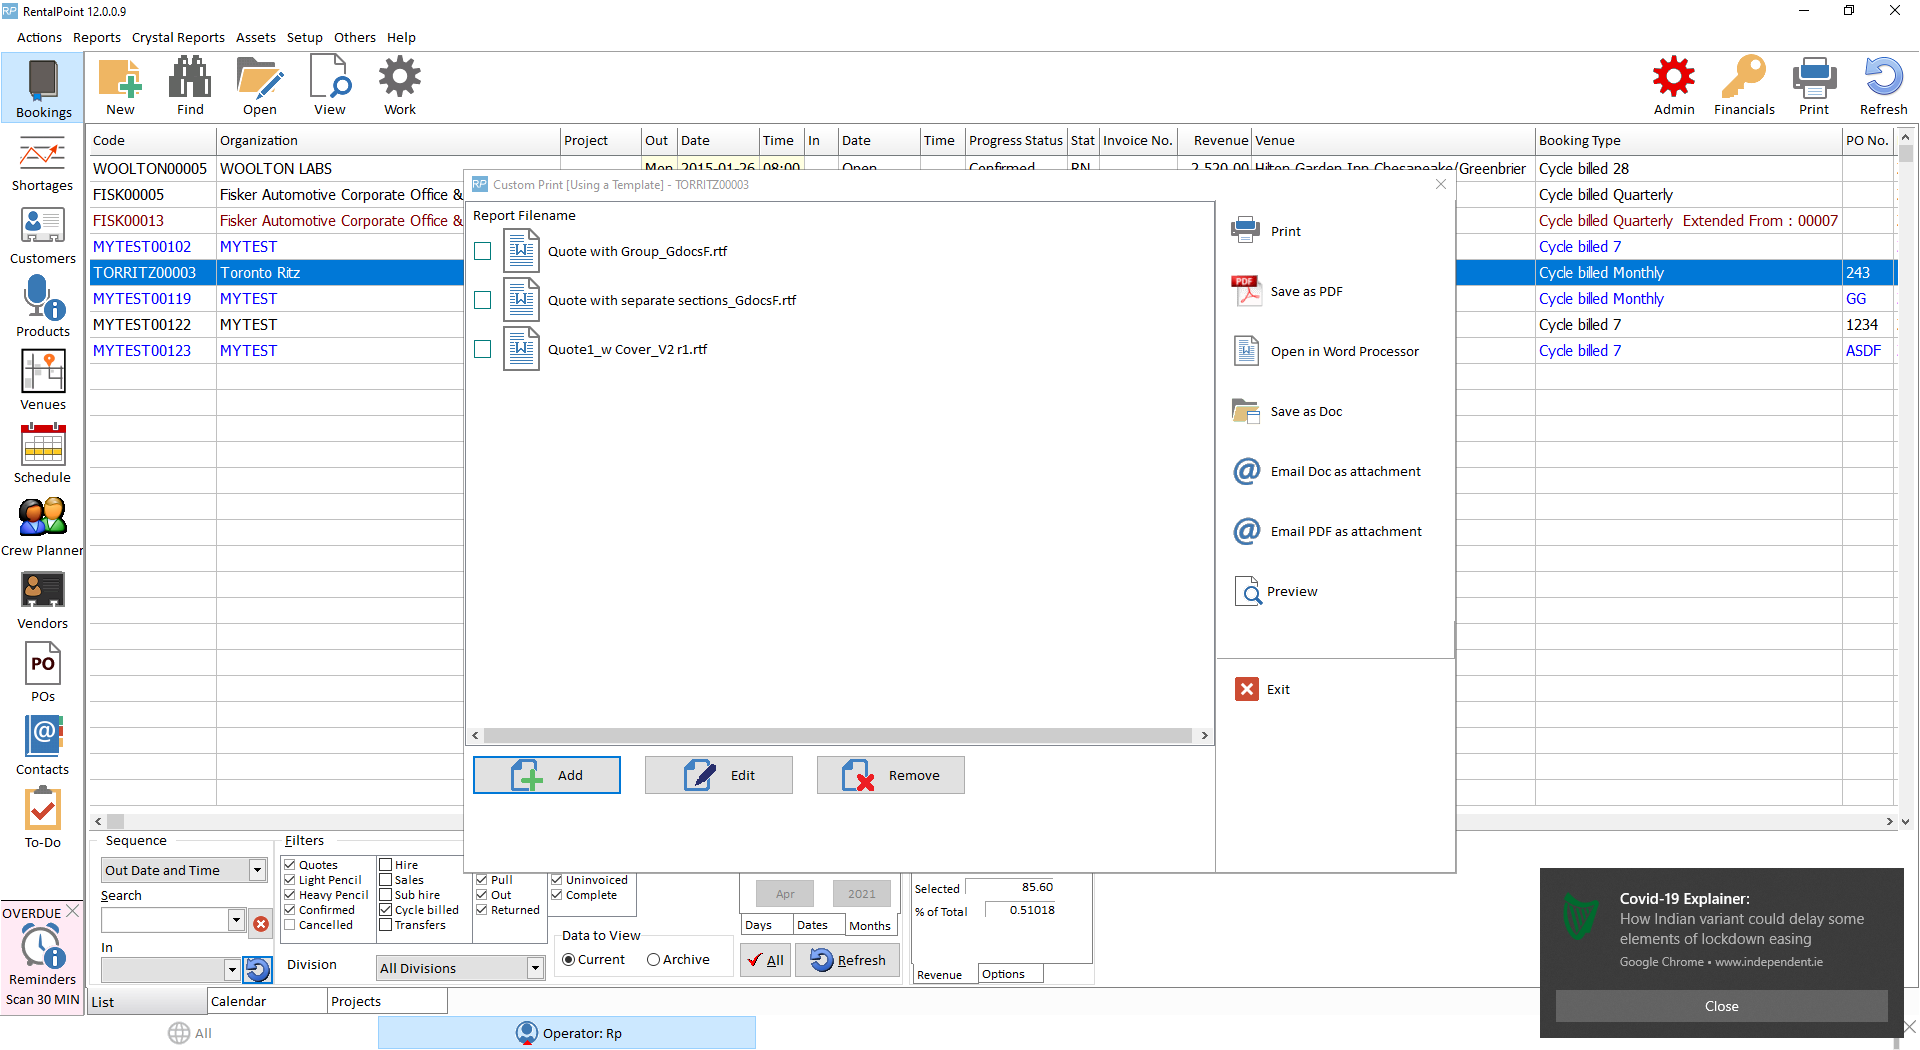
New templates must be placed in the Template folder. By clicking the  button the system will open up to that folder. From there select the required template, once done it will display in the list of options.

RentalPoint also offers several options in what the final output will be. It is possible to merge the document directly into a PDF or attach to emails.
It is possible to print out more than one template at a time. Once the finished document is merged and displayed it is added as an attachment to the booking you printed from.
Custom Templates have the ability to contain separate sections on the same report. It is possible to include both Rental and Sales items on the same report.
Depending on the user's system the files may "inflate" to very large file sizes.
A fix for this is to make a change to the system's registry. A change to the registry should only be made by a qualified person. A backup to the registry should be completed before any changes are made.
Once the backup is complete follow the Microsoft Support steps recommended which will guide you through the steps to limit RTF files sizes.


A pick list for a road case or rack lists the items that were previously packed into it. To print the pick list for a road case or rack, either click the ‘Pick List’ button and enter the rack/roadcase barcode or select the barcode from the tree before clicking the button.
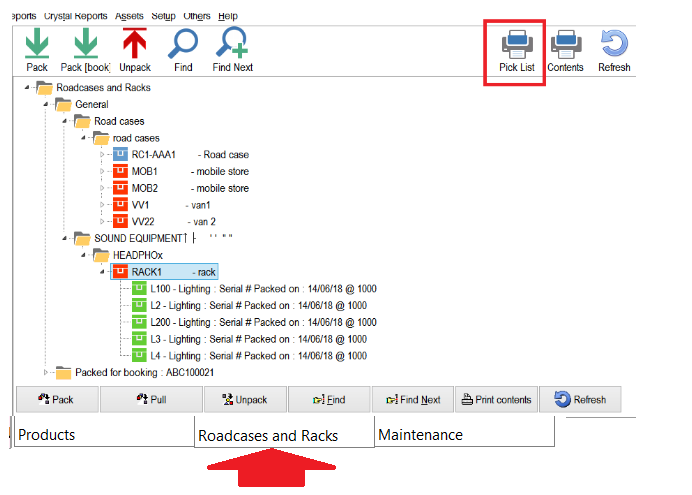

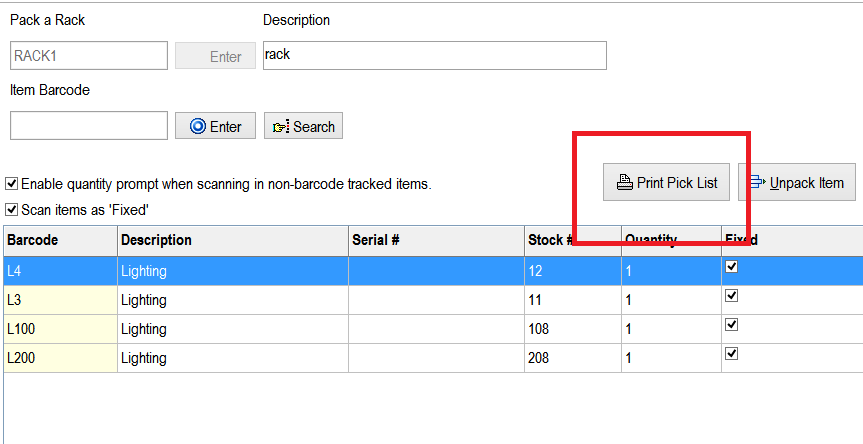
A pick list can also be printed for the road case/rack from the pack window.
Updating the ‘Pick List’
When you pack an empty road case/rack, a button will be displayed indicating that the pick list will be updated with the items packed (any barcodes packed for previous use of the roadcase will be removed from the current pick list).
If more items are added later these will be added to the pick list as well. 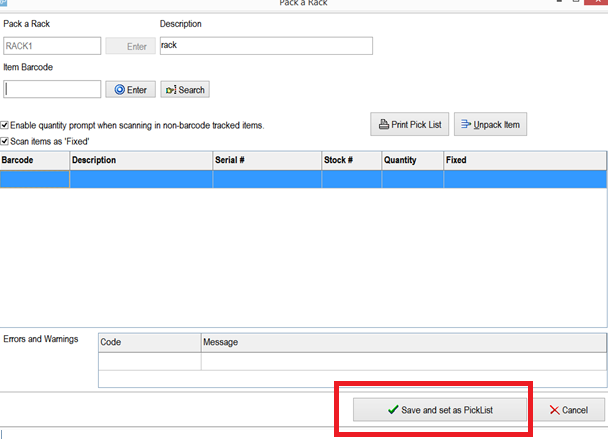
Print Contents
The ‘Print contents’ option will print only the items currently in the road case/rack.
Print Pack History
In the right-click menu there’s an option to print the pack history, which will list all the items that had previously been packed as well as the pack date and the operator.