How does it work?
RentalPoint provides functionality to request a digital signature from clients for Fast Report custom documents produced in RentalPoint (i.e. Quotes, Booking Hardcopies etc) by integrating with DocuSign software!
Requirements
You'll need
- a DocuSign Account with an App Integration Key for RentalPoint (see below for DocuSign setup)
- Fast Report Custom Templates using DocuSign caption fields <more on Fast Reports>
Setup
DocuSign Setup
You'll need a subscription to DocuSign. If you already have one, then skip to 'App Integration Key' below.
DocuSign Subscriptions
- For DocuSign, you would need a subscription for each email that will be used to send envelopes for signing.
The type of subscription would depend on the number of envelopes you anticipate sending out per month and the number of emails those envelopes would be sent from. - Envelopes Defined: In DocuSign, an envelope is a container for documents that you send to a recipient to sign. An envelope can have one document or many documents, and one signer or many signers. Envelopes have statuses (i.e. sent, delivered, completed, voided) and also contain information about the sender and timestamps that indicate the progress of the delivery procedure. Regardless of how many documents, fields, and signers a given envelope contains, it still counts only once towards your eSignature plan’s envelope allowance once it is sent out to be signed.
- DocuSign have a range of options available including advanced solitons that can be customized to your company requirements. <DocuSign Subscriptions and Pricing>
Set up your DocuSign App Integration Key
From your DocuSign Production account, click on Settings, then APIs and Keys
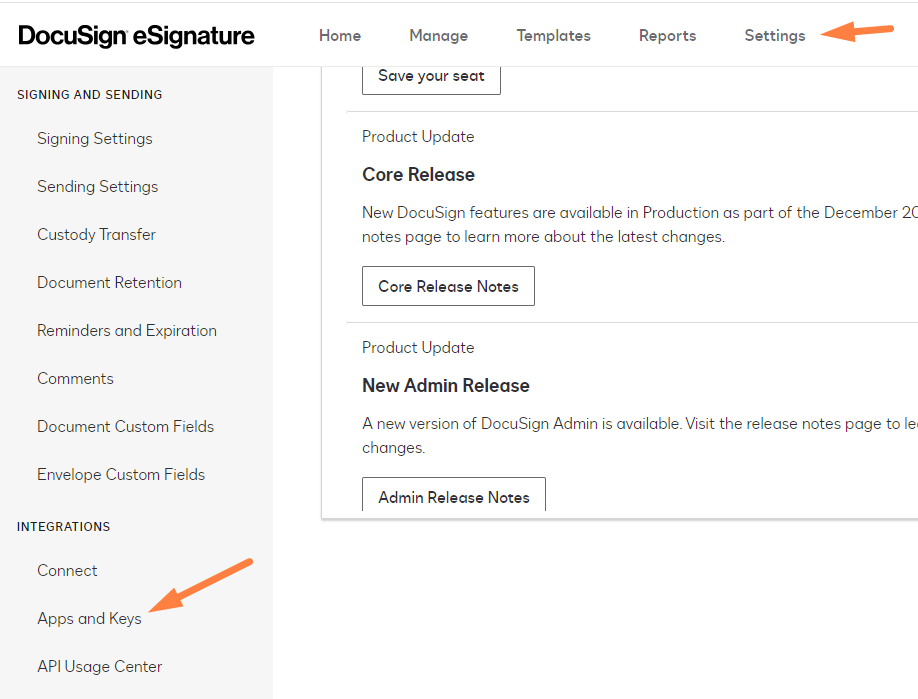
DocuSign requires that you set up a new App Integration Key in a developer account so that it can be validated before it can 'Go Live' in production, so click the developer account link to go there
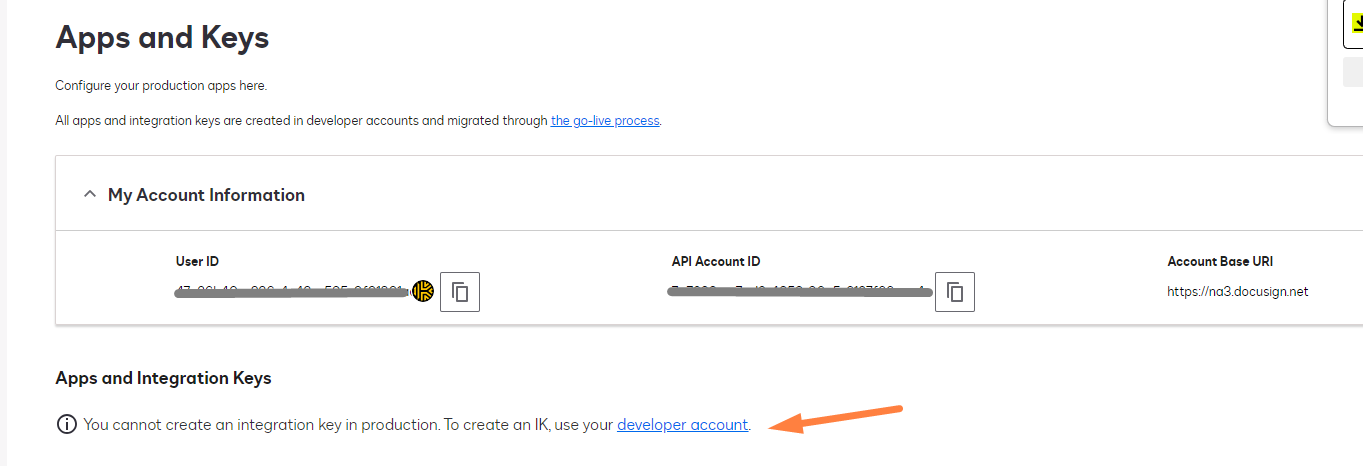
If you don't have a developer account, you can create one here or log into your existing developer account
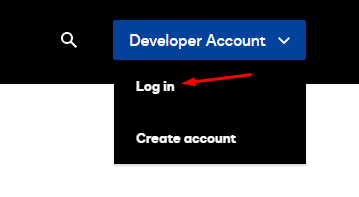
Goto My APIs and Keys
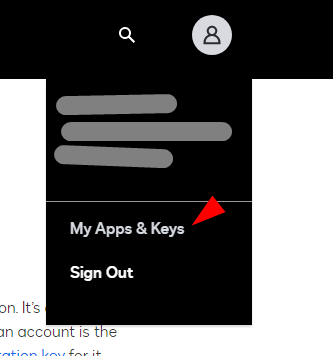
Click on 'ADD APP/ INTEGRATION KEY'

Enter a name and click ADD

Under Authentication, select YES for User Application
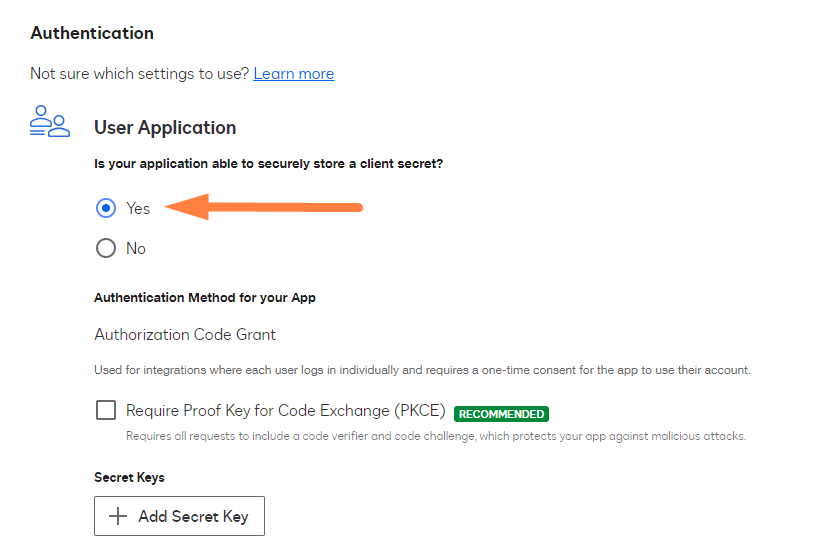
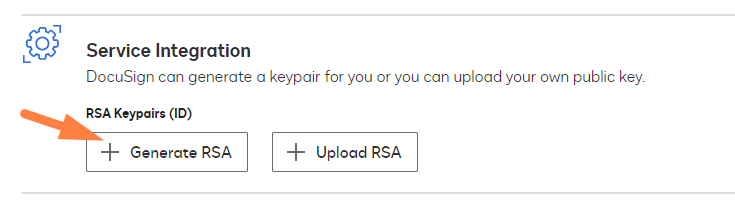
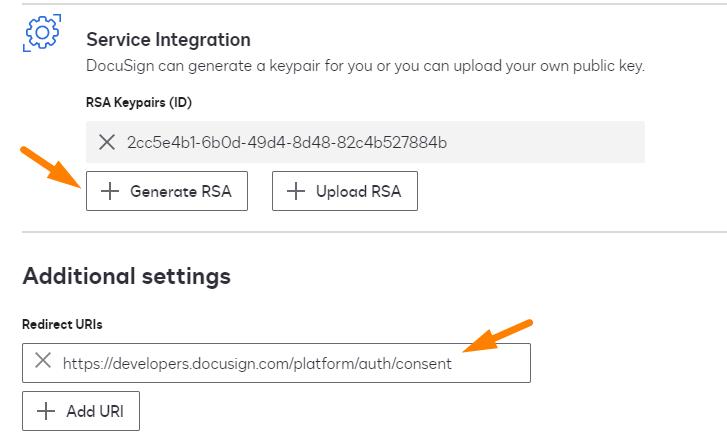
Generate an RSA
Create two Notepad txt files using the names below , then use the copy buttons to copy the keys
- paste the private key to docusign-private.pem
- paste the public key to docusign-public.pem

Under Additional Settings click Add URl , then in the box that appears enter the following URL
https://developers.docusign.com/platform/auth/consent
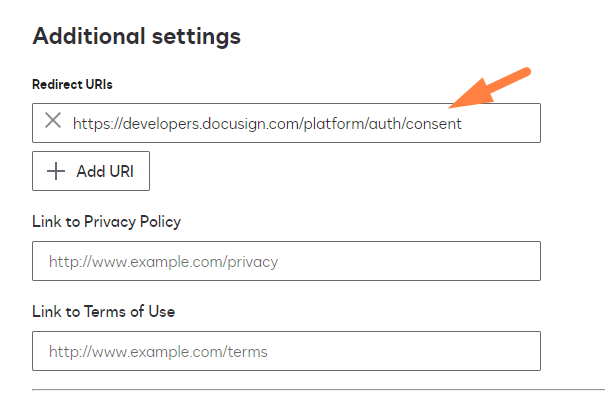
Scroll to the bottom of the page and click SAVE
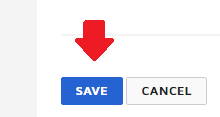
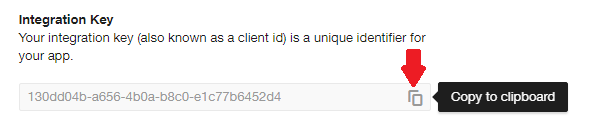
The Integration Key will now display in the list, click on the key to edit

Copy your Integration Key for use in RentalPoint setup
Configure DocuSign in RentalPoint2
You'll need a DocuSign Account in order to set up DocuSign in RentalPoint, see DocuSign Setup above for more details.
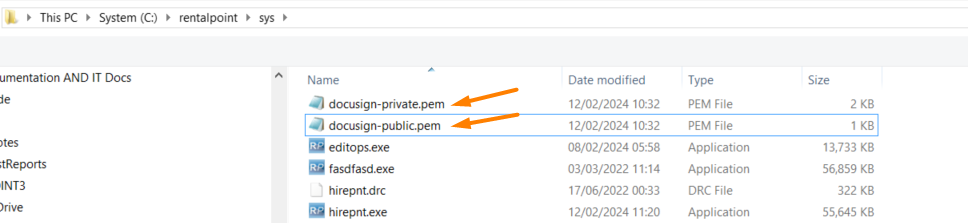
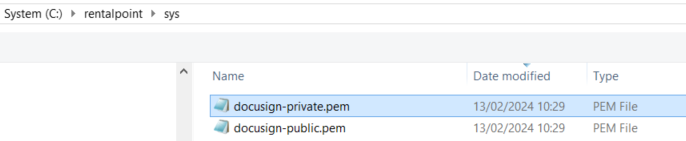
Navigate to your live RentalPoint\sys folder and paste the txt files you created when setting up your Integration Key above.
- docusign-private.pem
- docusign-public.pem
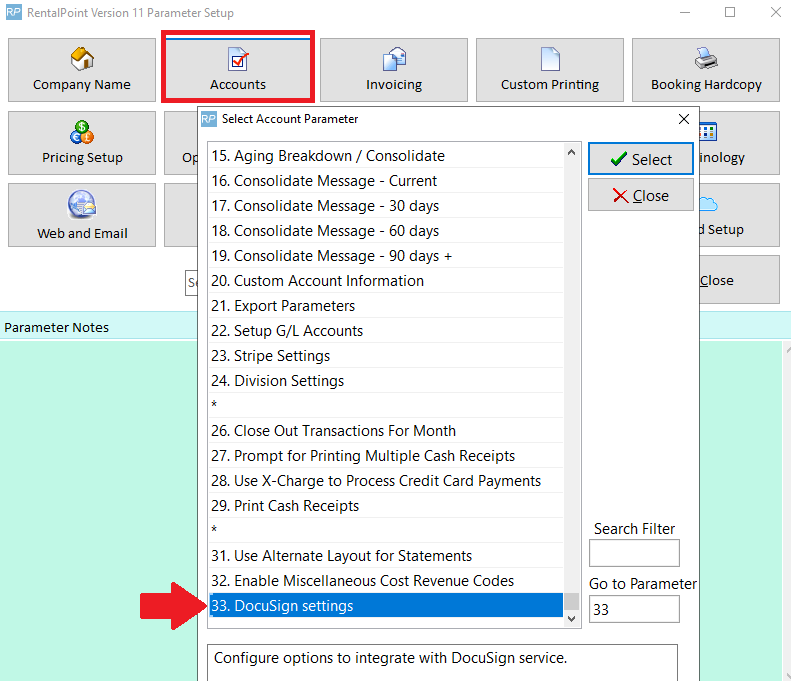
From your RentalPoint menu, Goto Setup-->Parameters-->Accounts-->33 to enable DocuSign in RentalPoint
If your App Integration Key is not live, follow instructions for Developer Mode below. Otherwise follow the instructions for Production Mode.
Promote your Integration Key from Developer to Production Mode
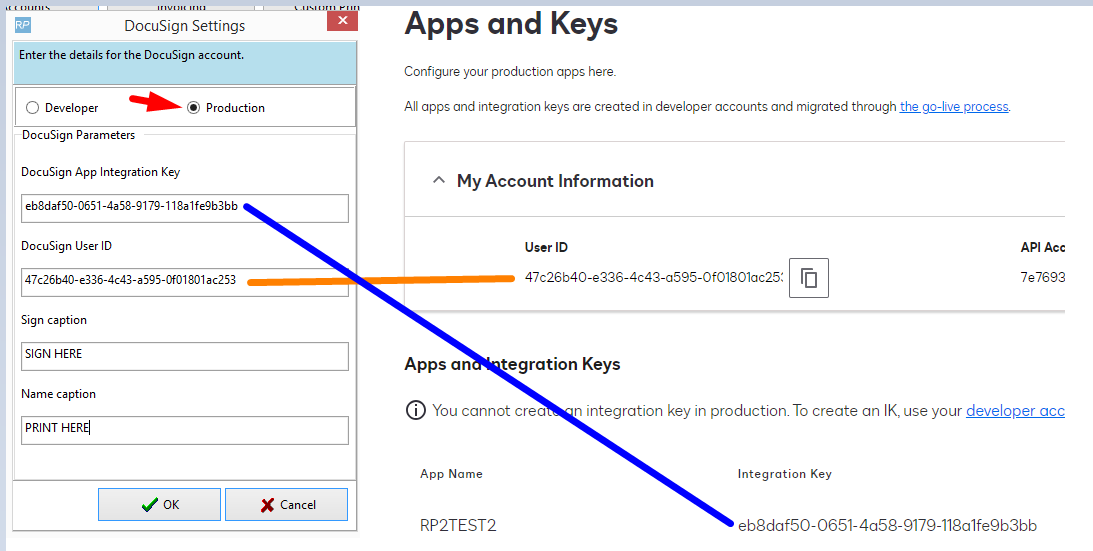
With a new App Integration Key, you'll need to send 20 calls before you can 'go live' with a production key. Set your DocuSign Parameter to Developer and paste your Integration Key and User ID into the fields provided.
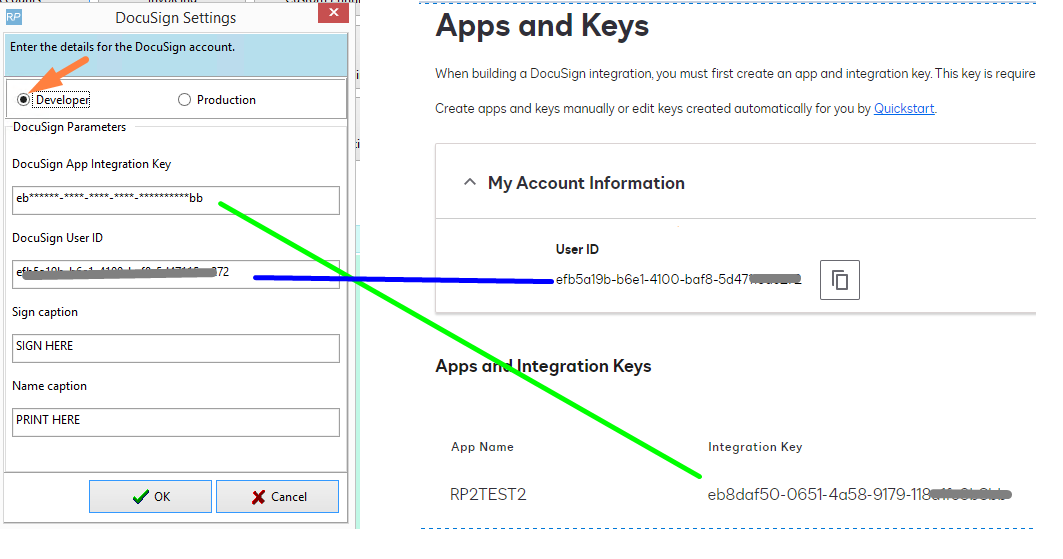
The Sign Caption and Name Caption values are what your user will see on the document they are asked to sign. Everytime you change these values, you'll need to re-add the fields to any Fast Report template in use.

Click  to save, then log out of RentalPoint and back in again before testing.
Authorize your Integration Key
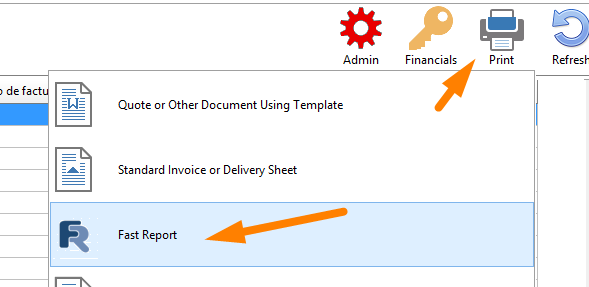
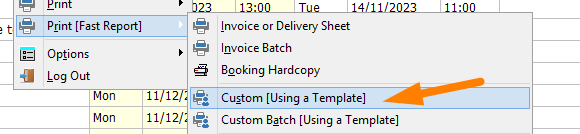
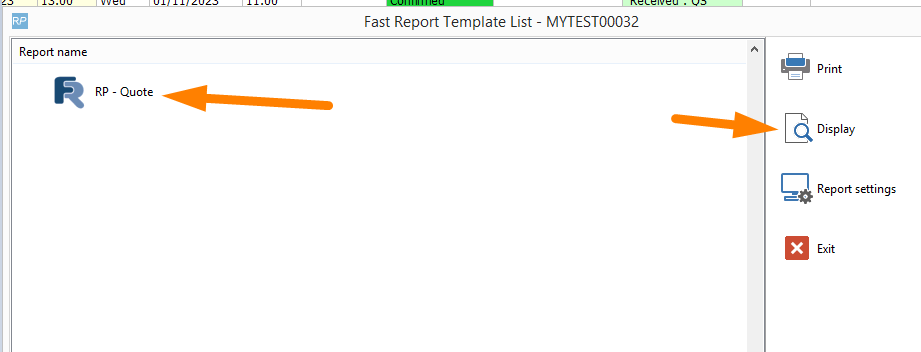
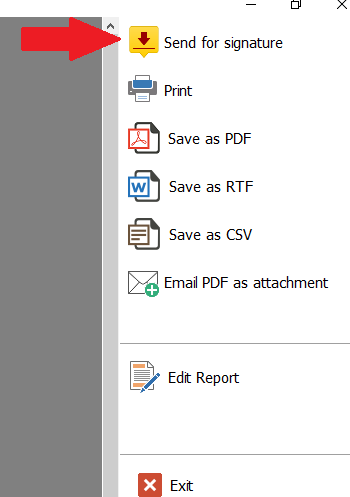
Now that your developer Integration key is set up, you'll need to make 20 API (app integration) calls before DocuSign will allow you to send your key to production. To make your first call, click on any booking then Print-->Fast Report-->Custom using Template
OR access from the right click menu
When the DocuSign caption fields are detected on a template, the user will have an option to send the document for signature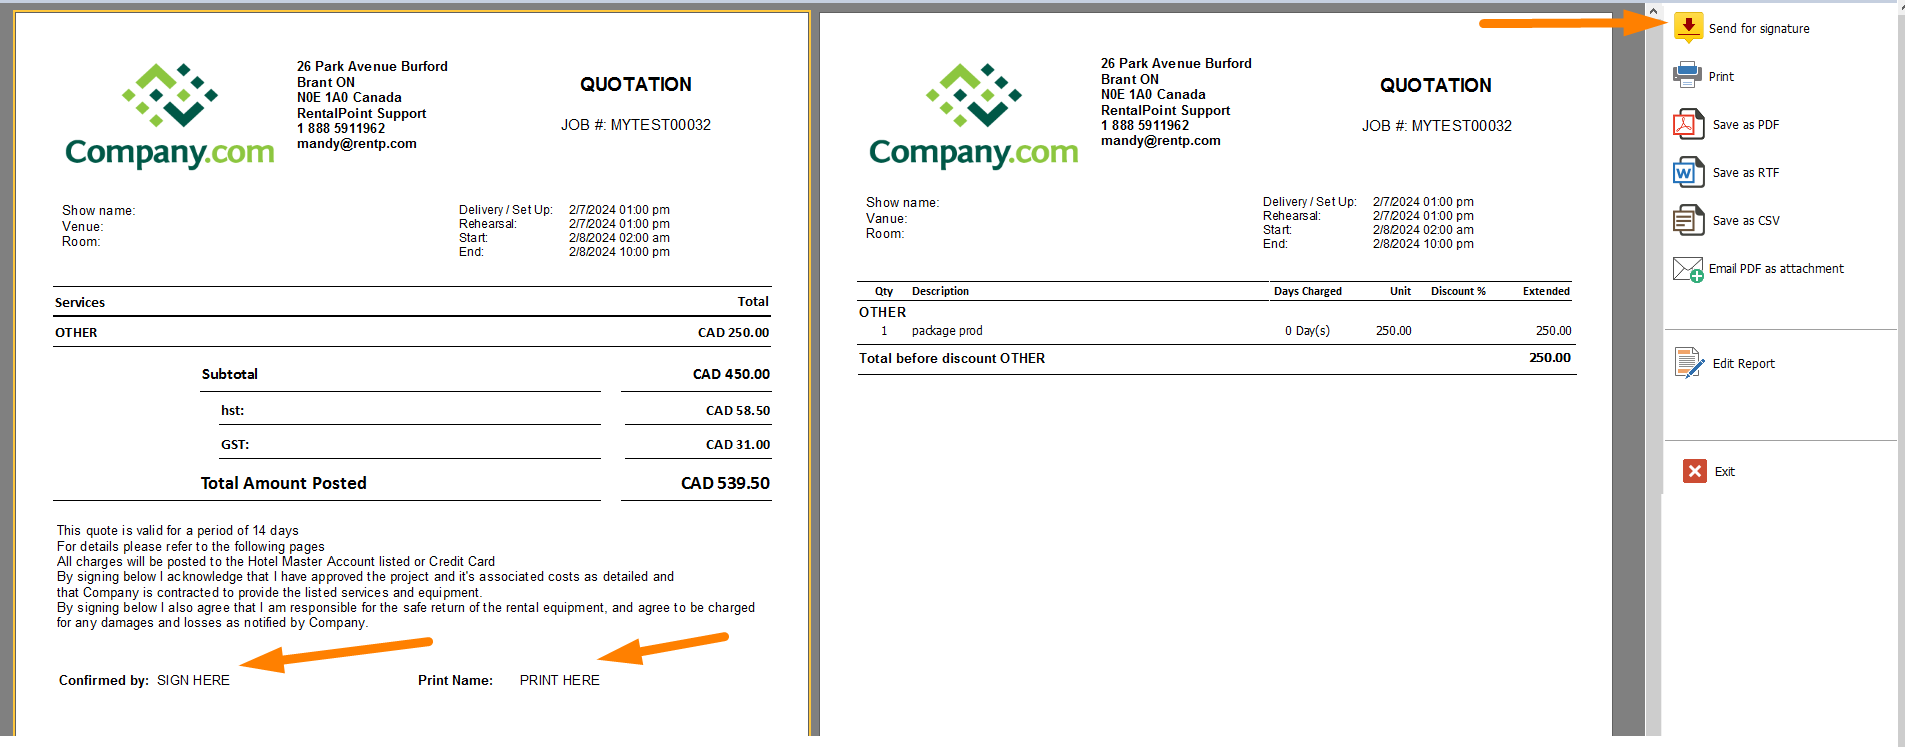
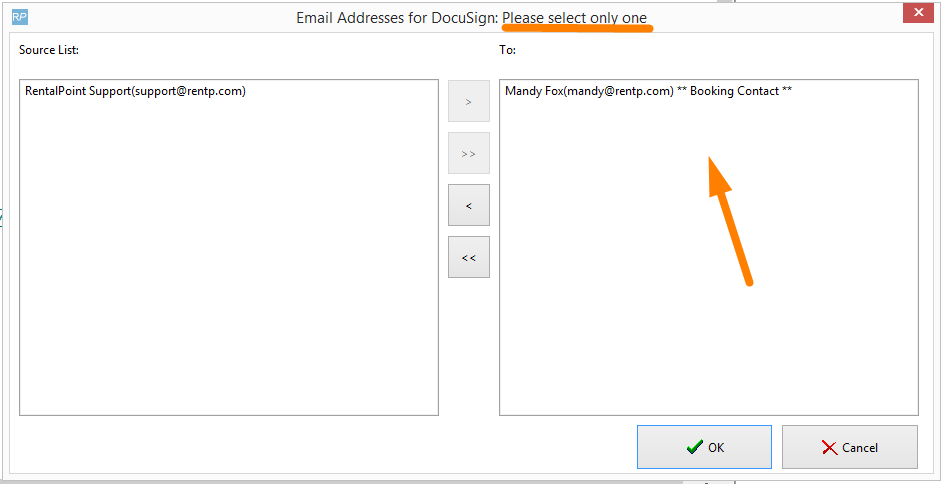
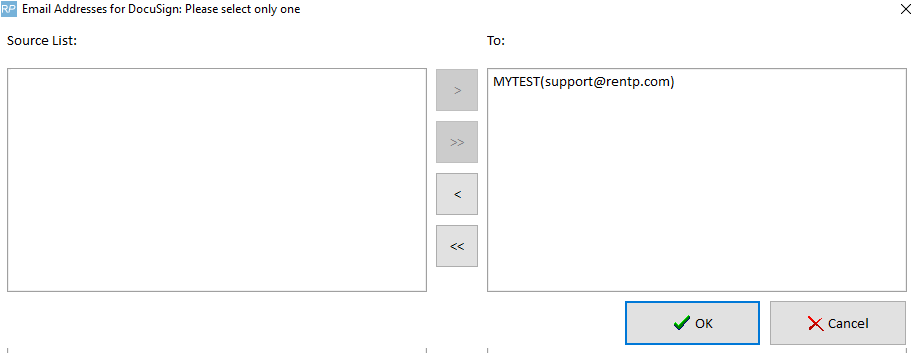
Select one receipient, then click OK
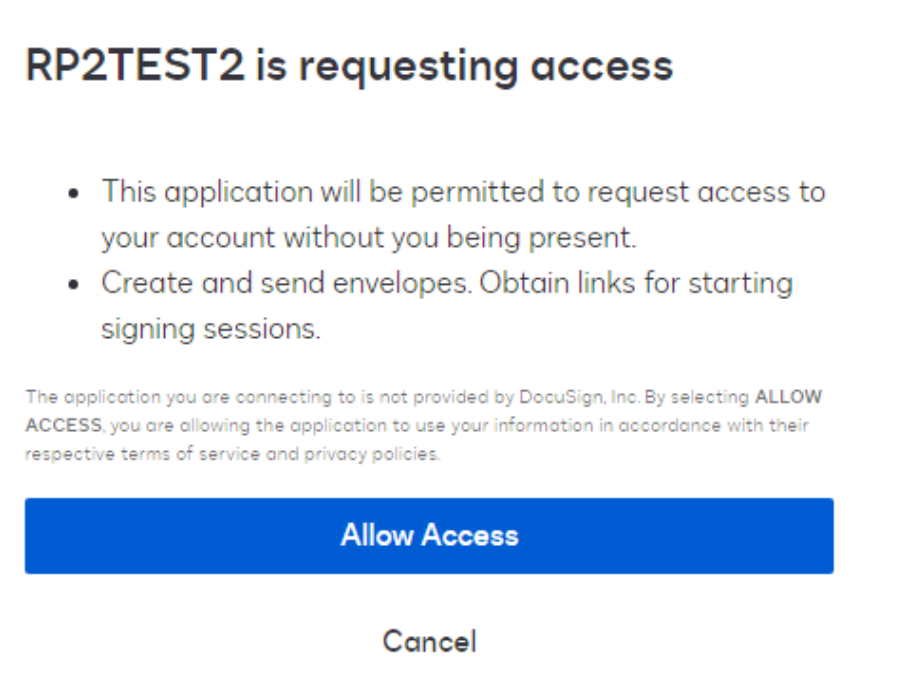
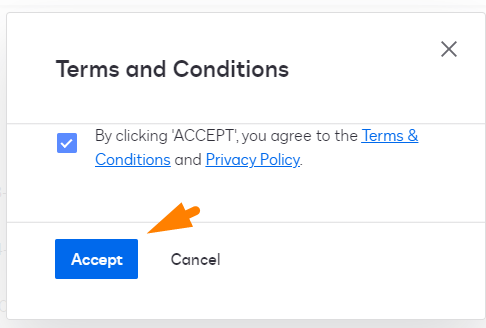
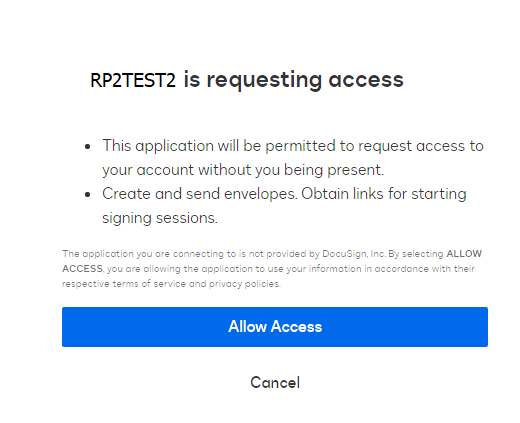
The first time you send to DocuSign from RentalPoint, you'll be asked to grant access permission to RentalPoint. Click Allow Access.
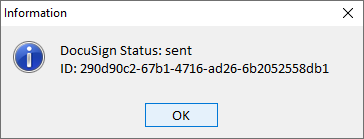
You should then get a confirmation receipt.
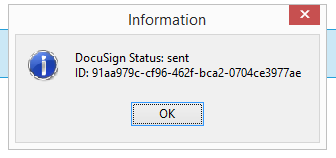
If you don't get this receipt, check your setup again and contact support@rentp.com if needed. You cannot proceed to next steps without passing this step successfully.
Request a 'Go Live' status for your DocuSign Integration Key
DocuSign requires all App Integrations to be set up in Demo status until 20 confirmed API calls are performed to test the integration.

Each successful call (send for signature from RentalPoint) will be registered with DocuSign until at least 20 successful calls have been made

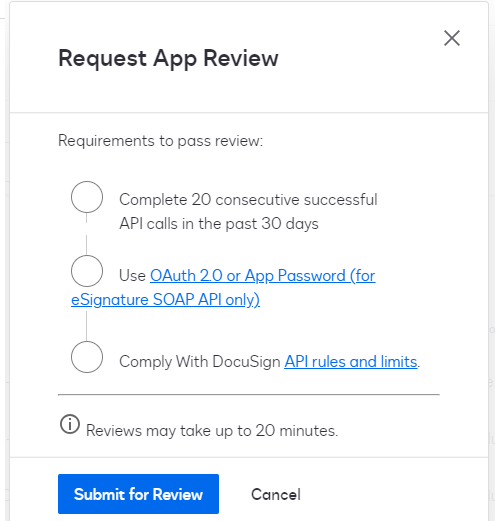
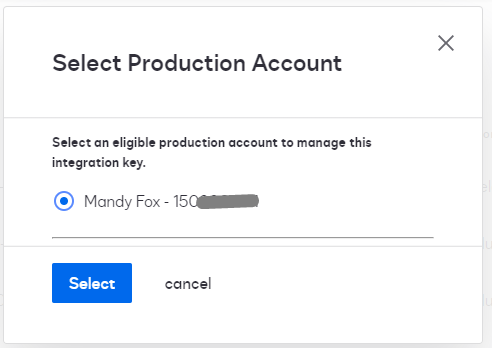
Once enough API calls have been made, you can submit your key for review. It may take a few minutes to a few hours for DocuSign to upgrade your 'Go Live Status'.

Click 'submit for review'
Once passed, the status will change and you can promote your key to production

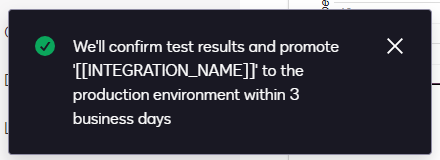
The status will be updated once approval has been granted.

Production Mode
Once your App Integration Key is live in DocuSign you'll see the status change in your DocuSign developer account
Click View in Production

Then edit the key in Production. The integration key is promoted but the other settings need to be edited again.

Ensure the settings are correct

Generate an RSA and add the redirect url https://developers.docusign.com/platform/auth/consent and save
Update RentalPoint
Update the RSA public and private keys to the pem files in your RentalPoint folder
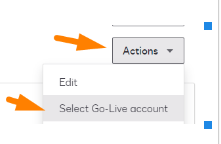
Then go to Accounts Parameter #33, switch your settings to production mode and copy the App Integration Key and User ID from the production account to your RentalPoint settings.
Log out of RentalPoint and back in before testing.
The first time you send for DocuSign, you'll need to Grant access to your new key, then you should be all set!
Using DocuSign in RentalPoint
Sending Documents for Signature
The DocuSign caption fields must be in use on your Fast Report in order to see the option to Send for signature illustrated below. Talk to your Fast Report specialist or contact support@rentp.com for help with adding these fields if needed.
To send a document for signature, first display your Fast Report

Then use the DocuSign 'Send for signature' option to request an electronic signature (if the docusign fields are not in your template you will not see this icon)
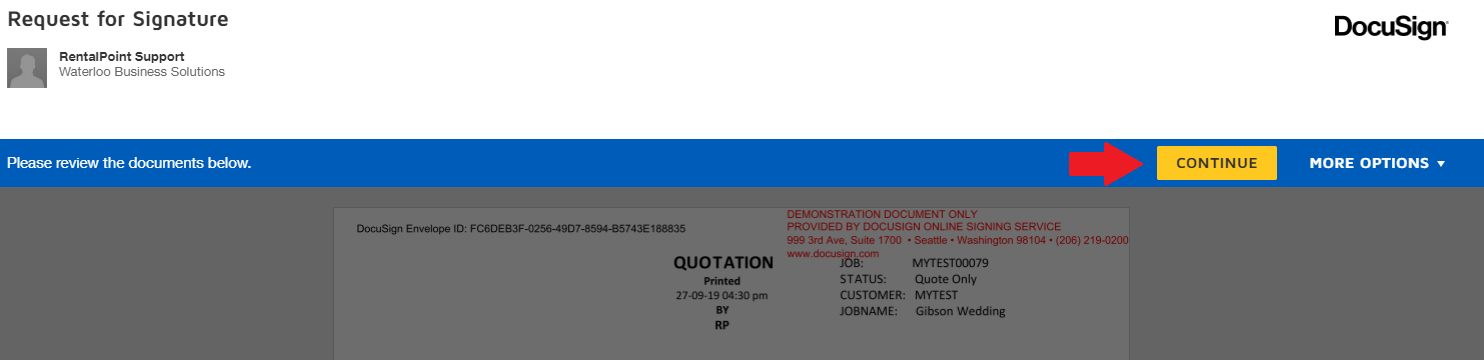
Choose One email address to send your document to
You may be required to log into your DocuSign account, once your password is confirmed, you'll get a confirmation number for your sent document.
View Documents Sent for Signature
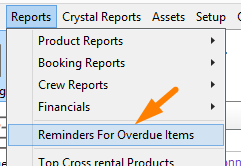
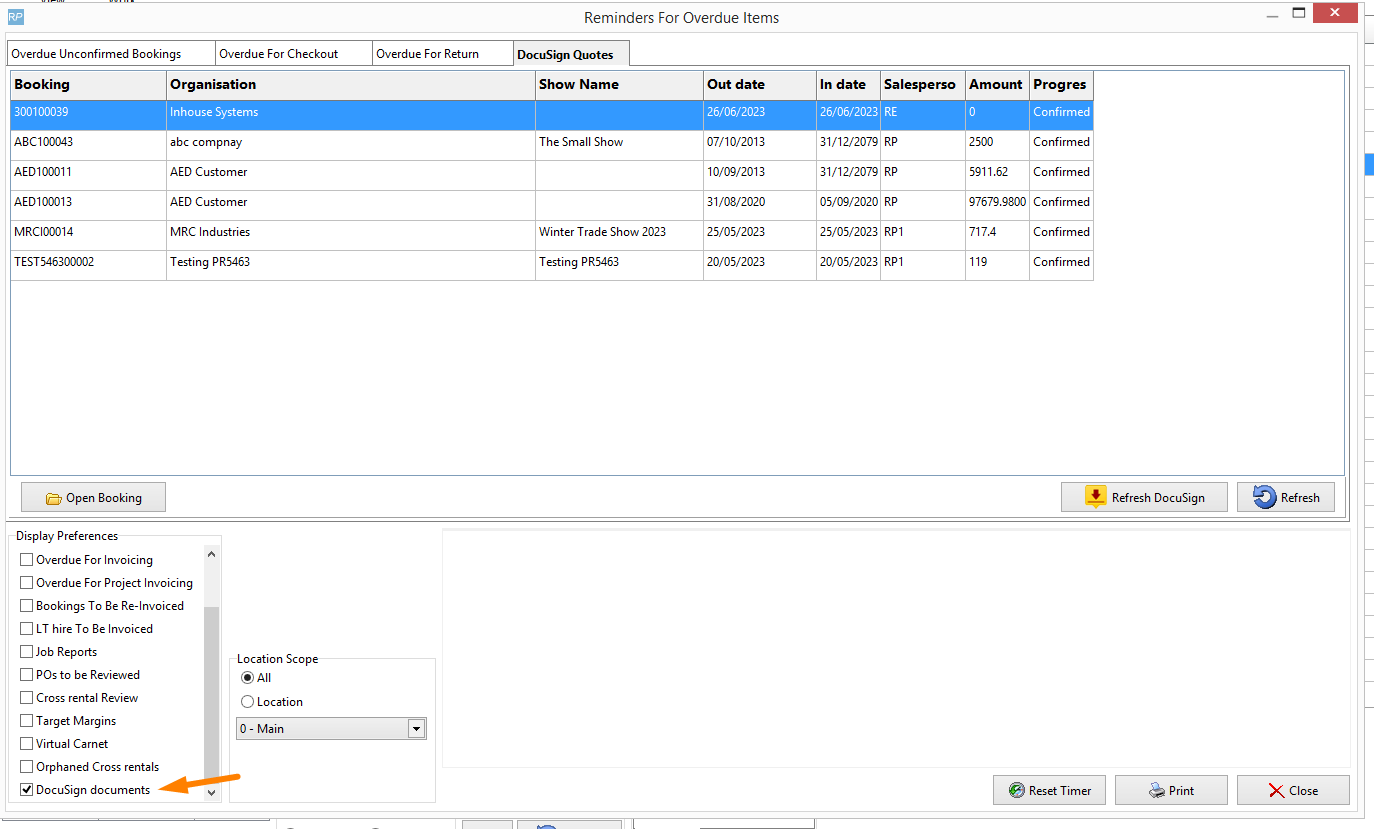
Documents sent for signature are visible under 'Reminder for Overdue Items'
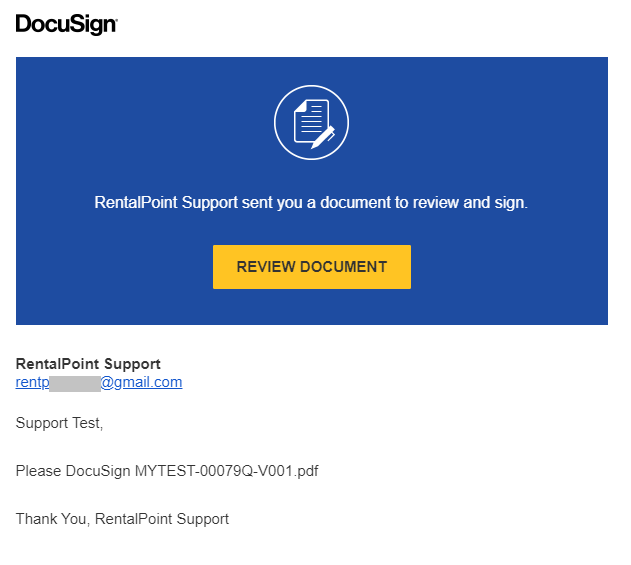
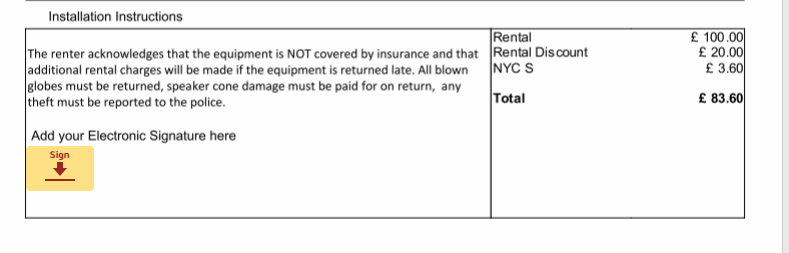
What your customer will see
The client will see an email from DocuSign requesting a signature, they will follow some simple instructions to sign the document. Once they click FINISH, the signed document is returned to you!

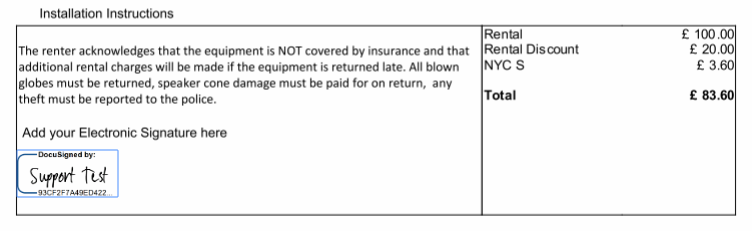
Receiving Your Signed Documentation
You'll receive a return email once the document has been signed

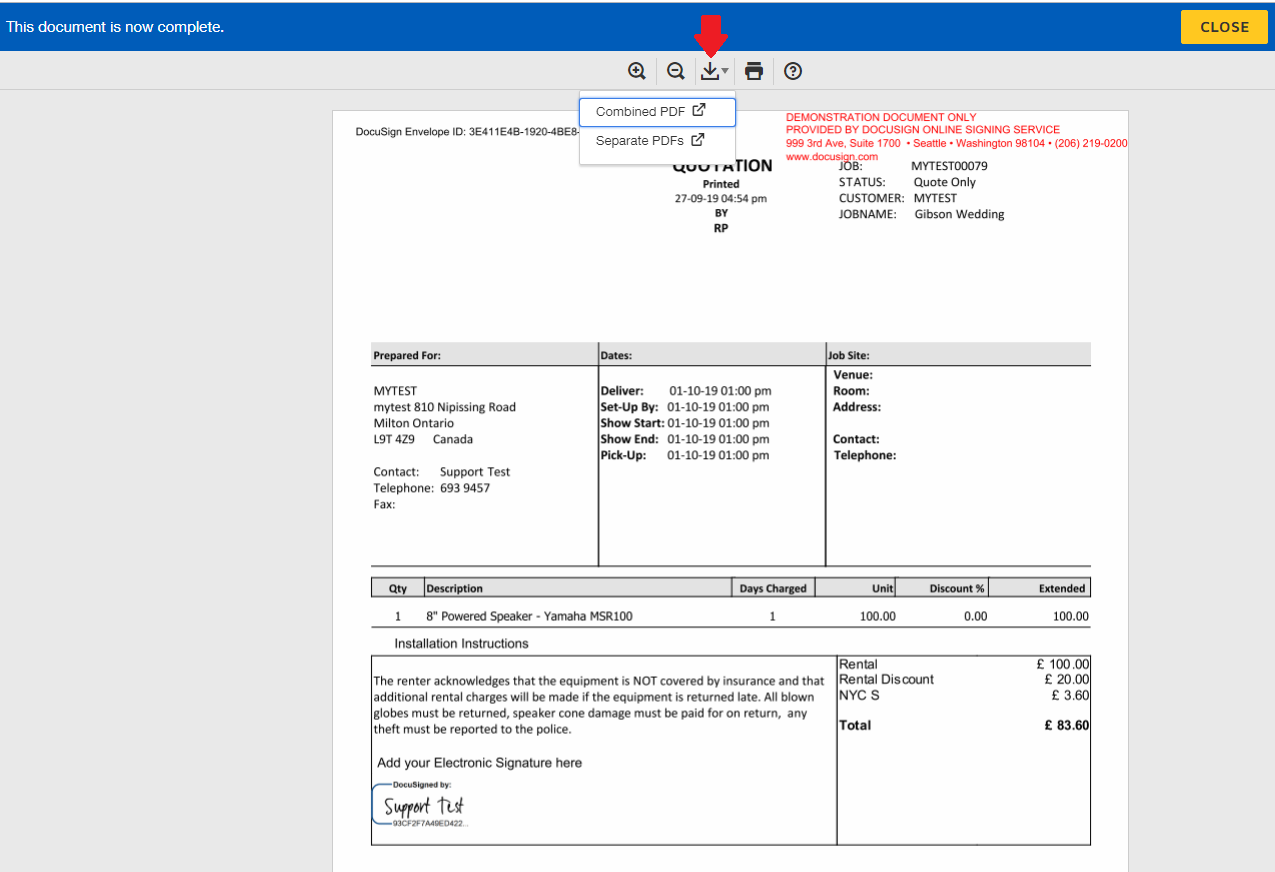
You can download and attach the signed document to your booking
- Combined PDF will download a PDF of the signed document and a signature certificate in one PDF
- Separate PDFs will zip two separate PDFs and download one Zip file
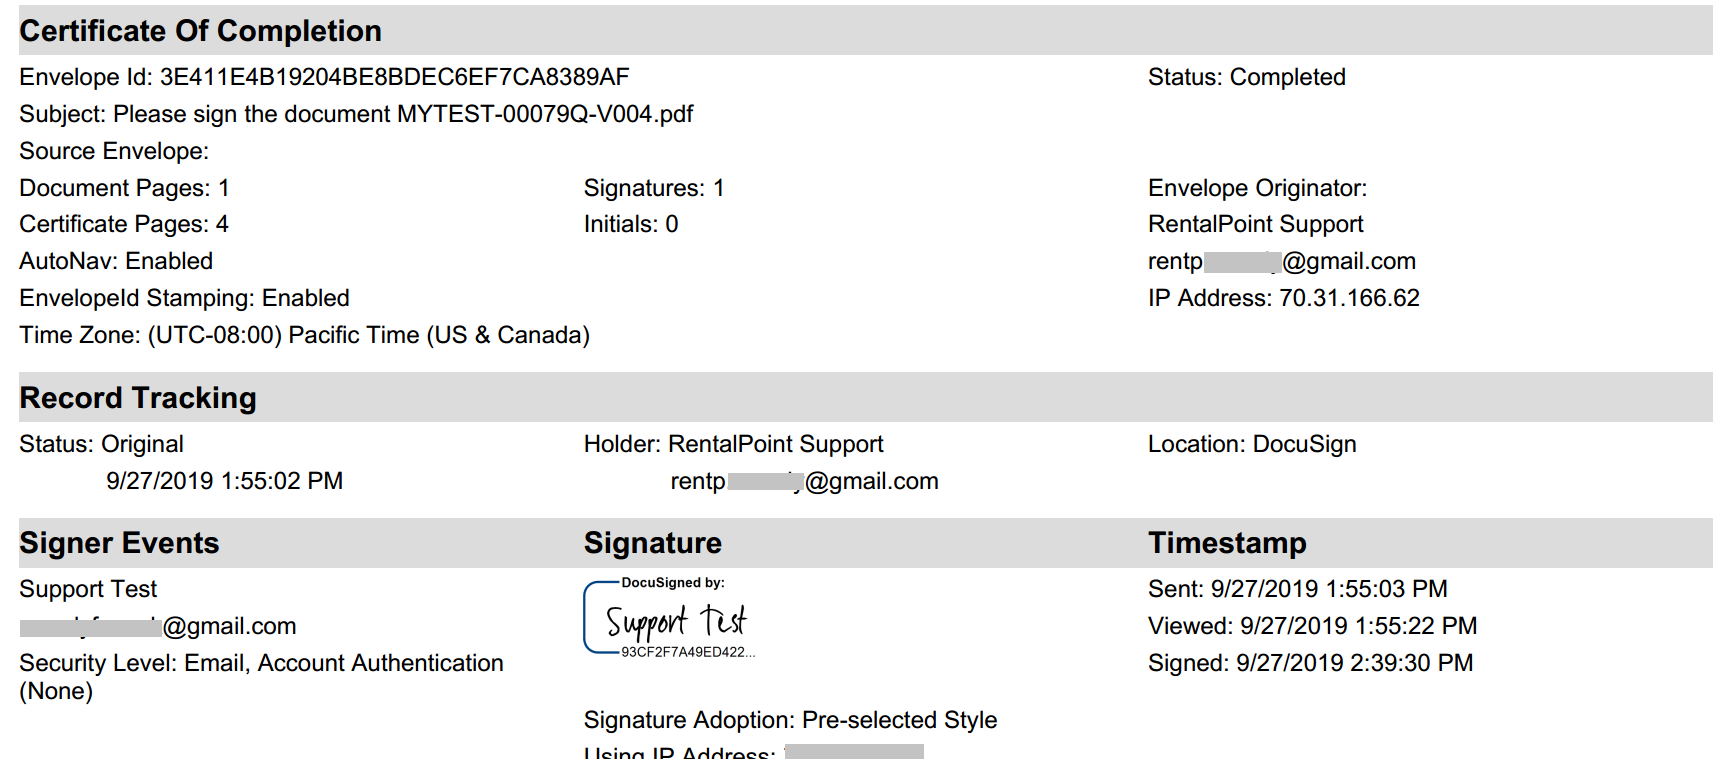
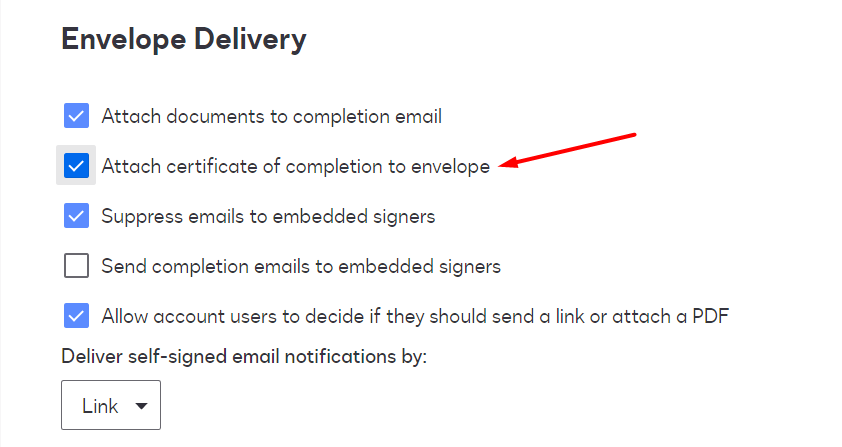
If you don't see a signing certificate in your combined PDF, check your DocuSign settings. Under Signing Settings-->Envelope Delivery, ensure 'Attach certificate of completion to envelope' set checked.
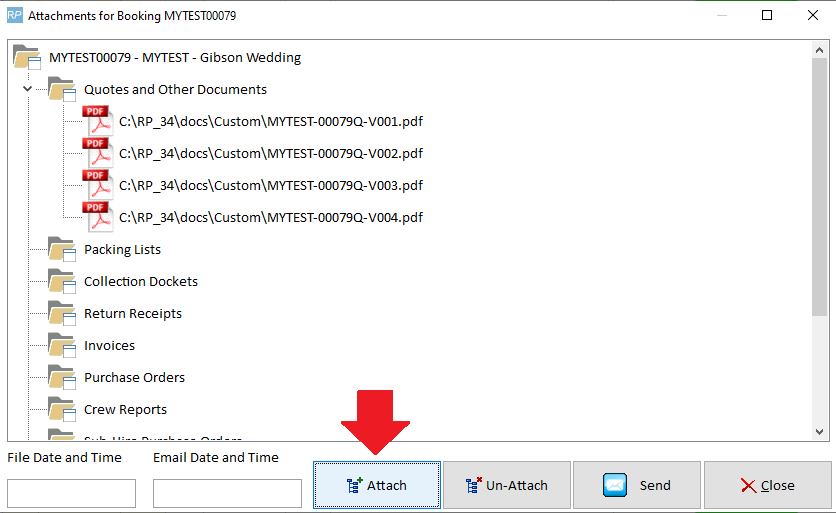
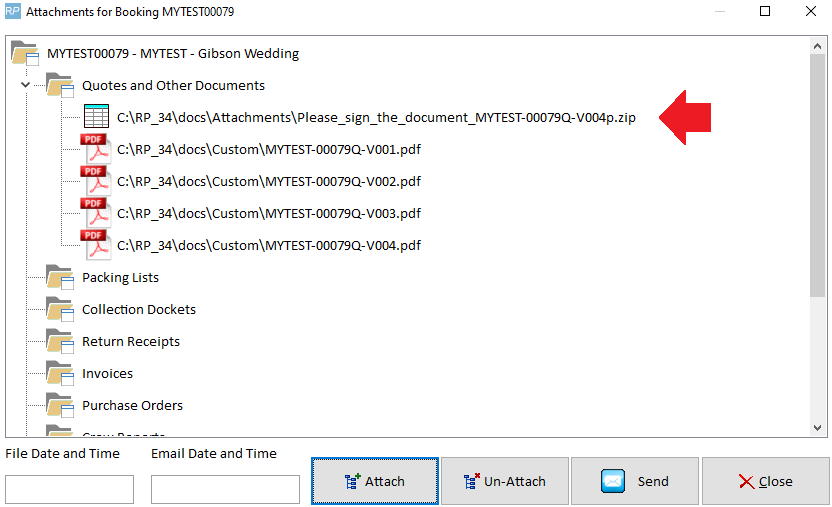
Highlight the booking, the click on View Attachments
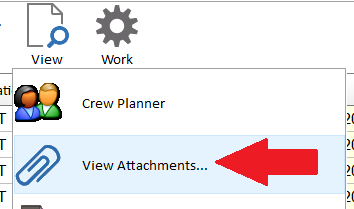
Attach your downloaded file to the booking