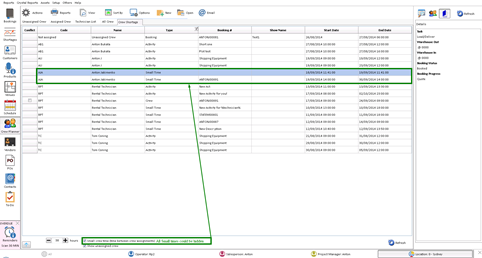
Crew Planner
The Crew Planner Module provides a central location to manage crew assignments for multiple jobs and maintain technician schedules. The interactive calendar displays crew requirements and assignments allowing operators to quickly view crew for a given period. The scopes allow operators to take a detailed look at bookings, crew and times and view options on the same screen. You can edit the dates and times of crew assignments by dragging the assignment or expanding the begin and end times of the assignments.
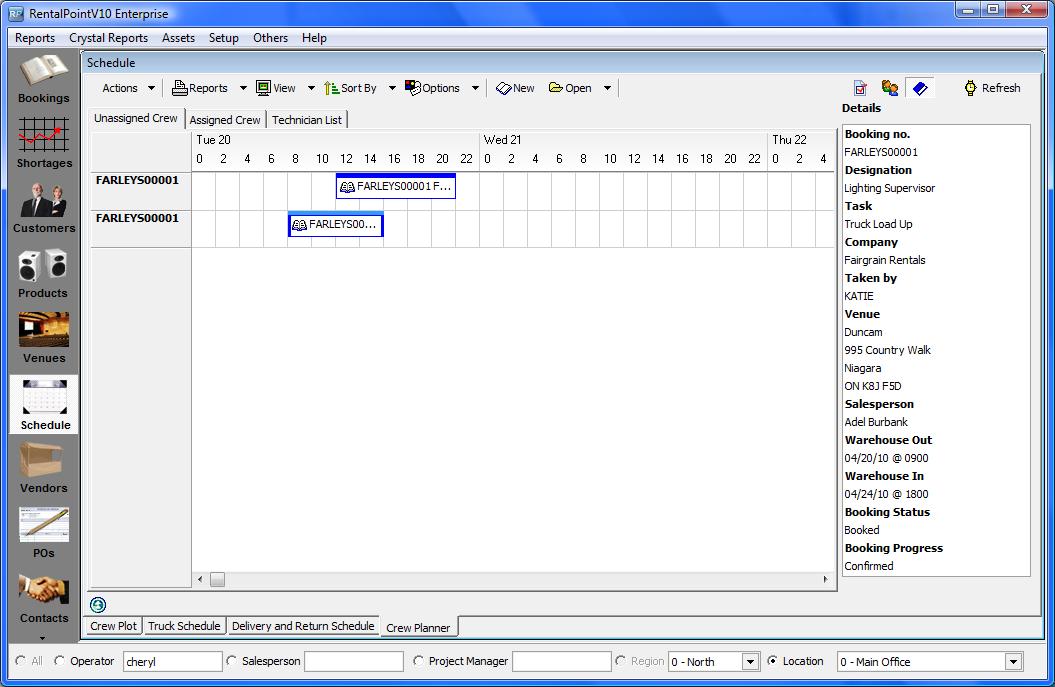
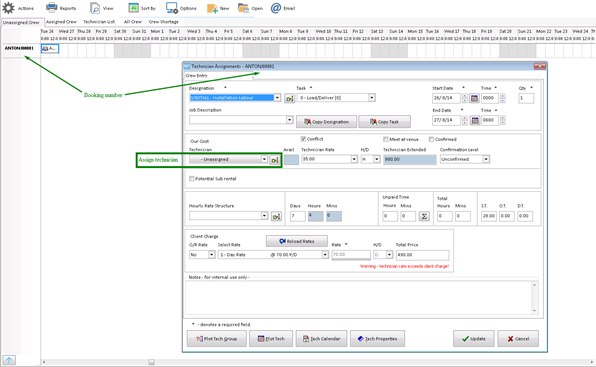
The Unassigned Crew tab contains all crew entries that do not have a technician assigned to them.
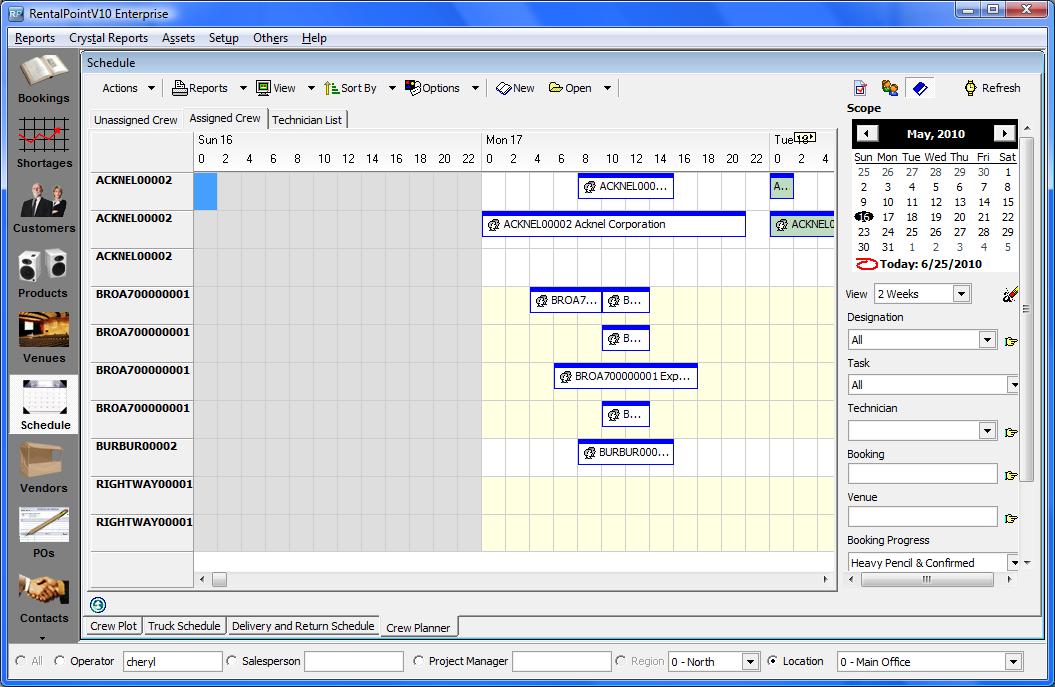
Assigned Crew Tab
The Assigned Crew tab contains all crew entries that have a technician assigned to them.
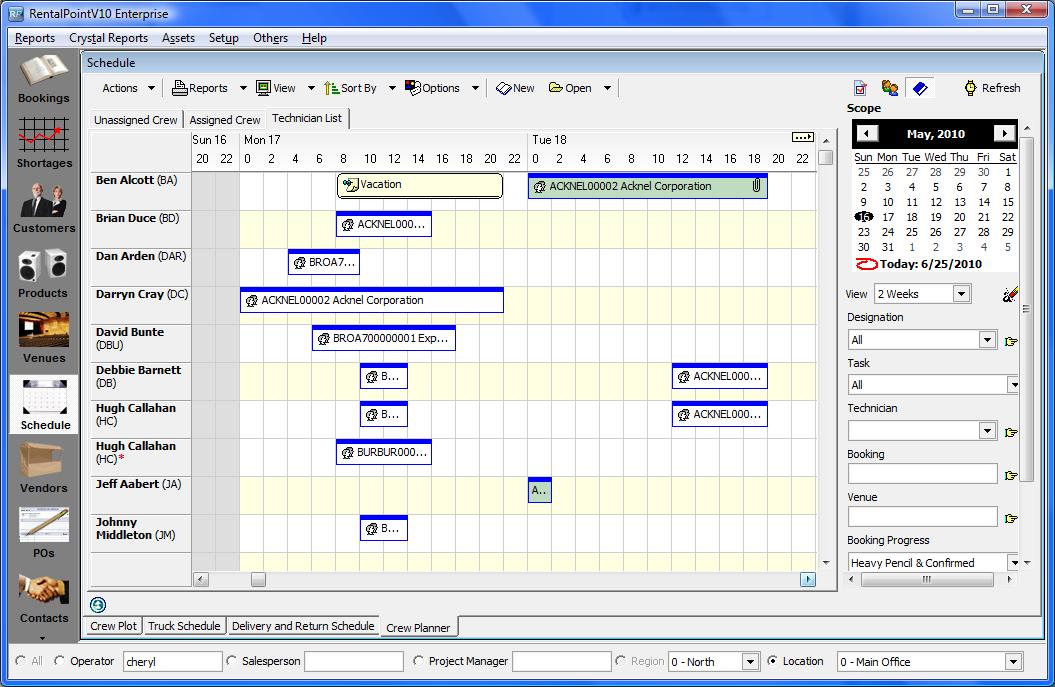
Technician List Tab
The Technician List tab lists all technicians with assignments in alphabetical order.
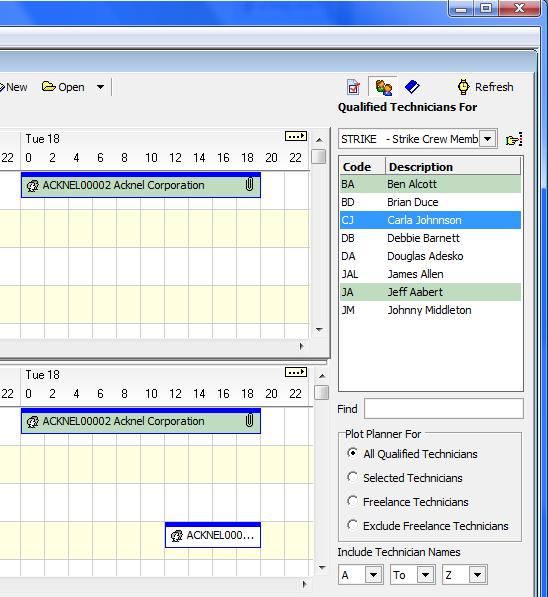
Qualified Technicians
In each of the main areas (Unassigned, Assigned and Technician List), you can activate a qualified technician grid that will display in the bottom half of the screen. This grid will list the technicians that are qualified to perform the designation selected from the top grid. This aids in quickly identifying crew members and assigning appropriate tasks.
Freelance Technicians
During scheduling you may notice some technicians are highlighted in green. This signifies that the technician is a freelancer. Operators can easily identify in-house or out-sourced technicians. If a technician is outsourced and a PO or cross rental is required, it can be raised from within the crew planner. A small attachment icon will display on the crew assignment and can be accessed directly from the crew planner.
Auto Emailing Technicians
With Crew Parameter 19 set to YES, this feature auto emails technicians when their assignments change. Technicians must have a valid email address entered and the 'Send Emails' option turned on in their contacts record.
Crew Shortages Tab
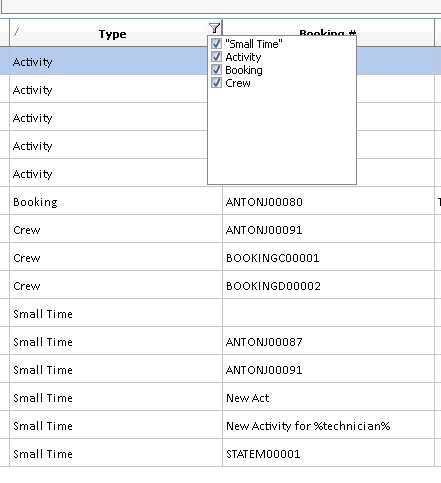
The Crew Shortage tab displays information about conflicts between crew assignments or activities in which technicians are involved. There are no additional parameters for crew shortages. There are four types of shortages displayed in the Crew Shortage tab.
Small Time Shortage
Small Time is the time that a technician needs to move from one job to another. You can hide these shortages by unchecking the Small Time scope checkbox. The Small Time value is determined by technician.
To resolve Small Time shortages you need to double click on a Small Time row. You will be moved to the Technician List. In this grid, you will able to move the conflicting items.
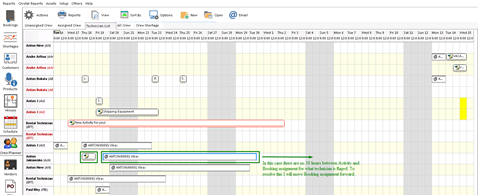
Note. Be careful that you don’t create new shortages whilst resolving Small Time shortages.
Activity Shortages
This is a conflict between two activities. It occurs when two activities with same technician assigned overlap each other.
To resolve Activity shortages, double click on an Activity row. You will be moved to the Technician List. In this grid, you will able to move the conflicting Activities.

Booking Shortages
This shortage type occurs only when you have a technician assignment with no technician assigned. You can hide these shortages by unchecking the Unassigned Crew checkbox scope.
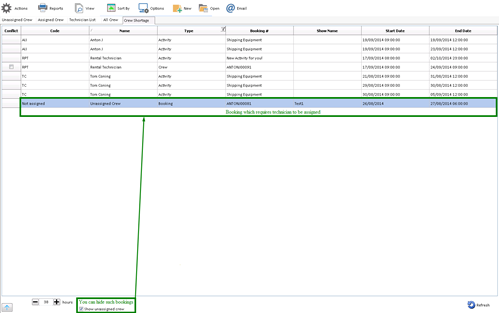
To resolve this shortage type, double click on the Unassigned Crew row. You will be moved to the Unassigned Crew tab. The system will display the Technician Assignment. Double click to open the assignment. Select a technician for the assignment.
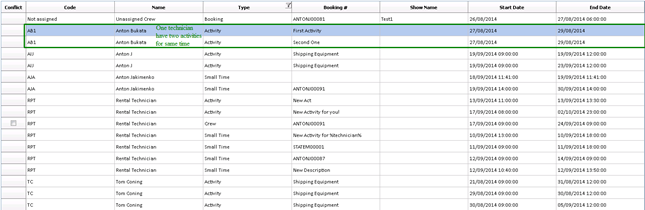
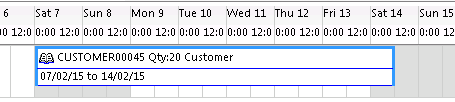
Crew Shortage
This shortage occurs when you have the same technician assigned for two different jobs at the same time or overlapping time between them.

In this example Joe has an assignment for two jobs, which are overlapping. To resolve it double click on one of these rows – you will be moved to Technician List tab. Drag and drop the assignments to resolve the shortage.

Additional Options on Crew Shortage Tab Filter
You can apply a filter to the main grid.
Conflict Checkbox
You can manually force a conflict by selecting the Conflict checkbox. Only Crew Type shortages may be flagged as a manual conflict. This conflict may be used to flag conflicts on technicians where the tech may have a personal reason to not accept the assignment/activity invitation.
*Note that you cannot change activities that were auto-generated by the truck schedule. You should use truck schedule or delivery and return schedule to resolve such conflicts.
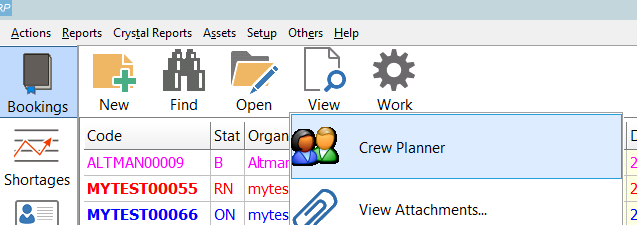
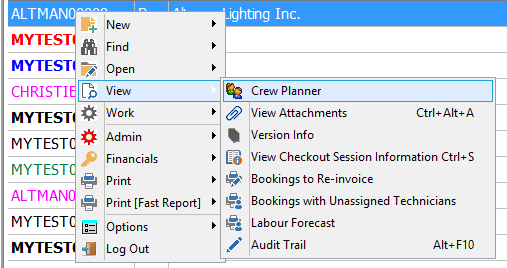
View Crew Assignments
Click VIEW on the Bookings tab Menu and choose Crew Planner to see crew assignment dates of selected booking.
OR right click on the booking, click View-->Crew Planner
SMS Kapow
This feature allows operators to send text messages to technicians confirming their assignments
Initial Setup
- Create an account on SMS service ‘KAPOW’ http://www.kapow.co.uk/index.html
- Set up your sending options via https://www.kapow.co.uk/user.html?view=sendingoptions
Optional Settings Are:
- Change your ‘from-id’. It is set to ‘kapow.co.uk’ by default (it is a paid service)
- Add trusted Email Addresses
- Set SMS parameters
Caution: SMS parameters (Long SMS) defines how long your messages could be (maximum 9 parts, 153 characters each). Messages longer than the set length will be truncated.
RentalPoint Setup
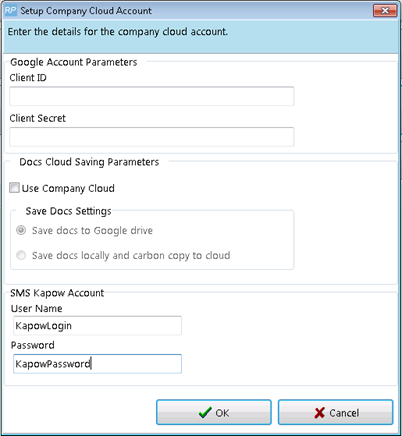
- Go to Parameters – Cloud setup – SMS Kapow Account.
- Enter your User Name and Password from Kapow Account:
Module Functionality and Usage
Send SMS is accessed from Crew Planner.
Open as follows:
- Select a crew task via Crew Planner tabs
- Search for technicians who will suit your task best
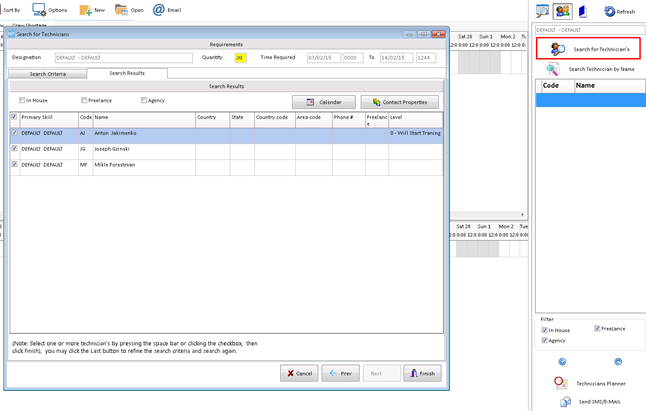
- Selected technicians will be listed in “Assign Qualified Technicians” form.
- Click on ‘Send SMS/E-MAIL’ button
Send SMS tab
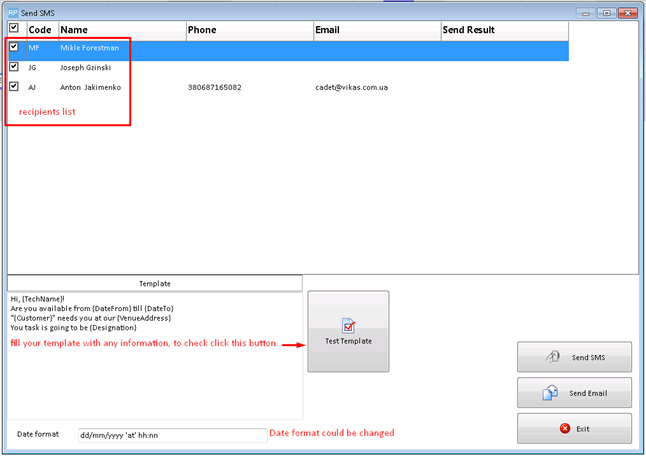
Template parameters:
{TechName} – Technician full name
{DateFrom} – Date and time task starts
{DateTo} – Date and time task ends
{VenueAddress} – Shows Venue name, Street, Suburb, City
{Customer} – Customer Code
{CrewChief} – Crew Chief full name
{Designation} – Designation
{JobDescription} – Job Description
To insert parameters – right click in Template field:
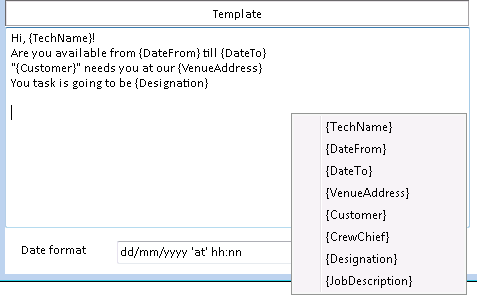
To change Date format to default – right click in Date format field:
Phone and Email could be manually changed via Send SMS tab (but will not be saved on next open), also you could double click on a row and make an adjustment in the contact record.
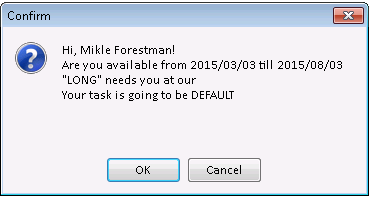
Test your template before sending by clicking ‘Test Template’ button:
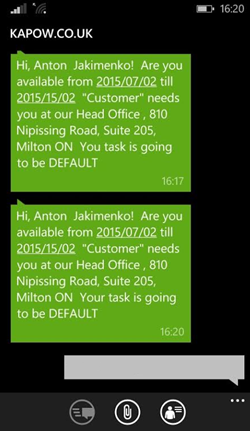
If everything is fine, just click on ‘Send SMS’ button/Send Email:

If Send Result was populated with ‘’OK” – the message has been received:
Troubleshooting: If you don’t get an “OK” for Send Result then an error occurred.
- Double check The following:
- Your user name and password via Cloud setup
- Your internet connection,
- Number of credits you have in KAPOW.
- If all the above looks alright - you need to click on a send result field and copy error message, it could be like:
USERPASS=ren&password=pas&mobile=380687165082&sms=Hi,%20Anton%20%20Jakimenko!%0D%0AAre%20you%20available%20from%202015%2F03%2F03%20till%202015%2F03%2F03%0D%0A%22Customer%22%20needs%20you%20at%20our%20%0D%0AYour%20task%20is%20going%20to%20be%20DEFAULT%20%0D%0A%0D%0A
And send it to support@rentp.com