The Product Record
Add/Edit Products
To add, edit duplicate or delete items in your inventory tree you can use the buttons located on the right side of the F10 window, or you can use the right click options.

General Tab
This section is used for information that is specific to the warehouse and identification of the product. Use the information for each field to help you determine the appropriate settings for each rental/hire product.
Product Code
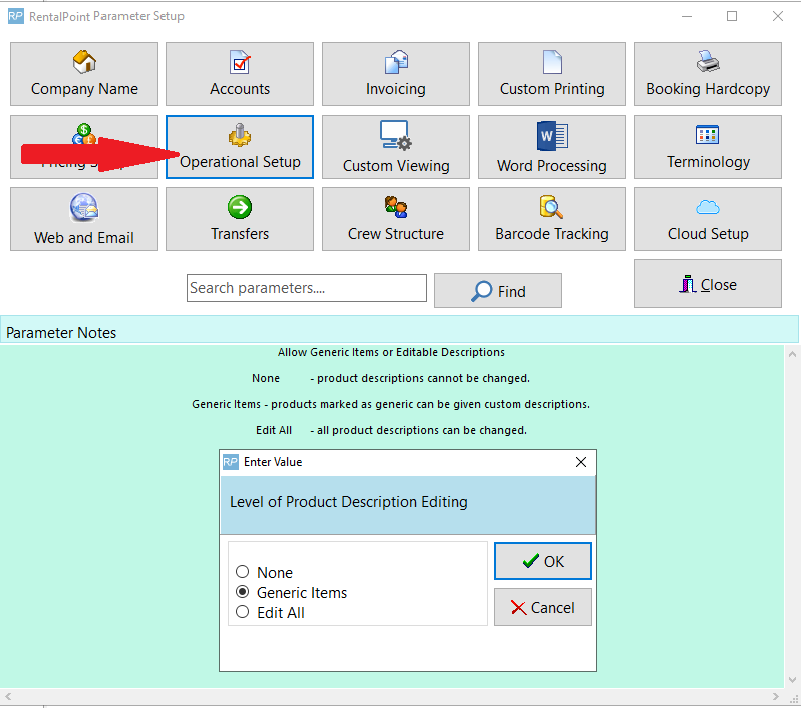
The product code is a unique 8-digit alphanumeric code that identifies a product. You can configure the system to generate this code for you via Operational Parameters #177 - Code Generator.
Quantity Owned
If the product is not an asset tracked item then you can simply change this value to whatever value you require. If the item is asset tracked then this field will be grayed out. The system will count the number of assets and not allow you to directly access the quantity owned. (Note: for Multi Location systems this field will display the total number of assets in all locations)
 For sales items, once qty owned is entered, manual adjustment of Sales Stock Quantity is not recommended. Click for more information Sales Stock Quantity
Configuration (Single Items, Packages, Macros)
- Single Item: The item can be rented individually.
- Package Product: A package is used when you would like to set up a group of items/products that would have a package price when booked together.
- Set up your package product first, then drag and drop existing products into the package components folder.
- When one of the items for the package is short, then the package will show short on the booking.
- When you add a package to a booking, the system will only charge the package price. All items within the package are not charged for.
- Macro Product: A macro is very similar to a package. A macro is a way of grouping items that are rented out together, much like a quick pick or favorites list of products. A macro will not have a heading and parts but rather it will add the products to the booking as individual products with their individual prices.
Shipping
- Shipped on its own: the volume and weight are counted towards the overall volume and weight of the booking.
- Is a road case: the volume and weight are counted towards the overall volume and weight of the booking.
- Always shipped in a road case: the volume and weight are not counted towards the total volume and weight of the booking.
- Always shipped in a road case:
- The volume of the product marked as 'always shipped in a road case' is NOT counted towards overall booking volume since it is inside a road case. The road case itself will be counted for volume.
- The weight of the product marked as 'always shipped in a road case' is counted towards overall booking weight. the weight of the road case will also be counted.
- Is a Rack - The item is a rack or container that will permanently have items attached to or placed in it. The volume and weight will be counted towards the overall total. Additionally, availability options can be enabled to track the stock of the attached items separately than regular stock. <More Details>
Printing
- These options control when the product should appear on the custom quotes and invoice templates
- Print product on custom quotes and invoices - When this option is unchecked the product is no longer printed on custom quotes or invoices.
- Print product on PO - Sub rental/hire - When this option is unchecked the product will not print on POs
- Print Package deal component - The options under this heading control when this product should print when it's a component of another item. There are additional ways of controlling when components appear so if you’re having trouble with components not showing when they should review Operational #61-63 for the global override settings. Also, you can place an insert field on a certain template if for instance you only wanted to exclude the component on a quote.
Product Options
- For individual rental/sale - If this option is checked it mean the item can be placed on a booking by itself. Uncheck this option if the product should only be rented as a component of another item.
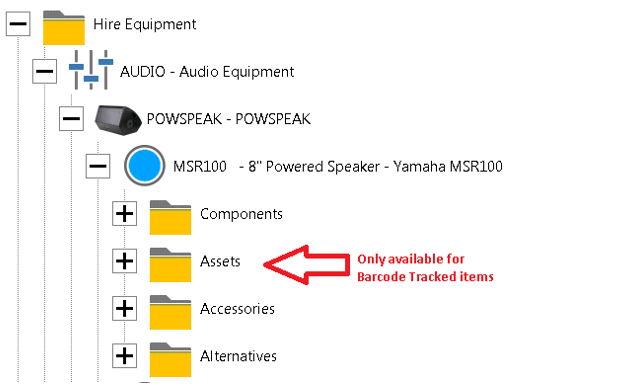
- Track asset movements (barcode track) - This option controls whether the stock will be tracked as individual assets, with each barcode being scanned when checking out or returning bookings, or if only the quantity should be counted. When checked stock will need to be entered by entering individual asset records in the 'Assets' folder.
- Don't allow this product to be discounted - Check this option if you want to prevent discounts from being applied to the product. This will restrict both line item discounts and the overall booking discount.
- Generic Items - Enabling Operational Parameter #127, will allow you to use Generic Items in the system. A generic item is a product that you can change the description for. Thus it has the functionality to be anything you require. Products must be marked as a ‘Generic Item’ in product properties before the description can be changed (see Section 5.5 for more information on Generic Items)
- Expand when added to a booking - Check this option if you want to see any components and/or accessories the product has when first added to booking. Otherwise you can view them by clicking the + sign on the left of the equipment grid.
 Bin Location
 Bin Location
- For asset tracked products, bin location is found in the asset record
- For non asset tracked products
- single location systems, bin location is found under the 'General' tab
- multi-location systems, bin location is found under the 'Location' tab
Price Restriction Overrides
Controls what the user can do when editing the unit rate or the extended price for this product from the equipment grid of a booking. This functionality is completely separate to product discount, since discount can be made visible for each line item while manual changes to price are not apparent. <Check out our Price Override Report>
Here's how it works
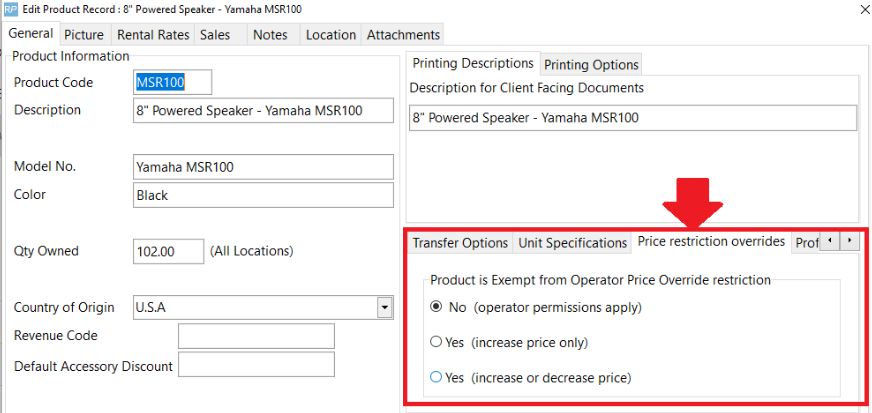
Price Restriction Override settings are found in the product record under a tab of the same name, as outlined in the Fig 1.1 below
Fig 1.1
Overall Concept
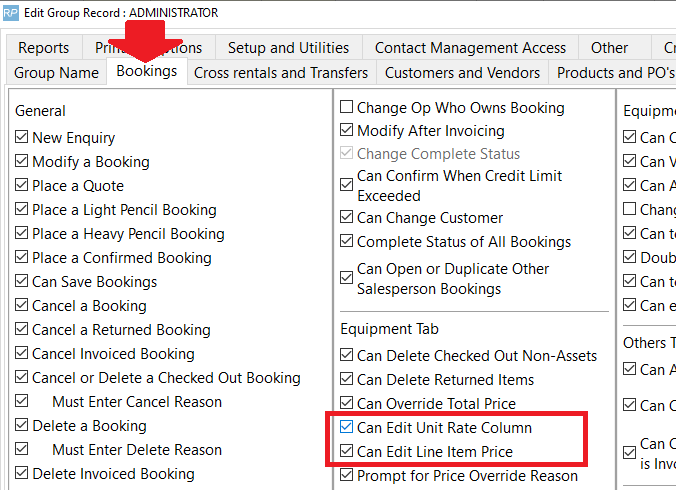
- For users with Operator privileges to edit unit rate and line item price on the equipment tab of a booking (see Fig 1.2 below), then price restrictions will NOT be enforced on that user
- For users with NO Operator privileges to edit unit rate and line item price, then a further check will be performed against the product price restriction override settings, with settings evaluated as follows:
- No (operator permissions apply) - user permissions stand, no extra considerations applied.
- Yes (increase price only) - user will be permitted to increase the unit price or line item price of the specific product on the booking
- Yes (increase or decrease price) - user will be permitted to increase/decrease the unit price or line item price of the specific product on the booking
The Operator Permissions used in conjunction with Price Restrictions are found on the Bookings tab of the Operator Group Record
Fig 1.2
Sundries & Generic Items
Sundries
Sundries were used in Rentalpoint prior to the introduction of generic item functionality. In previous versions, entering a sundry item was the only way of adding something to a booking that you did not have, and didn’t want to add in to your inventory. The sundry item allowed the operator to enter a description for it, a purchase (cost) price and then a sell price based upon a certain mark-up, or just a fixed dollar amount.
Sundry Limitations
- Sundries appear on a booking under a ‘Sundries’ heading and so are obvious to the client that you do not have the item as regular stock.
- At the end of the year you have this income from “Sundries” that you have no idea what it actually came from.
- Sundry Items did not appear on the Shortage List, so cannot be cross hired or purchased without it manually being done
- Sundry items that had a zero sell price to the client, did not appear on the print outs
 Our recommendation is to use Generic Items in place of Sundries moving forward.
Generic Items
A generic item is a product that can be given a unique description when added to a booking. Thus it has the functionality to be anything you require. Products must be marked as a ‘Generic Item’ in product properties (of inventory setup) before the description can be changed. Assets cannot be entered for generic products.
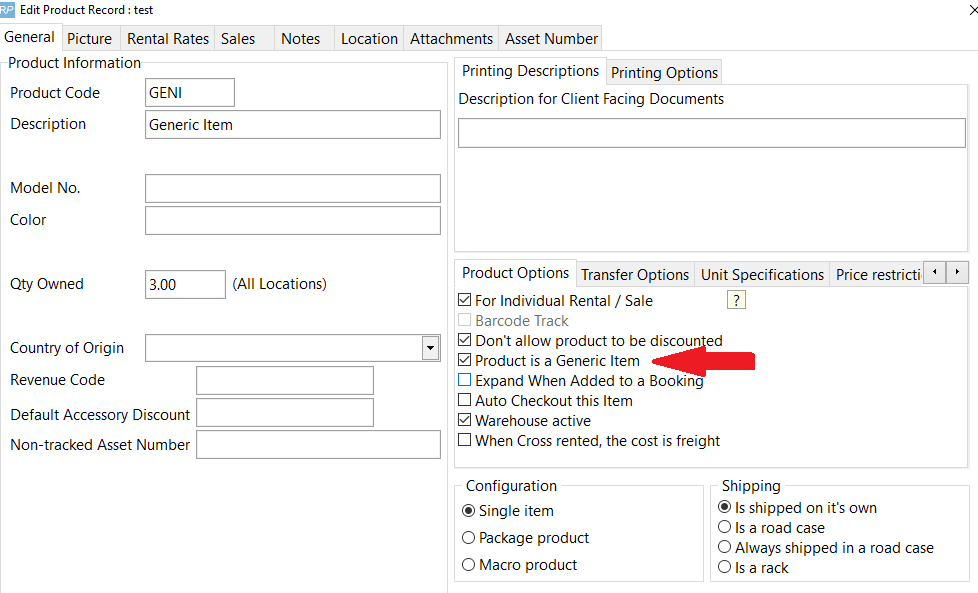
Enabling Operational Parameter #127, will allow you to use Generic Items in the system.
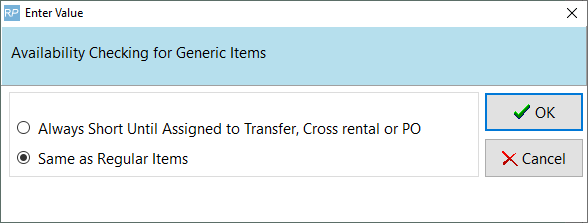
Once enabled, choose how shortages for generic items should be handled. This will depend on how generic items are used in your conapny
- Same as regular items: Use this option if you're using generic items for a set number of stock, so that shortages can be covered just like regular items. This option is also useful if you don't want to worry about shortages for generic items, in which case you can enter a high stock count in the product properties (such as 90000) so you’re always sure to have enough stock showing.
- Always short until assigned to Transfer, a Sub-rental or PO: Use this option if you're using generic items to cover things you don't normally have in your inventory and therefore need to be rented or purchased when a client requests it. When a quantity is associated with the generic item, with "Always short until assigned to sub-rental or PO" selected, the inventory for the generic item is ignored and will remain short until a sub rental / transfer or PO is assigned. The idea being the product can be anything you don't actually have in stock.

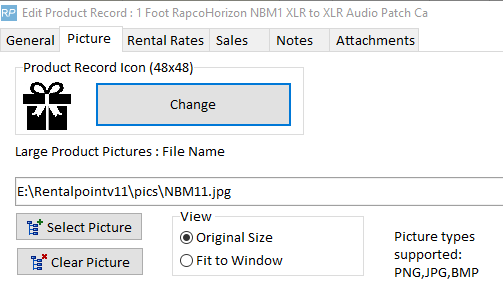
Picture Tab - Custom Icons
- Select a standard or custom icon to illustrate the product.
- Changing Product Icon
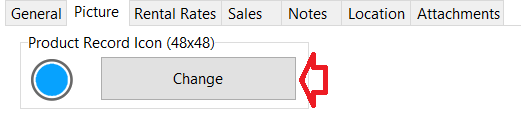
- Choose from the standard available images by first highlighting the image, then click
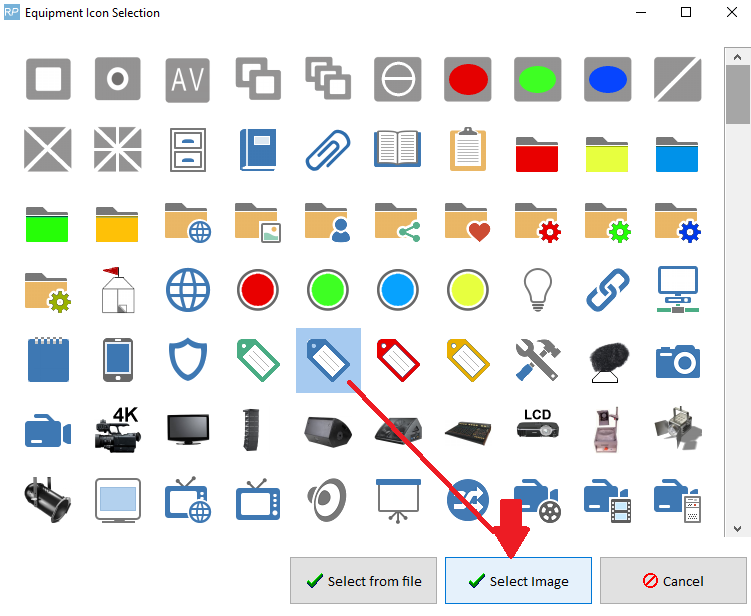


- Alternatively, load a custom image (24x24 or 48x48 pixels) using
 option
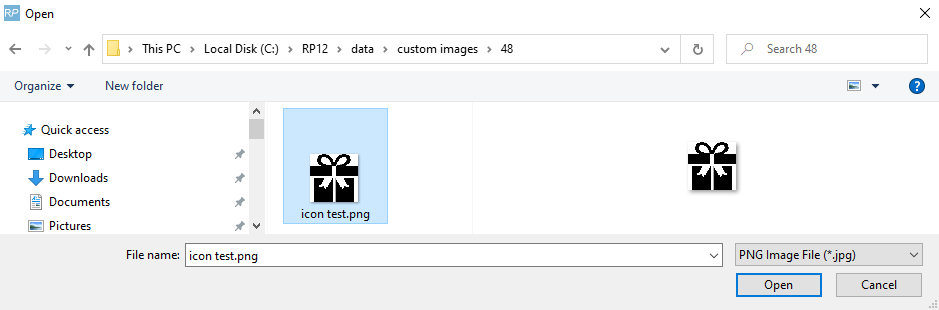
 option
- Here's how to resize your icon if needed, by editing the file in Paint


Picture Tab - Product Pictures
Associate a picture with the product which can be viewed when adding inventory to a booking.
 See Operational Parameter 37 'Product Info Popup Configuration' for option to have product picture automatically display when adding equipment to a booking (setup-->parameters-->operational-->37)
- Storing a Product Picture
- Use
 to store the link to your picture file
 - Clear the picture at anytime using
- Use

 to store the link to your picture file

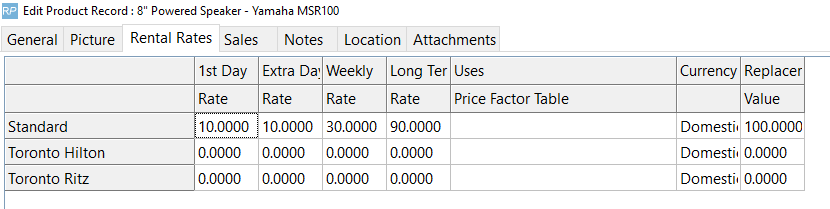
Rental Rates Tab
- Use this tab to specify the rates at which an item is rented out. You can set any number of different rates according to your Price Set Tables (Pricing Parameter #4). You can also specify whether you are basing the rates on a Price Factor Table (Pricing Parameter #2). Please contact RentalPoint support for assistance in setting up pricing in your system.

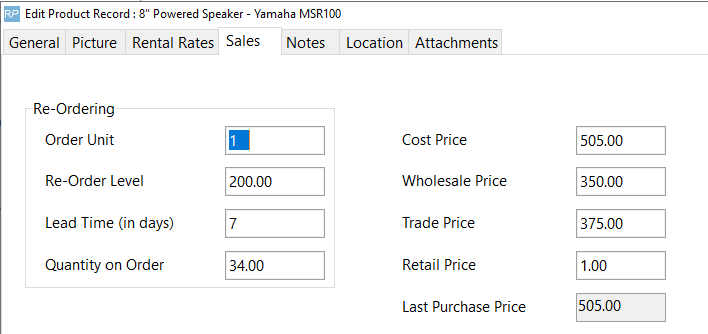
Sales Tab
- The sales tab stores all information about re-ordering and purchase pricing for the product. These prices will take effect in the event that the rental/hire item is sold.

Product Cost Price
- Product costs are used as the basis of values on reports, such as the Product History report.
- Operational parameter #64 will determine whether the cost of each asset is averaged into
the cost or just the cost value from the product properties is used. - Average cost - Takes the average costs based on the stock qty using the following
calculation.- [New Product Cost Price] = ([Old Stock Qty] x [Product Cost Price]) + ([Qty] x [PO Unit
Price]) / [New Stock Qty]
- [New Product Cost Price] = ([Old Stock Qty] x [Product Cost Price]) + ([Qty] x [PO Unit
- Pricing parameter #72 allows you to choose how the product cost is updated when new stock is purchased.
- Last purchase price - The product cost price is set to the unit rate from the last PO
received. - Asset register - will use the average cost of all the assets (if a product has no
assets entered the Cost price from the product properties will be used instead). Assets that
have been sold, are permanently out of service or have been added after the end scope of
the report will not be included in the average cost. - Product Master - will use the Cost Price value from the product properties sales tab.
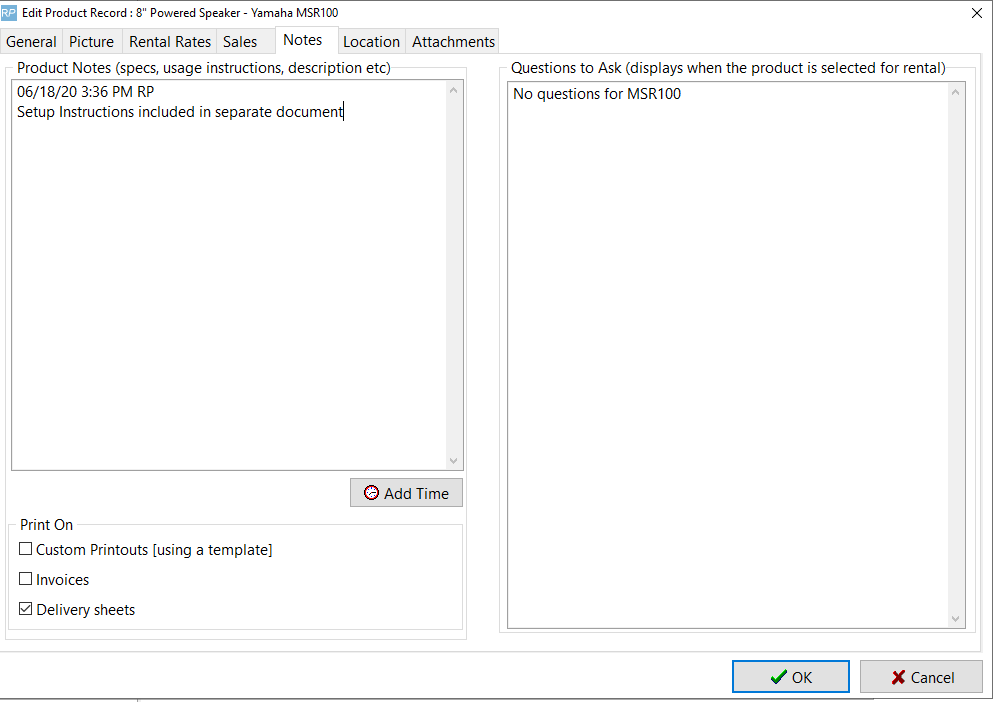
Notes Tab
- The notes section allows you to enter any notes on the product and enter any questions that should be asked if the product is being rented out. This information will display below the equipment grid of the booking when the product is selected in the grid. The Print options on the bottom of the window determine if the notes should print on any output documentation.

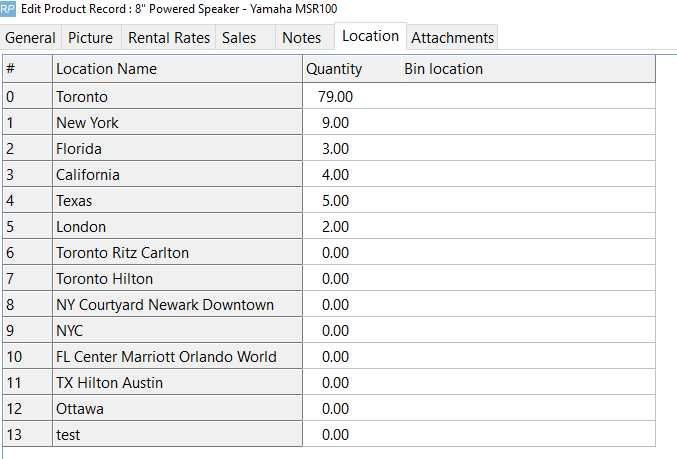
Location Tab
- This tab is only visible if you have the multi-location module installed. The tab displays the quantity that you have on hand at your different locations. If you are not barcoding your inventory, then you will be able to adjust the quantity in the Location tab. However, if you are barcoding your inventory, then you will not be able to adjust the quantity. Quantity will be calculated based on the assets that are entered for the product.

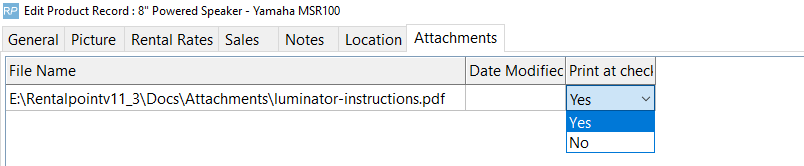
Attachments Tab
- This tab allows you to attach files that you may wish to be printed with the equipment at the time of checkout. If you want to have the files in the attachments tab print during checkout then you must select Yes from the Print at check-out drop down menu.

Setting up Products for Optimal Use on Bookings
When a product is added to Inventory, it will show in the tree with various different folders. See below for a breakdown of each folder.
- Set a category as a component/accessory/alternative to a package/product to see ALL products under the category added to the equipment grid with 'enq' status.
- The user must then select which products from the category are required and click refresh to remove all unselected products.
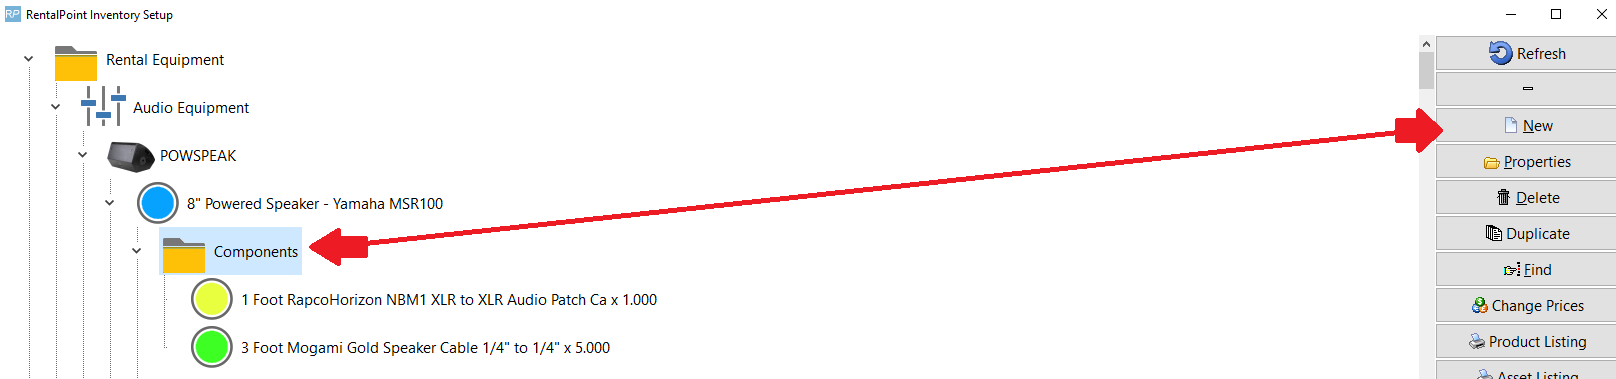
Components
Components are parts that go out with the product in question. There is no extra cost associated with these items since they are deemed to be part of the main product being shipped.
Components can be set up as optional or mandatory.
- Optional components will be offered when the main product is being added to the booking.
- Mandatory components and selected optional components are added to the equipment grid the same time as the main product.
To add a component to a product you can either cut and paste or drag and drop an EXISTING product to the Components folder of the product you are setting up. ** New in v12 See Product Paste List below **
Quantity
- Will usually change according to the package/main product quantity
- When set to 0 (zero), the component quantity will always remain at 1
- For less component products than the main item, use a decimal value.
- Eg: a quantity of 0.1 will set the component quantity on the equipment grid to 1 until the package/main product quantity exceeds 10. (see further illustrations under accessories below)
Accessories
Accessories are products that may be shipped with your main product that are NOT included in the price of the main product; i.e. they are charged separately.
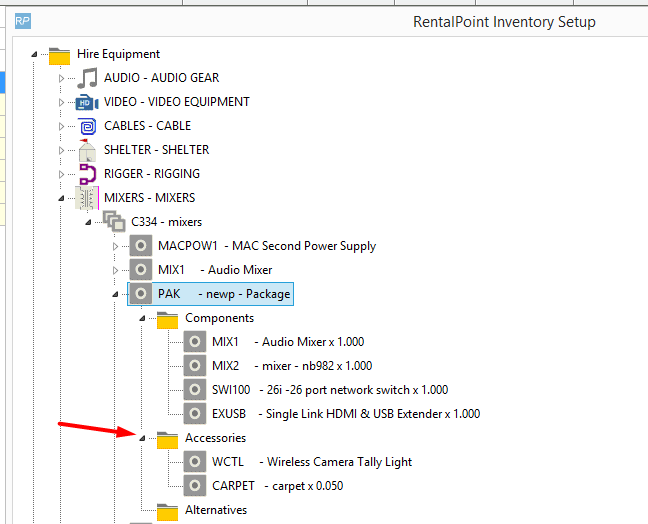
To add an accessory to a product you can cut and paste or drag and drop and EXISTING product to the Accessories folder of the product you are setting up.
Quantity
- For a 'one time only' accessory, set the accessory quantity to 0. The accessory quantity will remain as 1 even when the main product quantity is increased
- For a 1:1 ratio with the main product, set the accessory quantity to 1. The accessory quantity will equal the main quantity when added to the equipment grid
- For a 20:1 ratio for example, set the accessory quantity to .05 (where .05*20 = 1). The accessory quantity will then be set as a multiple of the main quantity.
- Main Product Qty 1-20 --> Accessory Qty 1
- Main Product Qty 21-40 -->Accessory Qty 2
- Maint Product Qty 41-60 --> Accessory Qty 3


Optional Accessories will be presented to the user when adding the main product to the booking. The user can then choose to include the accessory in the booking or exclude it. To ensure the accessory is always added, leave 'optional accessory' unchecked.
Accessories are added to the equipment grid the same time as the main product
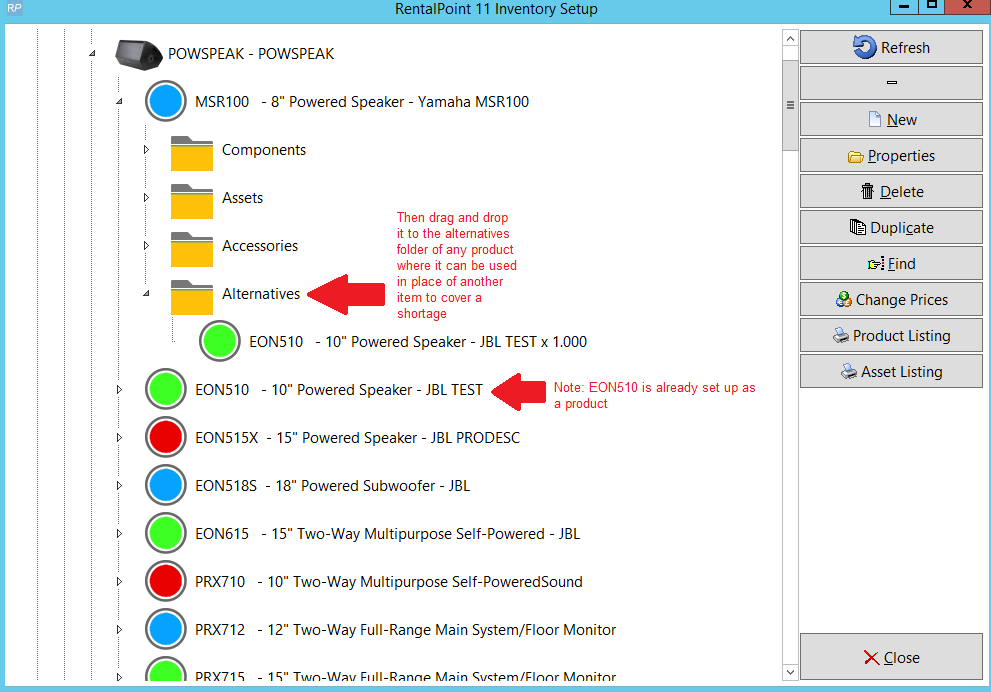
Alternatives
Alternatives are suggested to the user when the main product is short. For example, when adding a product to a booking, Rentalpoint anticipates a shortage for that item, the alternatives list will display allowing the user to select an approved alternative in its place.
To add an alternative to a product you can either cut and paste or drag and drop an EXISTING product to the Alternatives folder of the product you are setting up.
Parameters affecting Alternatives
- Operational #18 'Alternative Pricing Default'
- Operational #54 'List Category as Alternative'
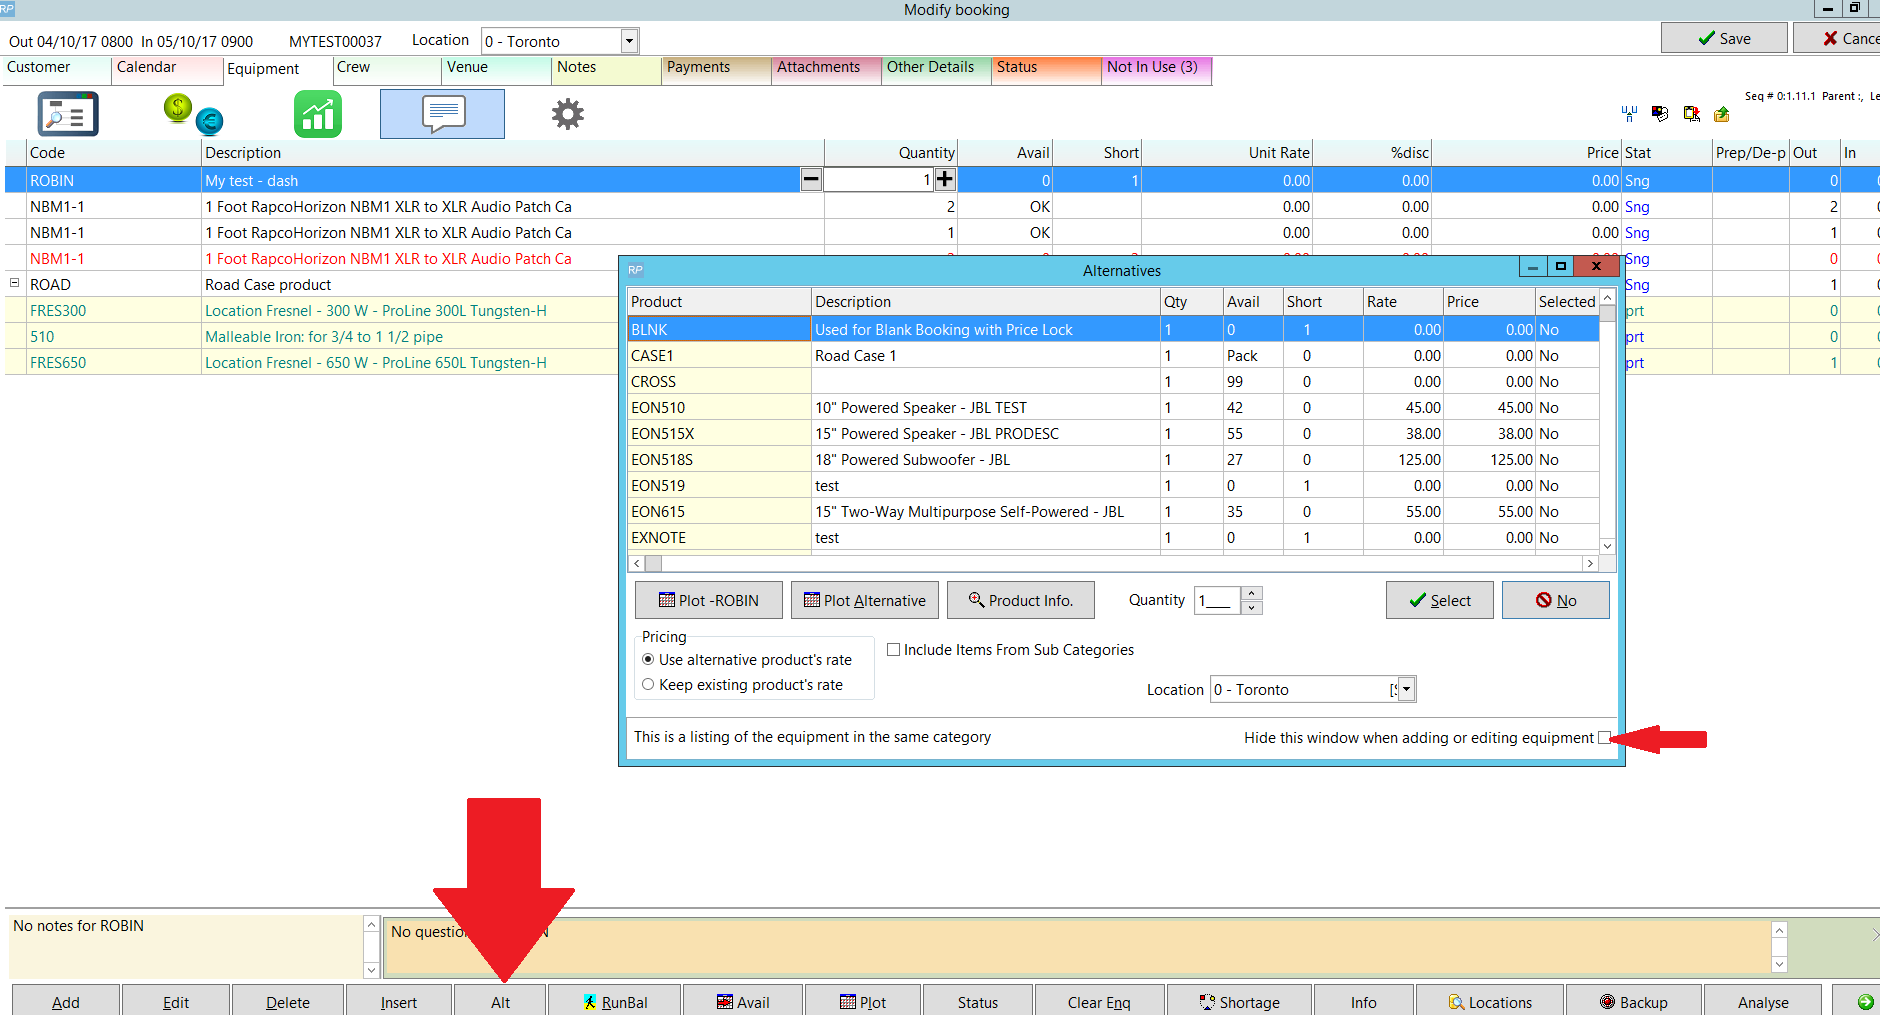
Alternative Product Popup
To see alternatives to the product highlighted on your equipment grid, click on the 'Alt' button at the bottom of the window.
The alternatives window will open, then uncheck the checkbox in the bottom right hand corner of the window.
Once unchecked, the alternatives window will pop up whenever an item is short.
Product Paste List (Quickly Add a list of existing products as alternatives, accessories or components)
In product setup (F10) a list of products can be built which can then be quickly pasted into one of the component folders.
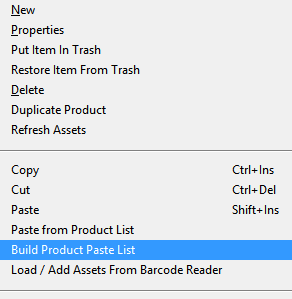
While on the product tree, right-click and select ‘Build Product Paste List’
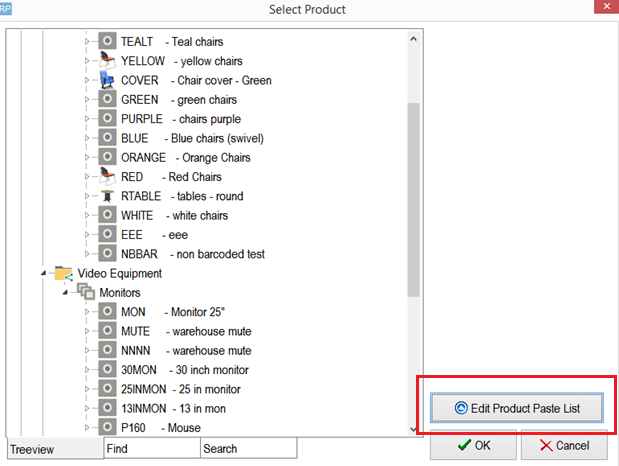
From the Product Search Window, on the bottom left click the ‘Edit Product Paste List’.
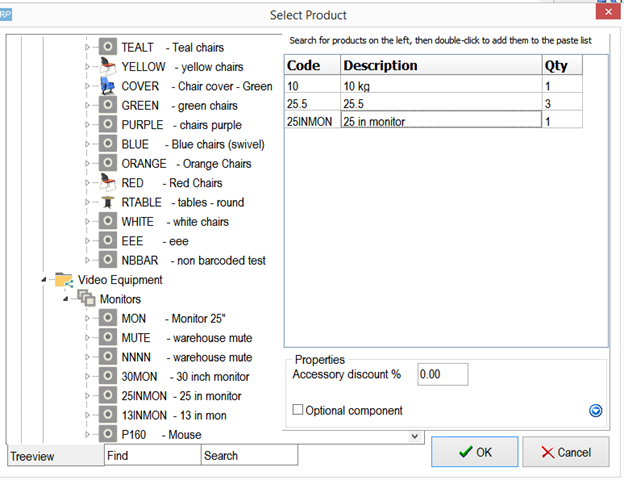
Search for products on the left side of the window and double click on products to add them to the list
OR right-click on a product in the list to delete products from the paste list
 only products that are marked for 'individual rental/sale' in Product Setup will show in the search list
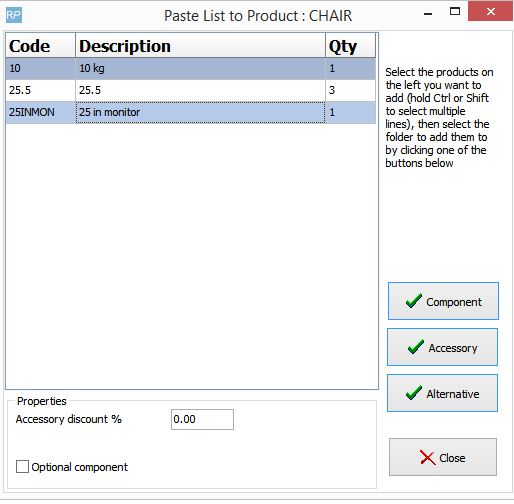
To paste products, select a product in the tree, right-click and select ‘Paste from Product List’.


Select the products to add and click one of the buttons on the lower right to add them to the desired folder.