Offered in RentalPoint v12, Once configured, all invoices, payments and credits processed in RentalPoint, can now be exported to Quickbooks Online!
How to Export RentalPoint Accounts to QuickBooks Online
Once RentalPoint is configured to work with QuickBooks Online, every time you produce an invoice, credit, payment or payment reversal, the information will be stored and ready to export to QuickBooks Online.
Use the steps below to export RentalPoint accounts to Quickbooks Online at whatever intervals you prefer.
Configuration steps are outlined further below. Contact support@rentp.com for assistance with configuration as needed.
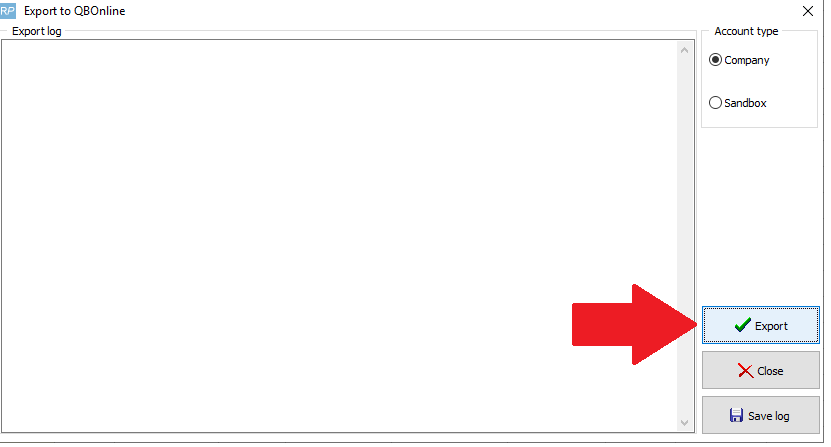
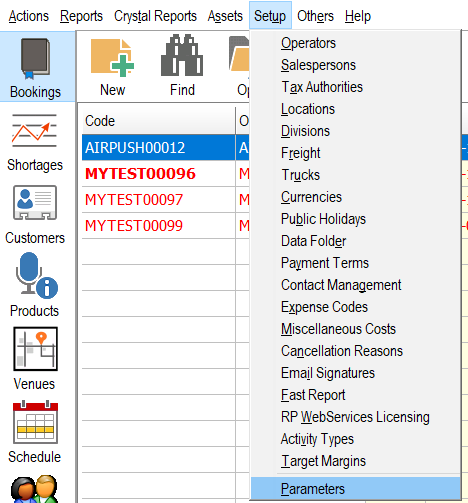
Click Others-->Import/Export-->Export Accounts

Then click Export
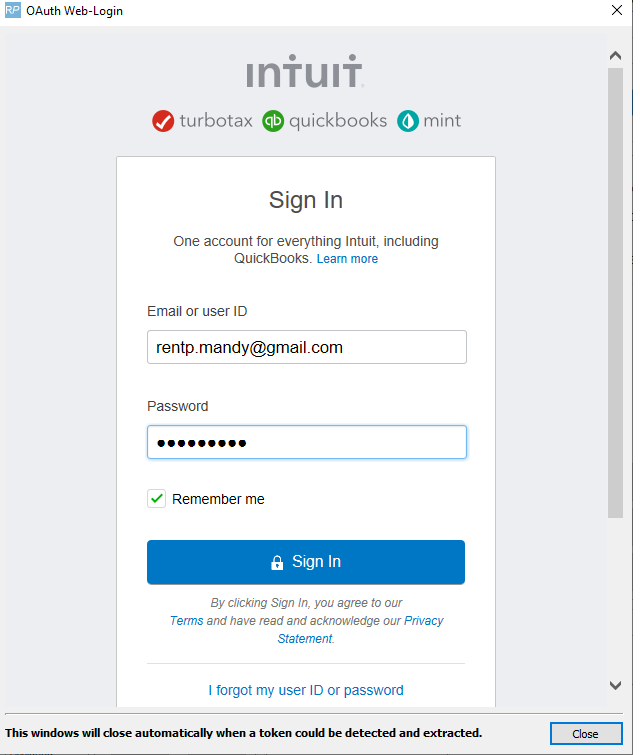
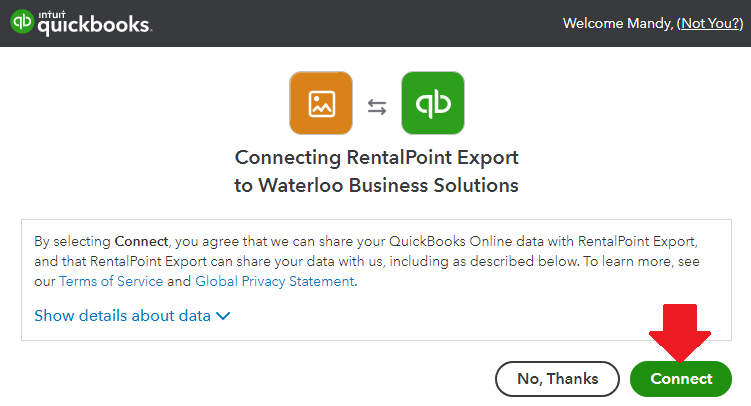
Depending on your setup, you many need to login to QuickBooks to proceed.
While RentalPoint is waiting for a successful login you will see this message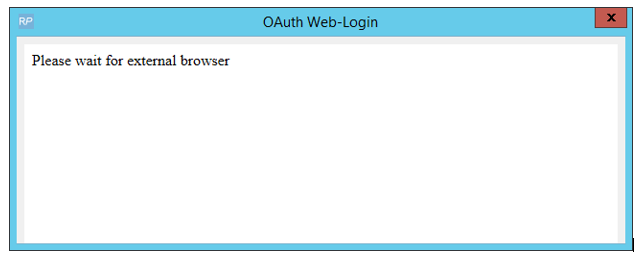
Once logged in, you’ll see information on your screen as the invoices are exported to QuickBooks.
You’ll see a report of how the information is processed and an ‘Export Finished’ message when complete.

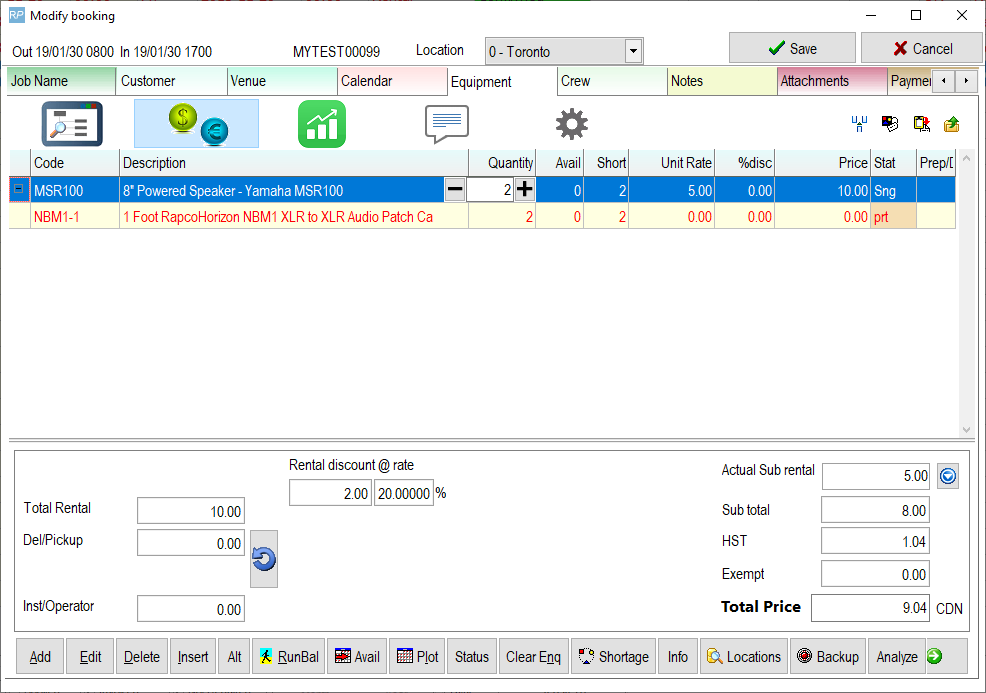
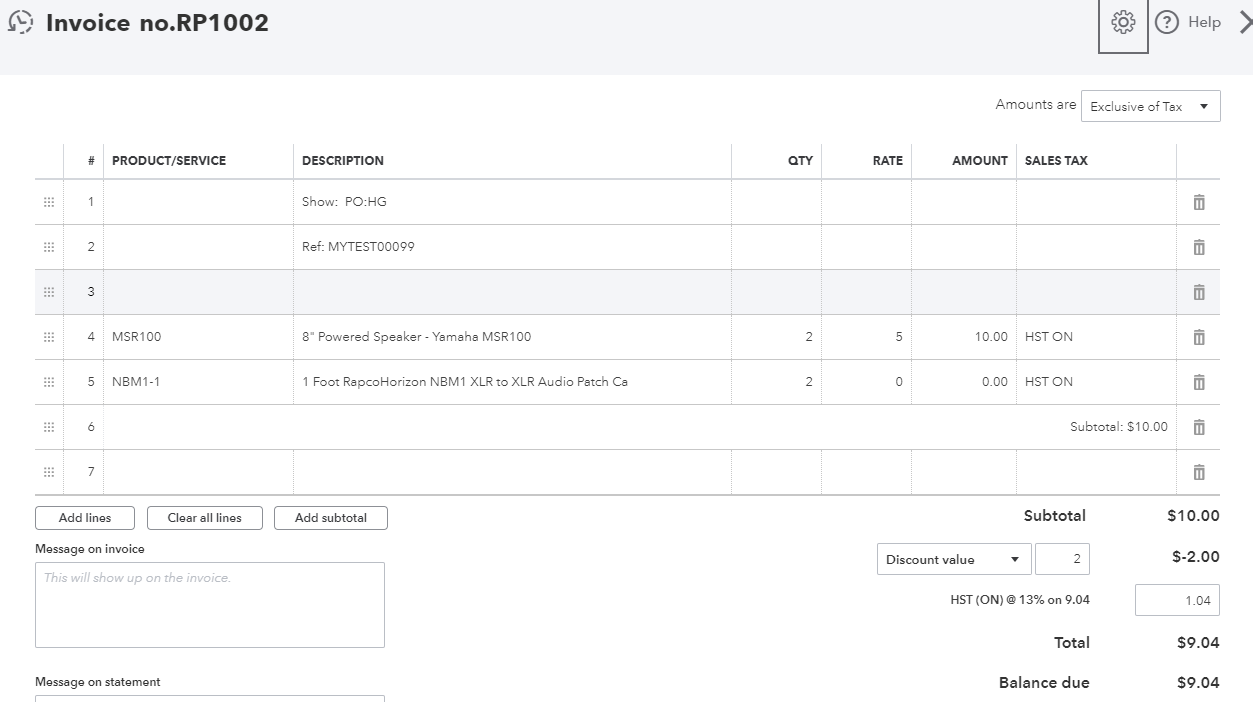
Sample Booking & Corresponding QuickBooks Invoice
Booking in RentalPoint
Invoice in Quickbooks once exported
Configure Quickbooks Online for Integration with RentalPoint
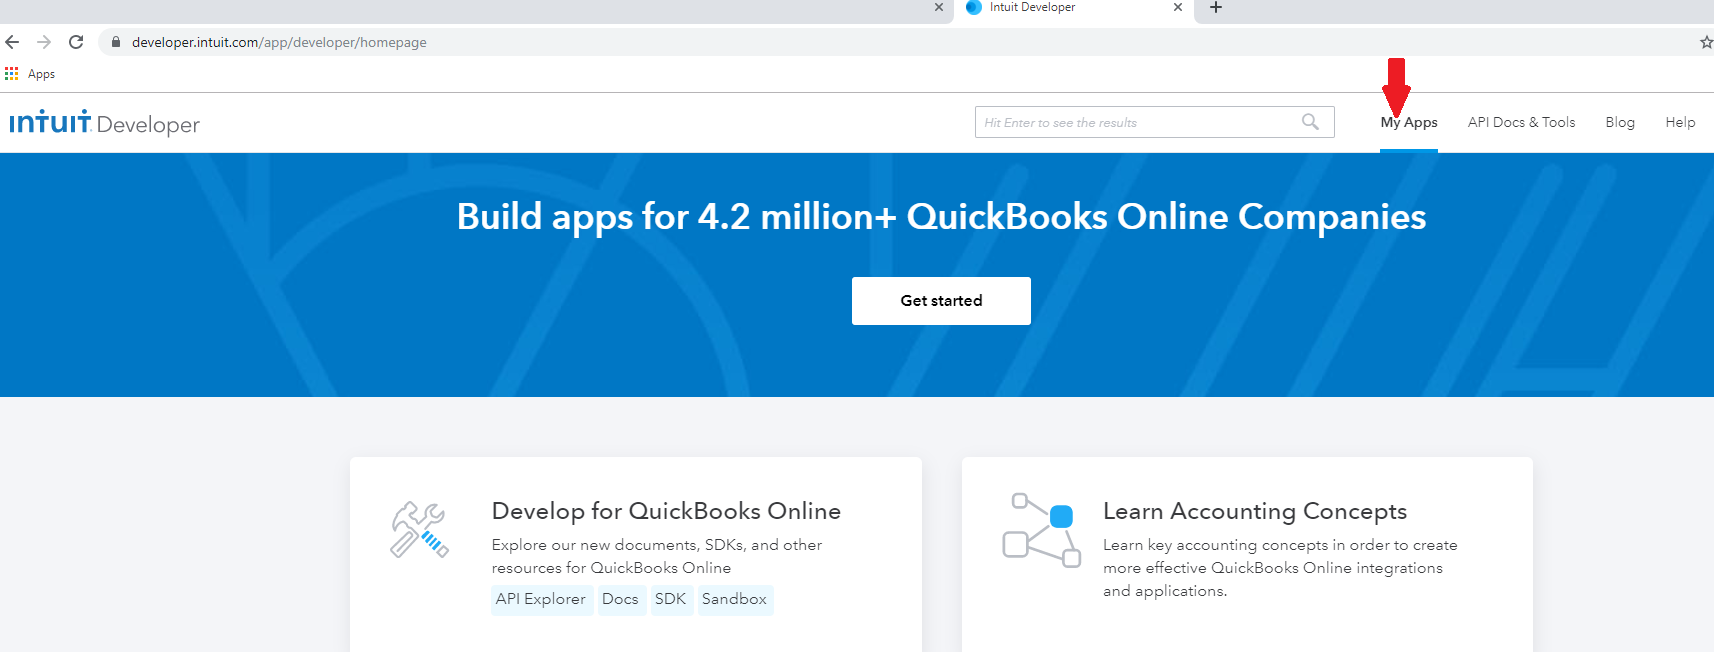
https://developer.intuit.com/app/developer/homepage
General
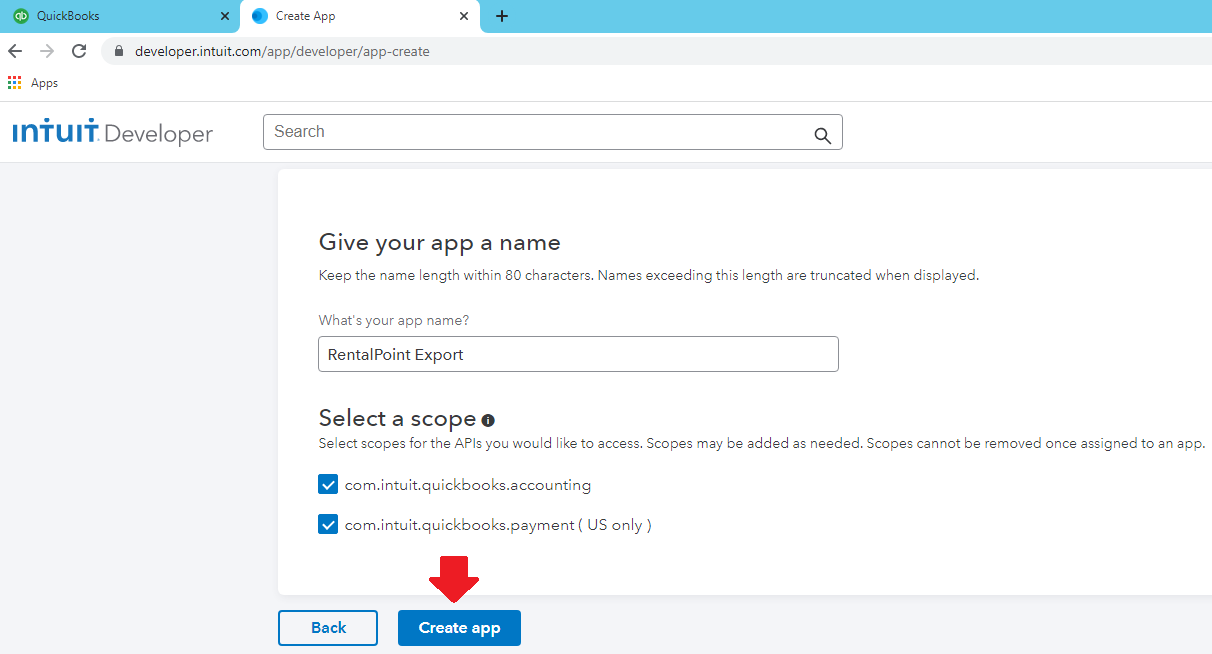
On the developer homepage, click 'My Apps', or 'Dashboard' if 'My Apps' isn't an option

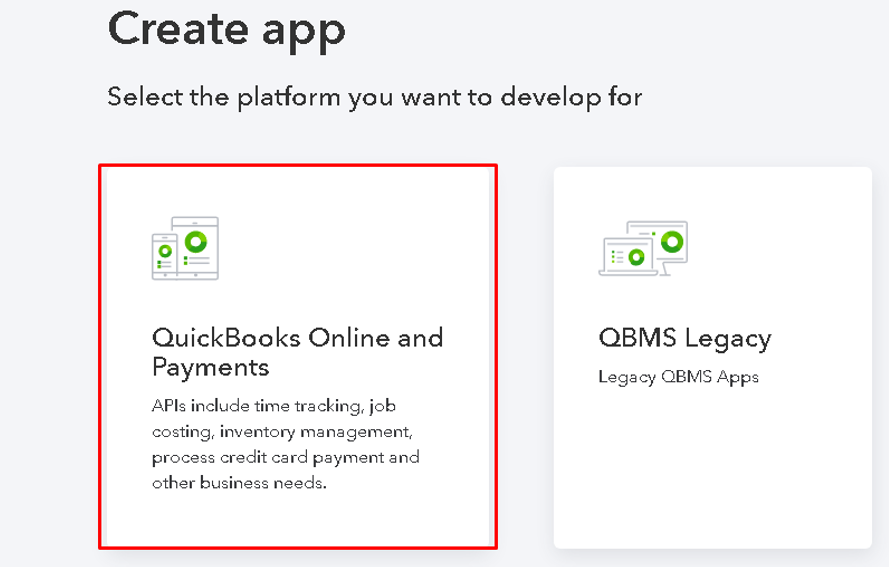
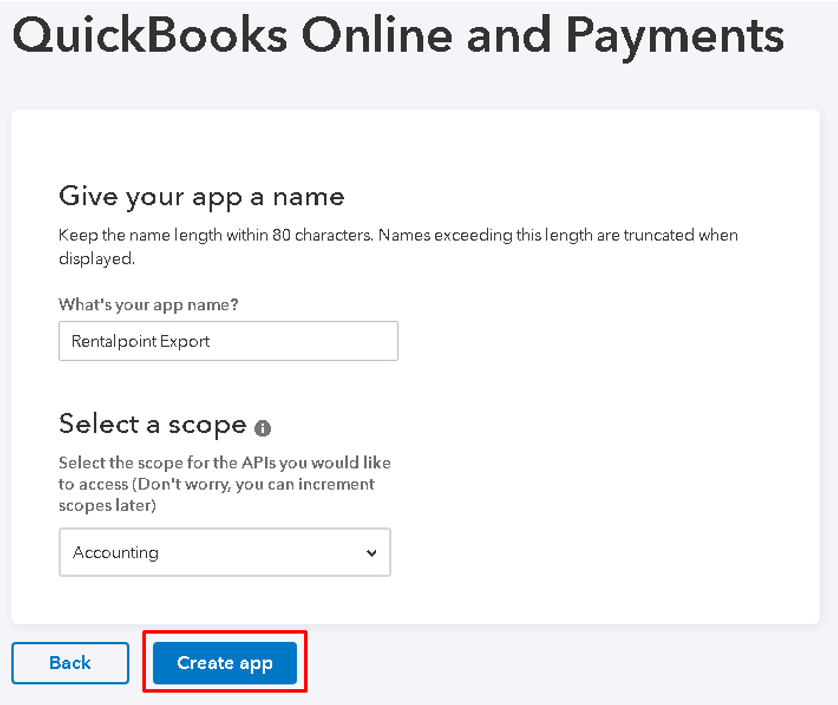
then 'Create New App'
Or US version
You'll get an email from Intuit which you need to confirm in order to complete setup. Once confirmed you'll see a checkmark beside 'Verify your email address' below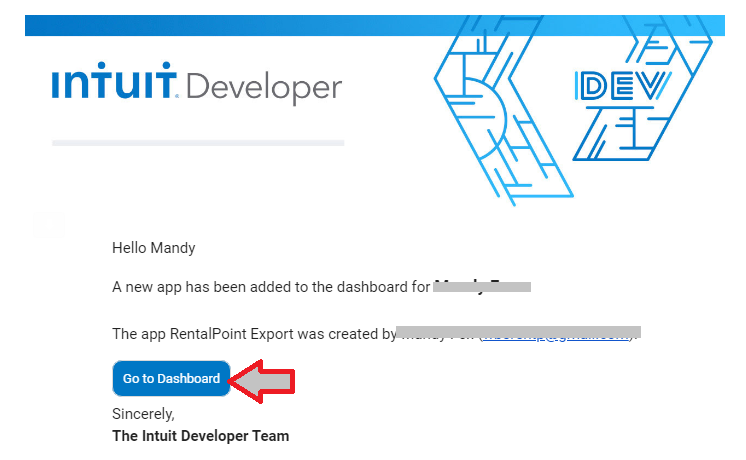
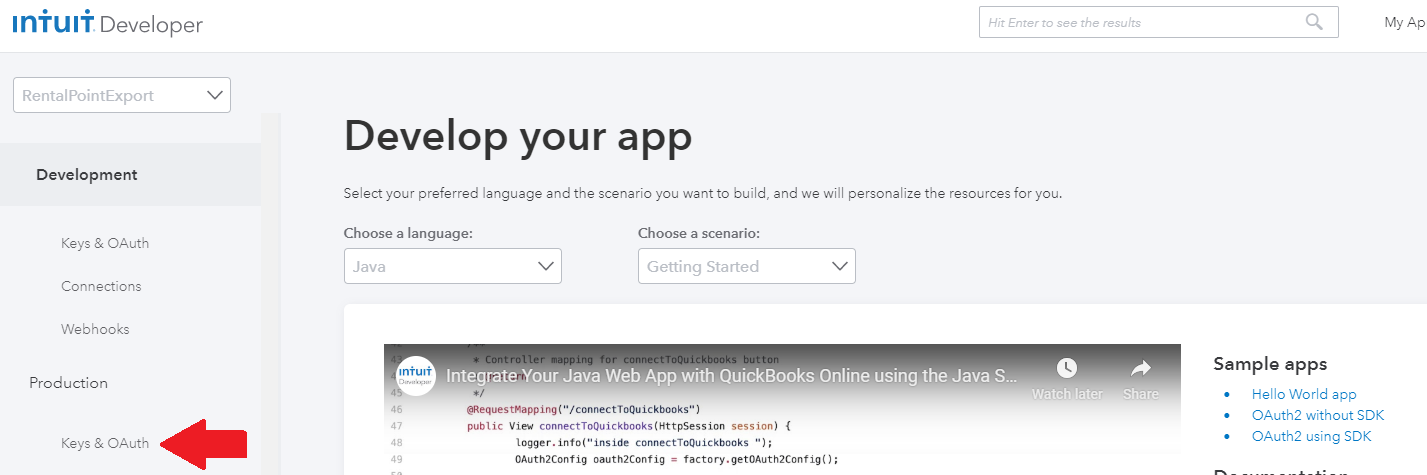
Click ‘Keys & OAuth’ under the Production label
Click on 'Complete your account profile', fill in the information required, then click <---- to return to the Production Keys requirements screen illustrated below.
then click 'Provide EULA & privacy policy URLs in settings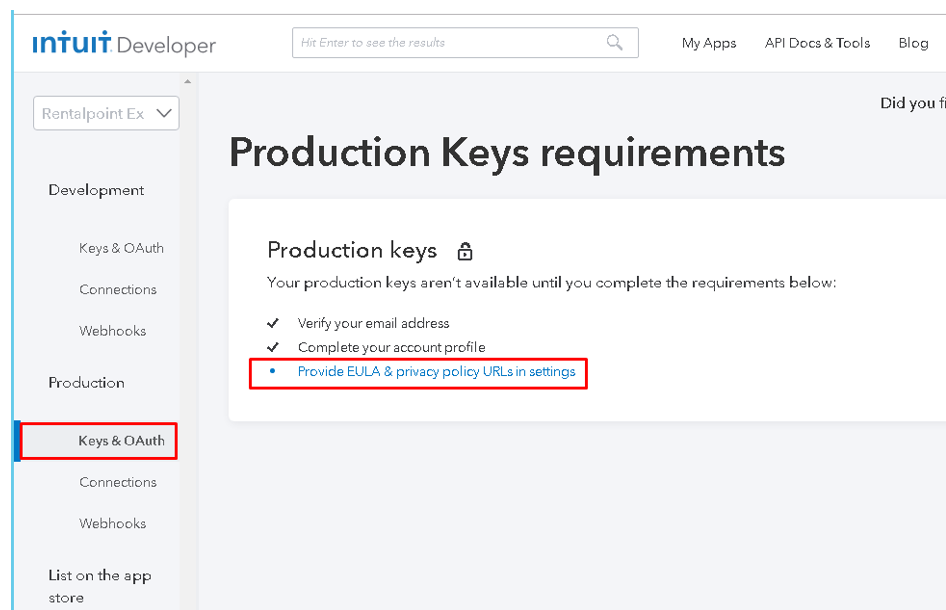
Enter link to terms of service and privacy policy for your company. You need to enter something here in order to complete setup. If you don't have a terms link, just copy/paste the link for this document into both fields.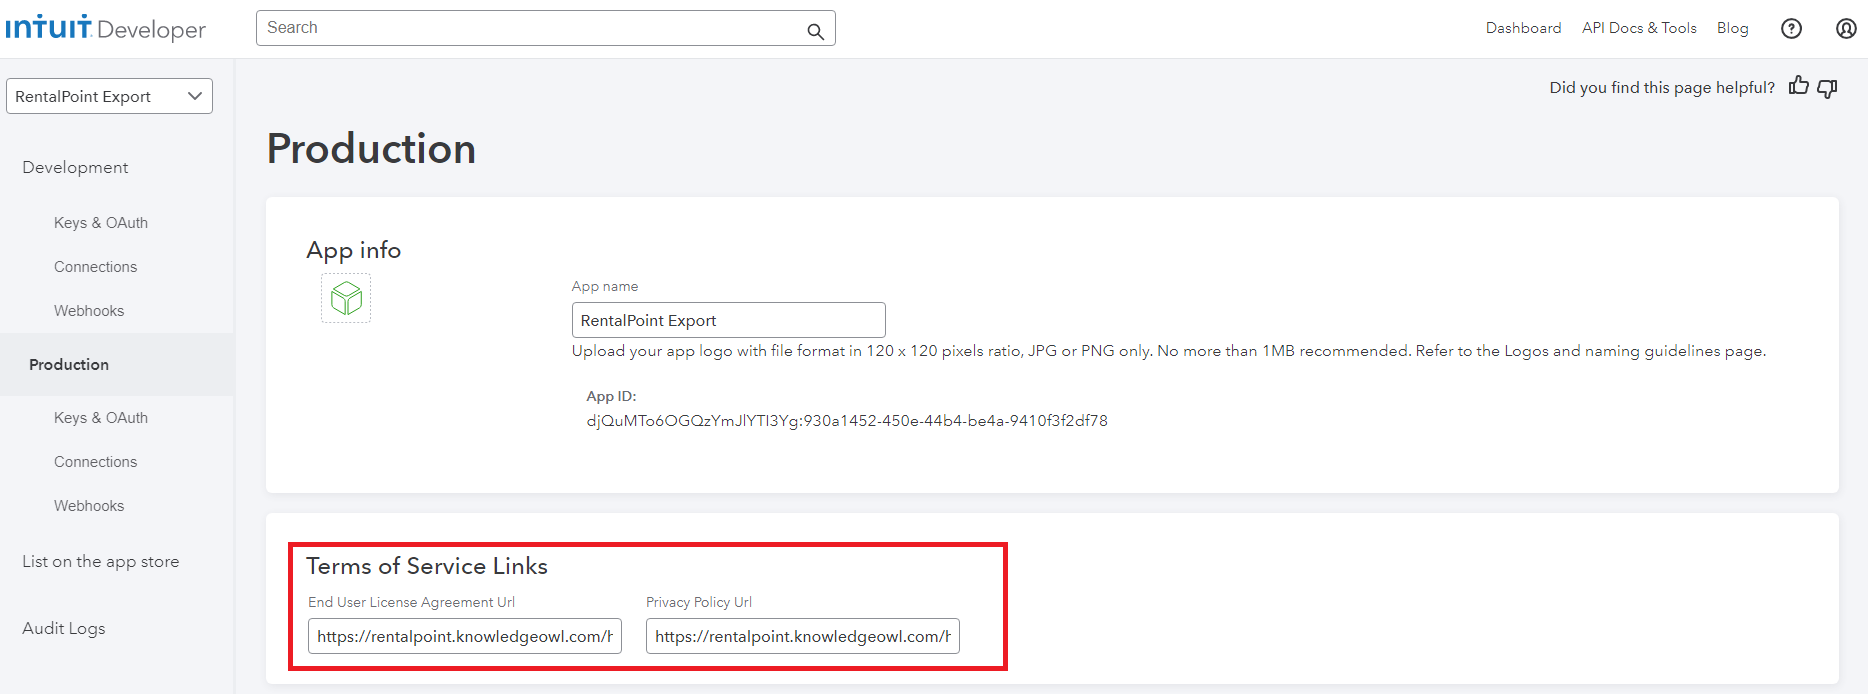
then answer the Target Industries questions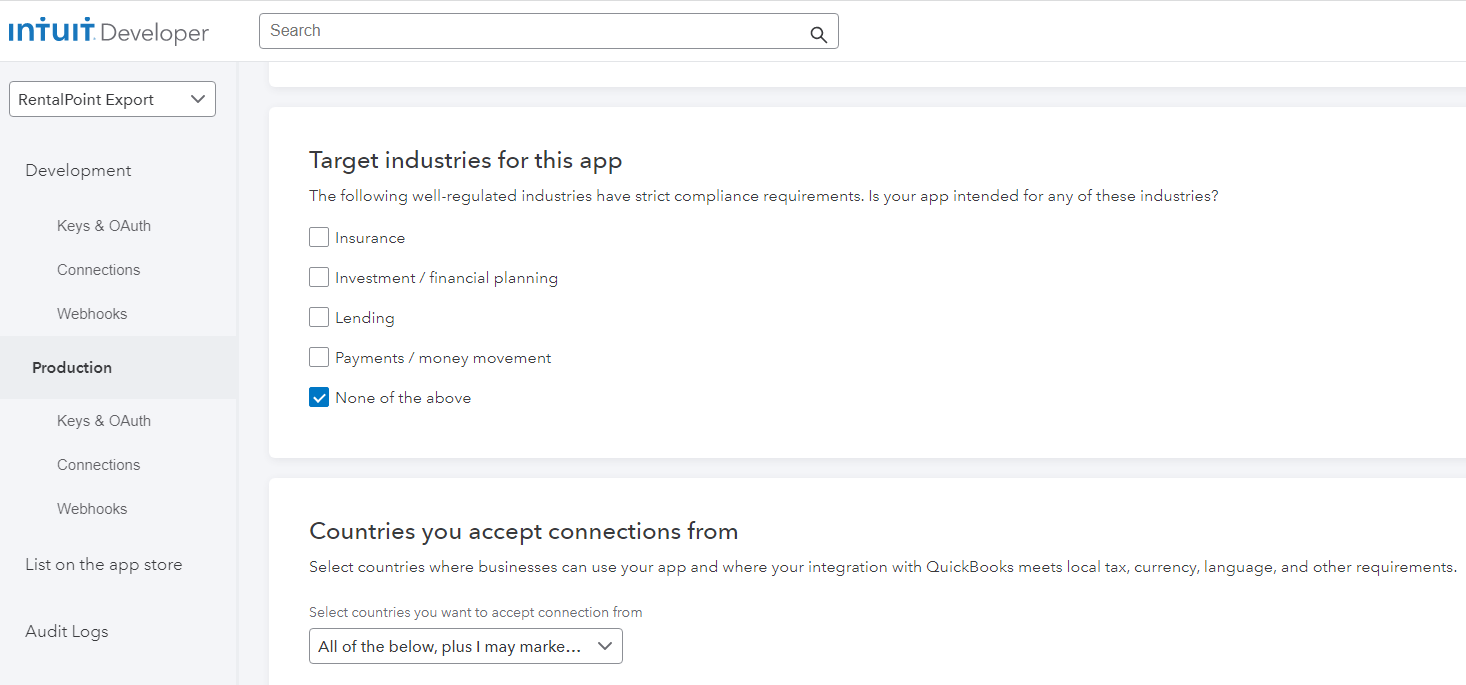
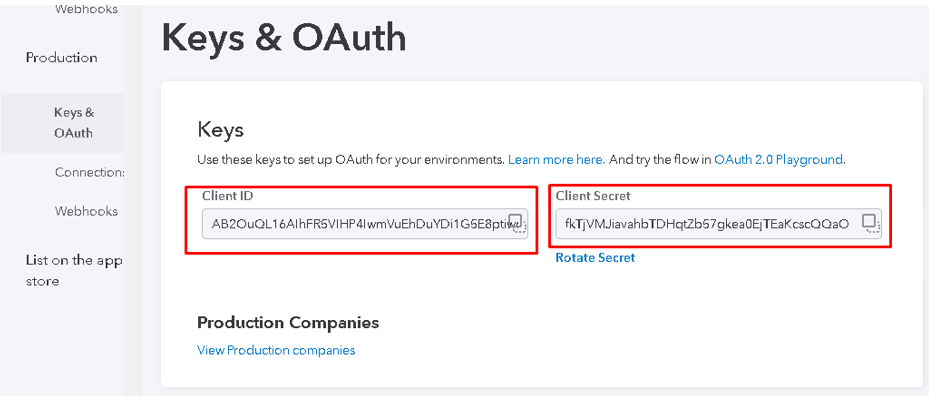
Click save to commit your changes, then click Keys & Auth to return to the previous screen
Scroll to the top of the screen to see your Client ID and Client Secret. You'll need to copy/paste these into RentalPoint Parameters once you've completed your Quickbooks setup, so either keep the page marked OR copy/paste them to a notepad file for easy access later.
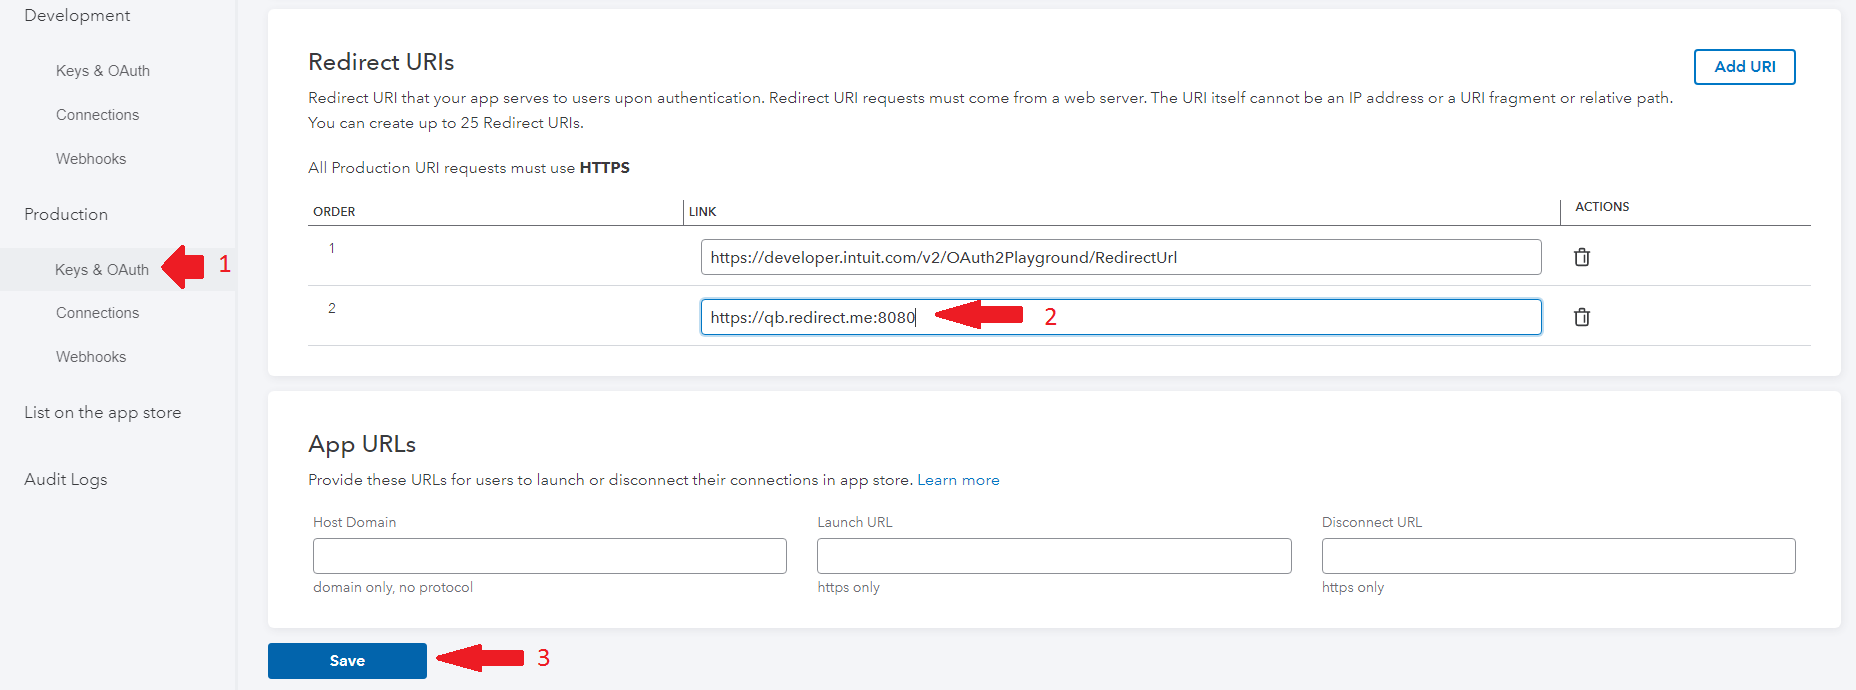
Configure Re-direct URL
On the bottom of the same screen (Production Keys & OAuth) for the app you just created, copy/paste https://qb.redirect.me:8080 to the redirect urls
Then add qb.redirect.me into your system hosts file on the workstation you will export from (you may do this on many workstations if needed)
- Open an elevated command prompt
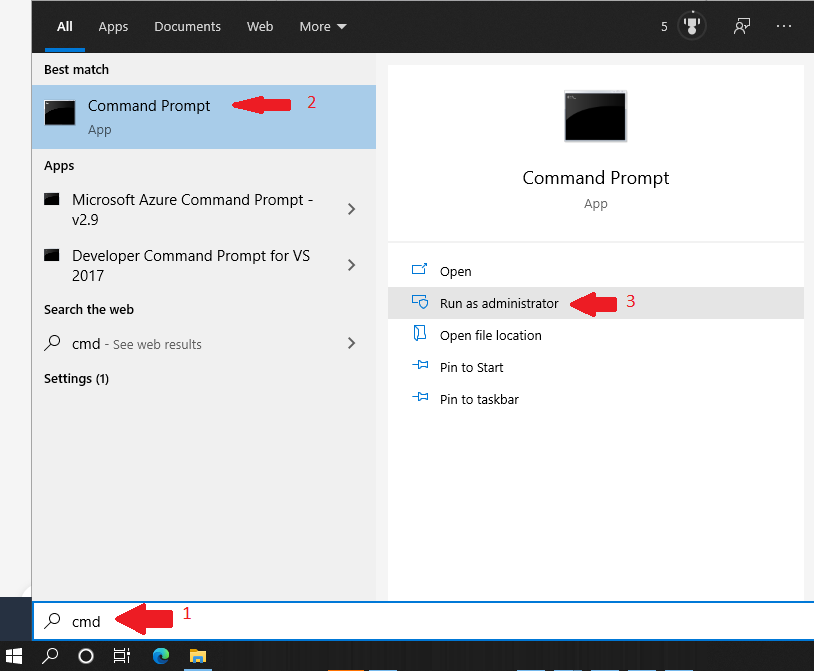
- Then type notepad C:\Windows\System32\drivers\etc\hosts

- Copy/Paste or type this line into the file 127.0.0.1 qb.redirect.me
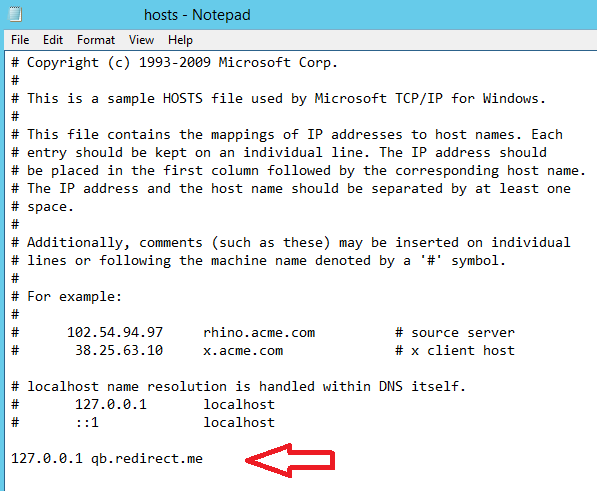
- Save and exit the file <Ctrl S>


Add Security Certificate to Google
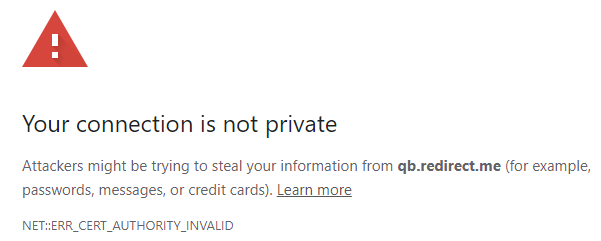
A security certificate has been provided as part of your RentalPoint Software installation. To avoid the message below, you'll need to install the security certificate with your Google Chrome browser settings.
Using Google Chrome
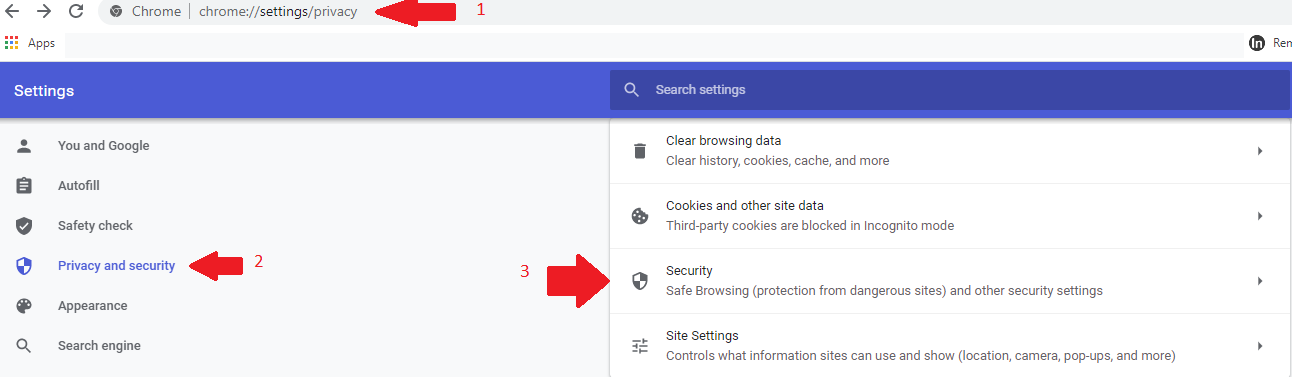
- open a webpage to chrome://settings
- then click Privacy & Security
- next click Security (Safe Browsing....)
- Scroll down to Manage Certificates and click the icon to access
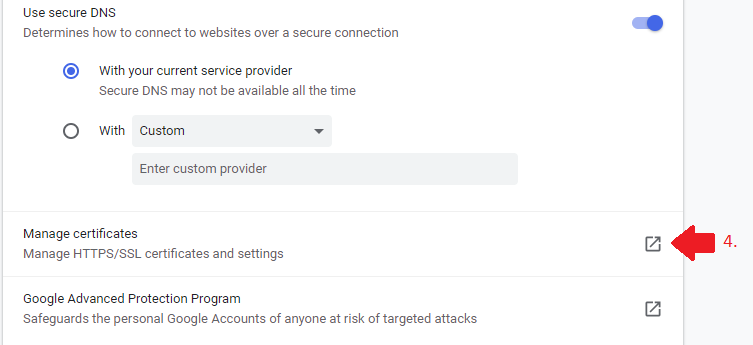
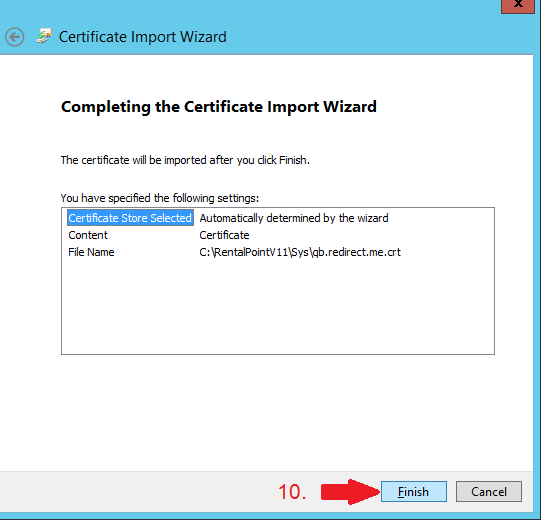
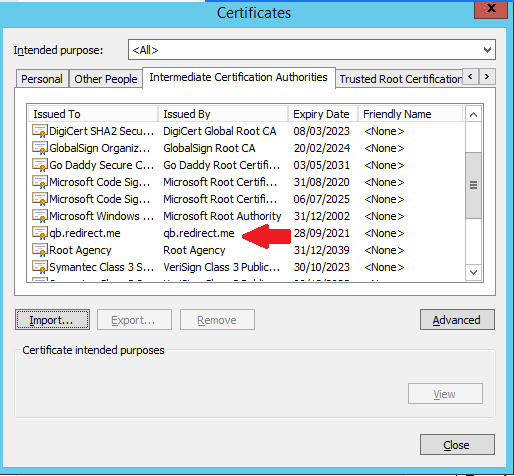
- Intermediate Certification Authorities, then Click IMPORT
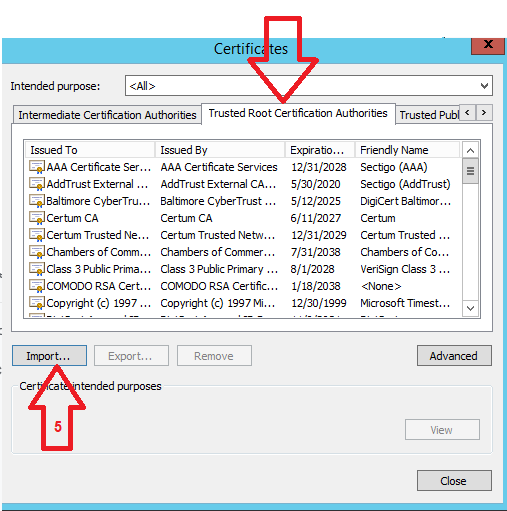
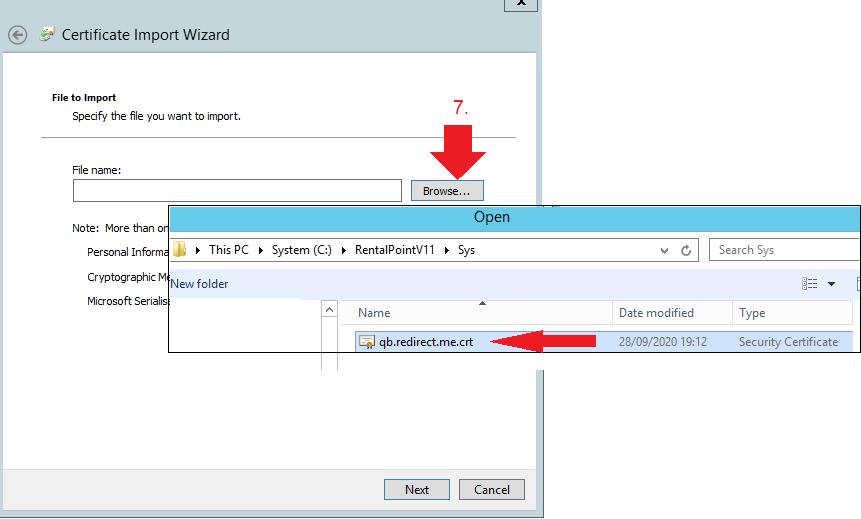
- Click NEXT to use the import wizard

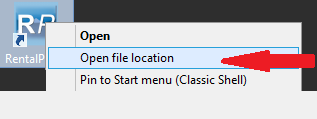
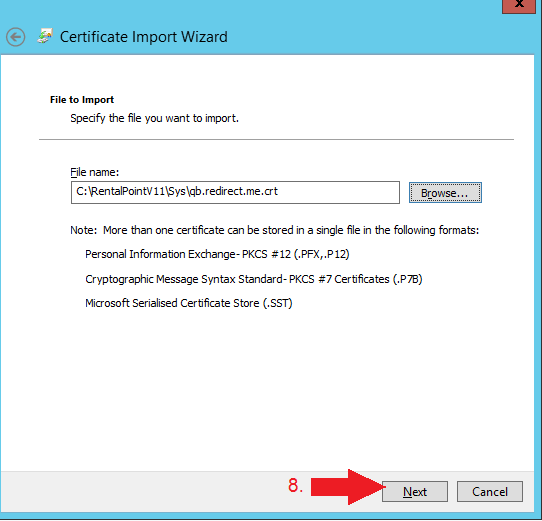
- Locate the file qb.redirect.me.crt in your RentalPoint\sys folder (If you're not sure where this is, right click on the icon you use to run RentalPoint and click 'open file location' to find out where RentalPoint was installed on your device.)


Allow Port 80 and 443 through Windows Firewall

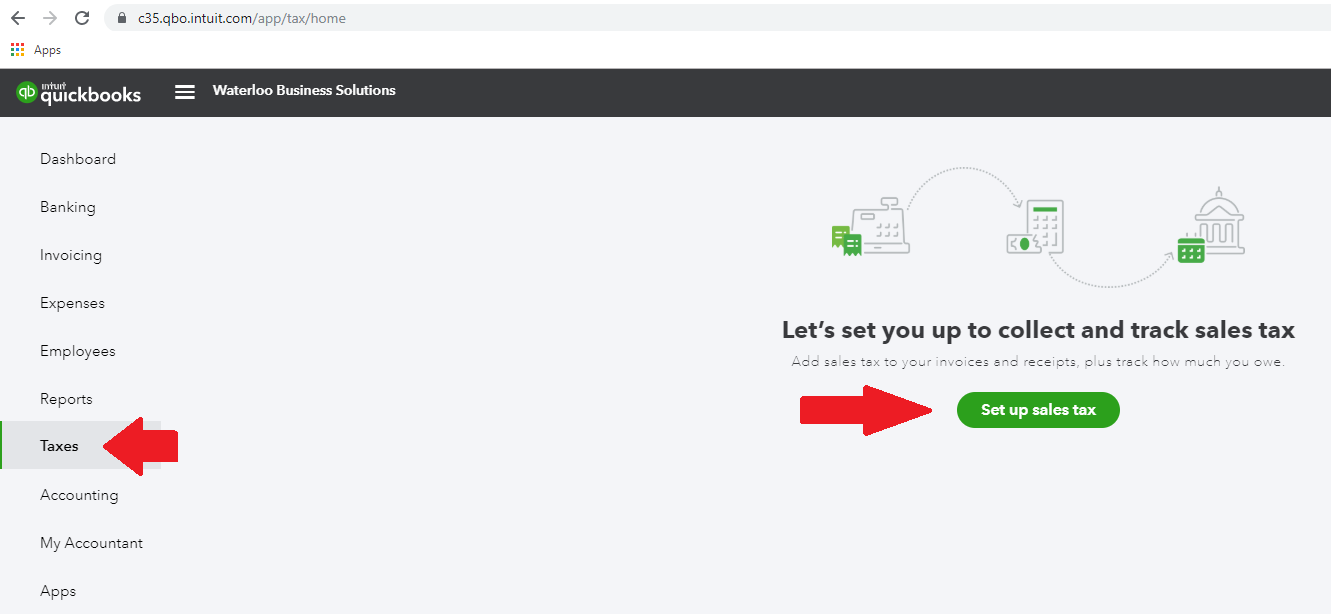
Setup Quickbooks Taxes for RentalPoint Export
- Login to Quick Books, Add tax for Rentalpoint export
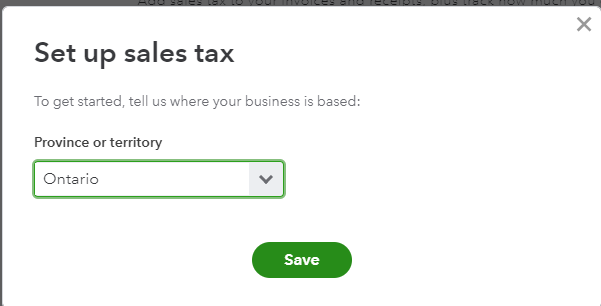
For example, choose Ontario & Quickbooks will automatically set up the relevant taxes
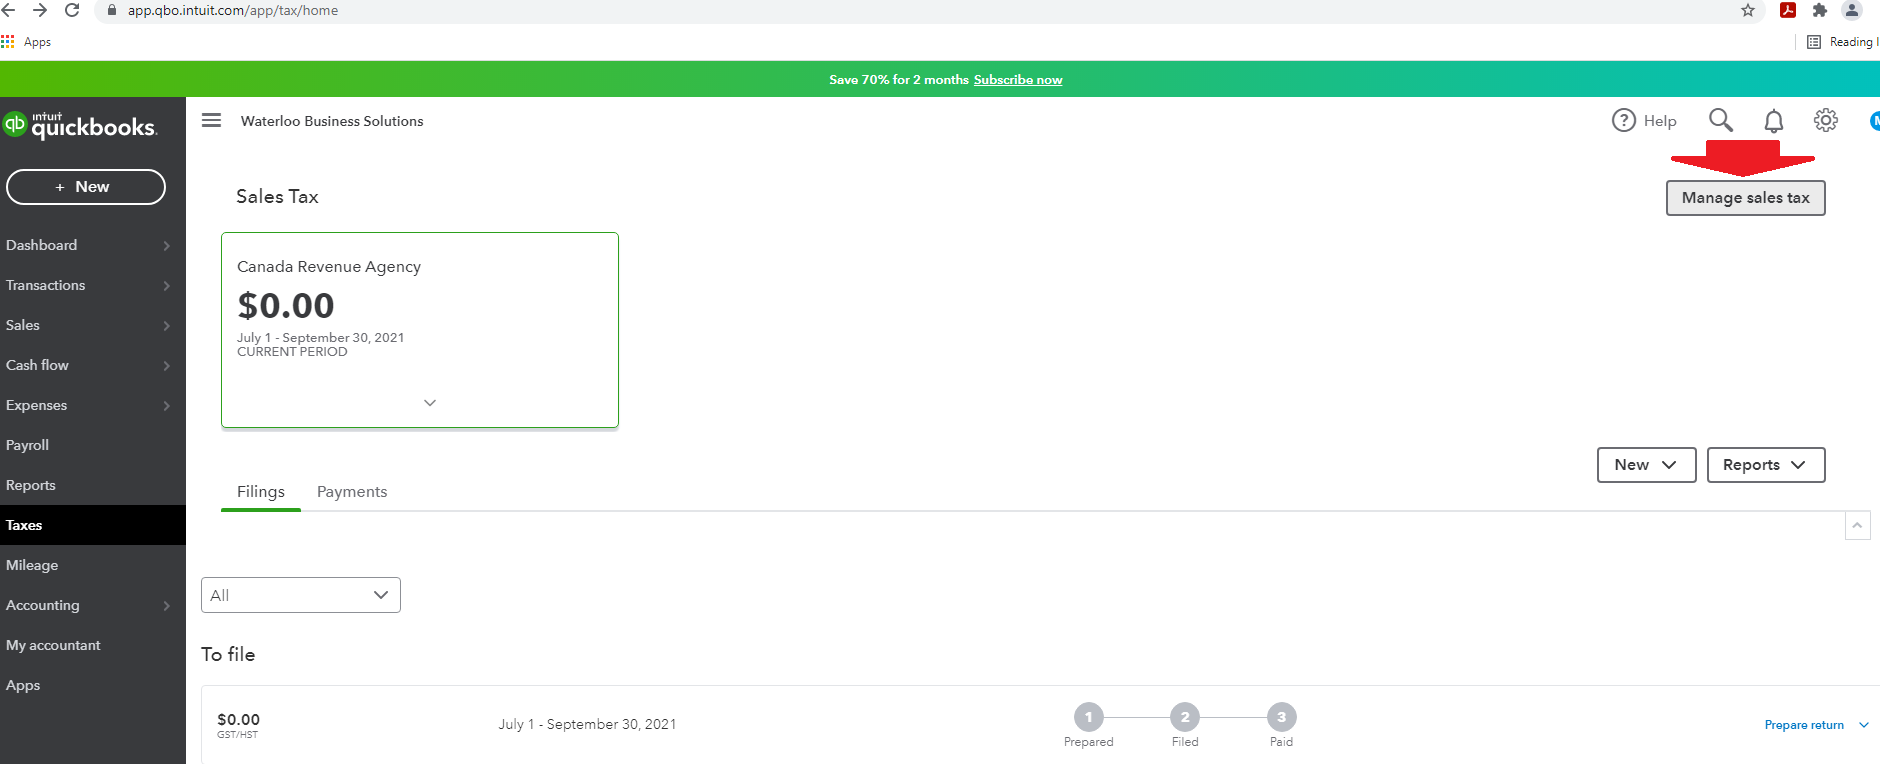
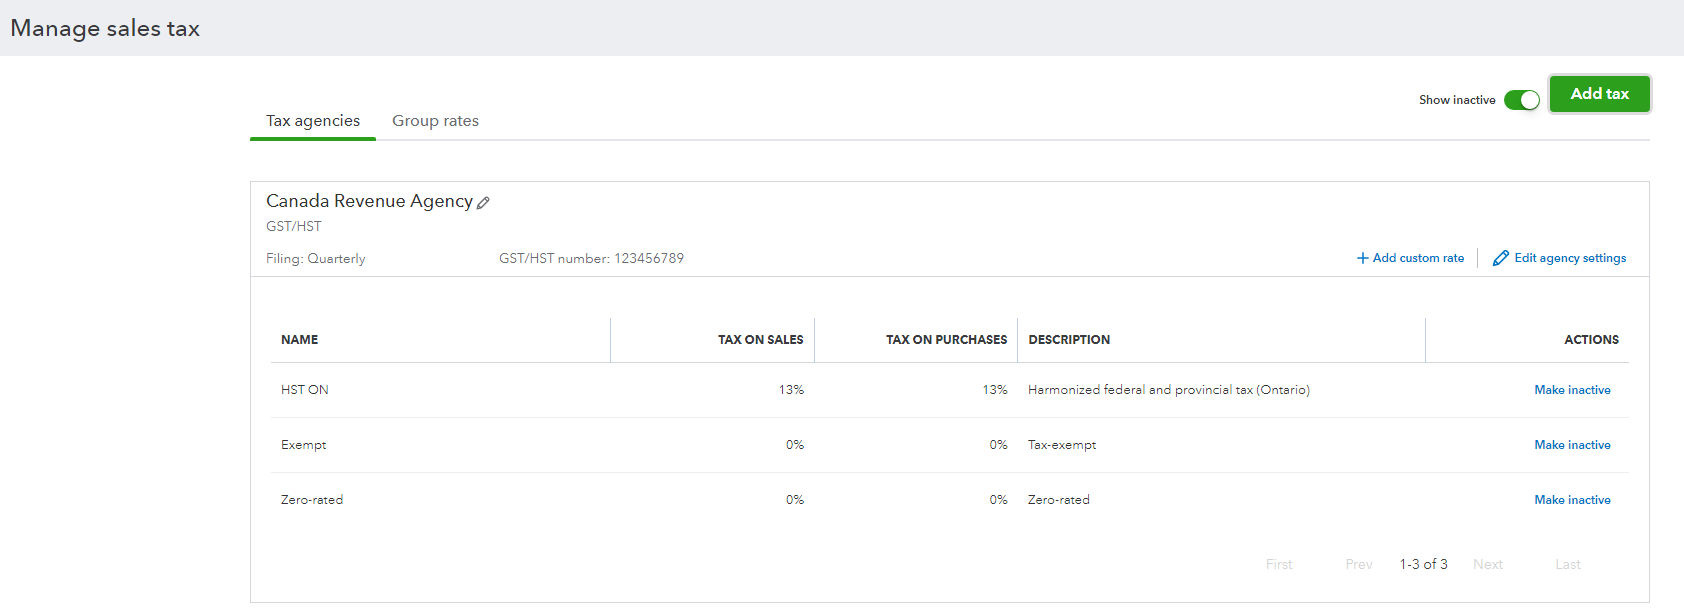
Relevant sales tax has been automatically set up, click Manage Sales Tax to see it....
Configure RentalPoint for Integration with Quickbooks Online
Once Quickbooks Online is configured for integration with third party software, proceed to setting up parameters below. If you skipped this step, see detailed instructions on how to configure Quickbooks Online in the section above.
- Goto Setup-->Parameters--> Account Parameters 21 “Export Parameters”
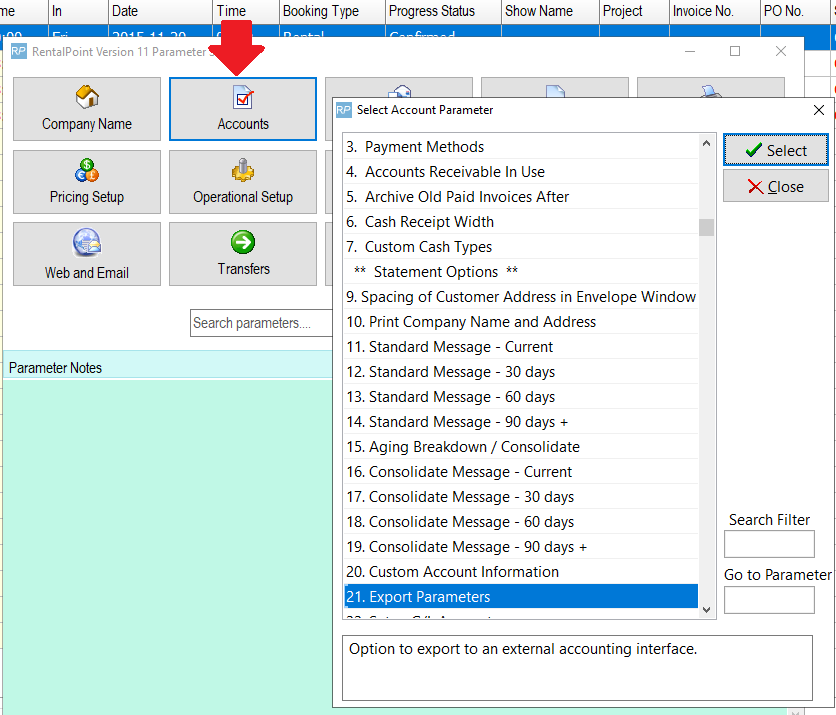


Select “Quick Books Online”
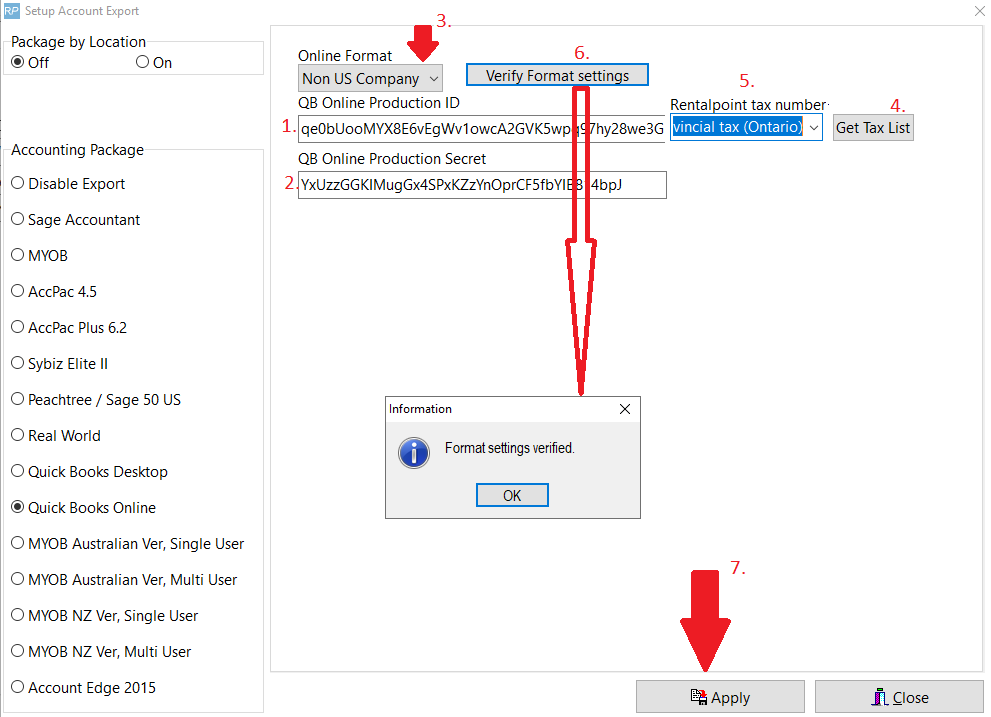
- Fill in “QB Production ID” using Client ID from Keys & OAuth setup above
- Fill in “QB Production Secret” using Client Secret from Keys & OAuth setup above
- Set the Company Format
- Click Get Tax List and follow OAuth Web login instructions
- Once logged in, you can choose your RentalPoint Tax number from the drop down list provided for your region
- When logged in, you may get a blank Google screen which is ok. Go back to your RentalPoint screen and see if you can now click the drop down for RentalPoint tax number.
- USA Users: Choose the taxes from your home state here. If you collect taxes from many states, you'll need to set those taxes up in Quickbooks Online too, so that 'out of state' taxes will be properly identified when imported from RentalPoint. Unidentified taxes will still be imported, however, you'll need to edit the invoice post import and identify the tax location for reporting purposes as needed. Consider running a test invoice for each state that you do business with to ensure your taxes are recorded properly.
- Verify Format Settings (then minimize the QuickBooks window to return to RentalPoint)
- Click Apply (if you skip this step your parameters will not be saved)

RentalPoint Operator Privilege Needed
'Can Use Quickbooks Online Integration' must be checked in users operator privileges in order to have the ability to Export Accounts to QuickBooks Online. Goto Setup-->Operators to grant the privilege or see your System Administrator for access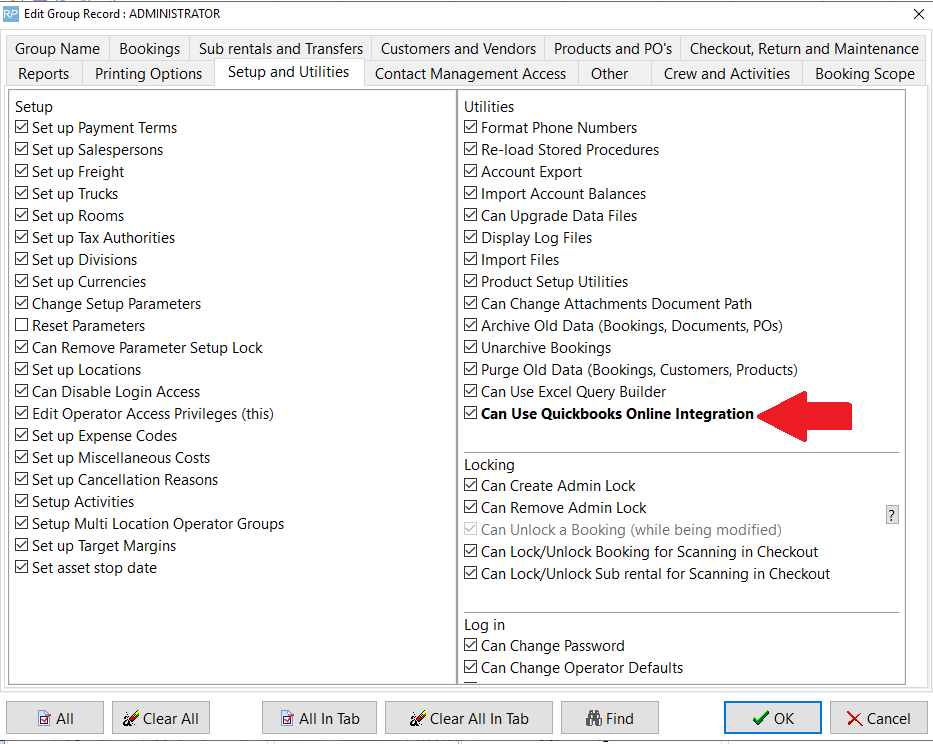
TroubleShooting
Ensure you are logged into QuickBooks as an Administrator when attempting to set up the integration
1. Could not load key, check password
- This is an error with the QB certificate, please contact support@rentp.com with your error message

2. The redirect_uri query is invalid
“The redirect_uri query parameter value is invalid. Make sure it is listed in the Redirect URIs section on your app's keys tab and matches it exactly.
Copy the text https://qb.redirect.me:8080 to your redirect url settings in QuickBooks, there should be NO additional characters.

3. Uh oh, there's a connection problem.
Sorry, but undefined didn’t connect. Please try again later, or contact customer support for help.
- This is likely an issue your your client ID and secret key. Copy paste your keys into RentalPoint Accounts Parameter 21 again to ensure they are correct.
4. Invalid Tax Number
- Go back to 'Configure RentalPoint for Integration with Quickbooks Online' above and ensure you click APPLY when your tax settings are verified. Then log out of RentalPoint and back in again before exporting to Quickbooks.

5. Invalid Reference ID: An item in this transaction is set up as a category instead of a product or service

This error arises when an item being imported from RentalPoint matches the name of an existing category in QuickBooks. To resolve this, modify your QuickBooks Category, then import again.

