Custom Crew Fields
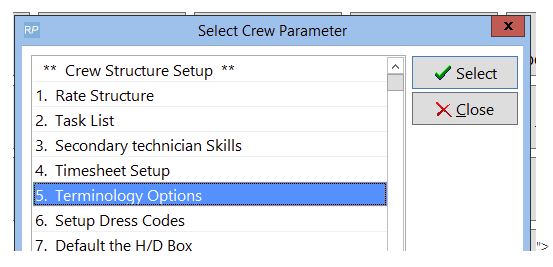
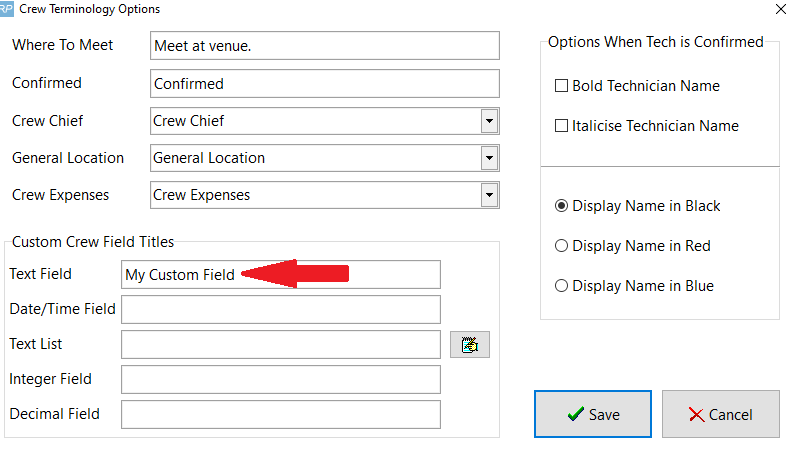
Enable custom crew fields under Crew Parameter #5
Enter a name for the field to be used
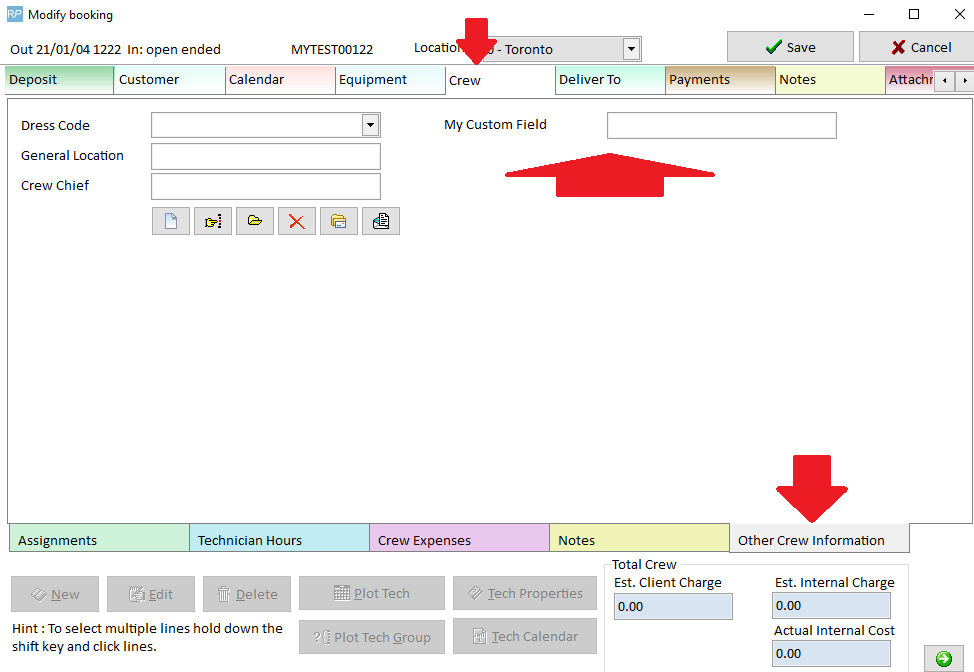
The field then shows up in the booking under 'other crew information
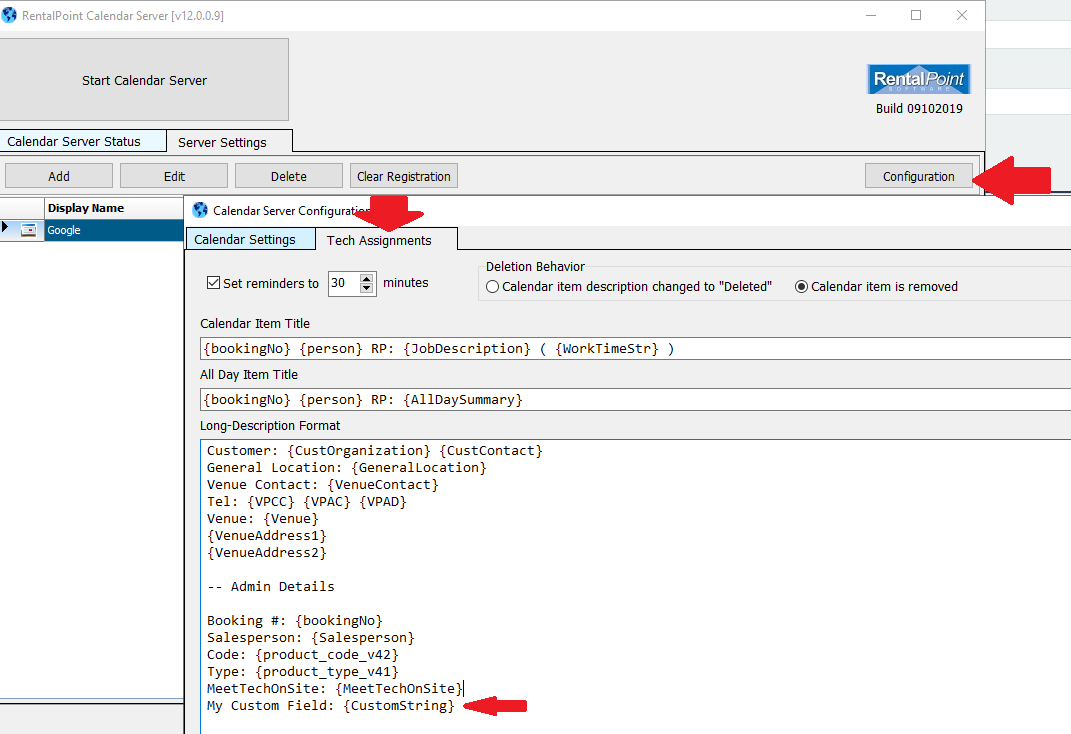
In the calendar server setup, edit the email format, you should be able to remove fields/change the titles as needed.
List Qualified Technicians for a Designation
For list qualified technicians for the designation by one click, set Crew parameter 'List Technicians in Crew Planner with One Click' 23 to YES.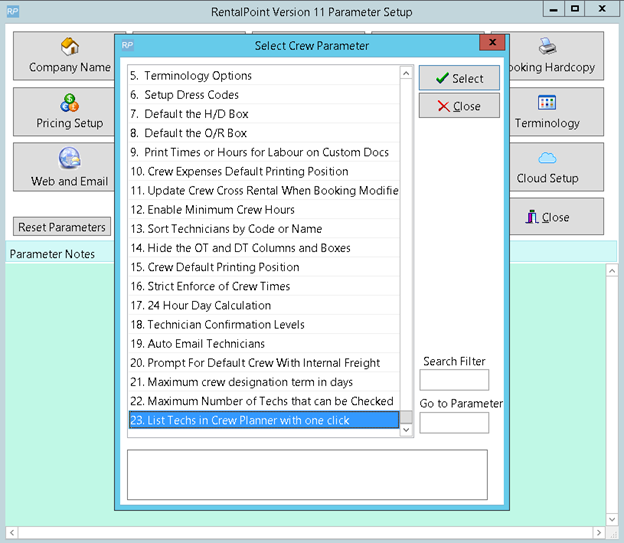
Now in Crew Planner “Unassigned Crew” Tab will show Qualified technicians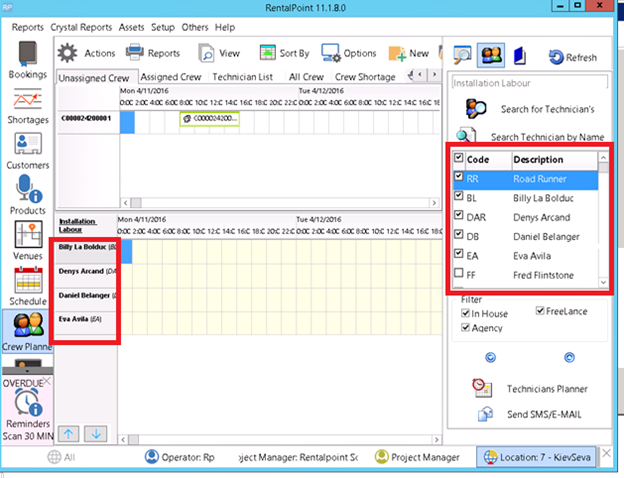
Secondary Skill Search
In the crew tab of the booking, edit or create any crew entry. The Crew search and assignment window allows technicians to be searched on a number of fields including – Primary and secondary skills, location (country and state), phone country code and phone area code, in house, freelance and agency type technicians. From the crew planner it is possible to select multiple technicians and check their availability on the calendar.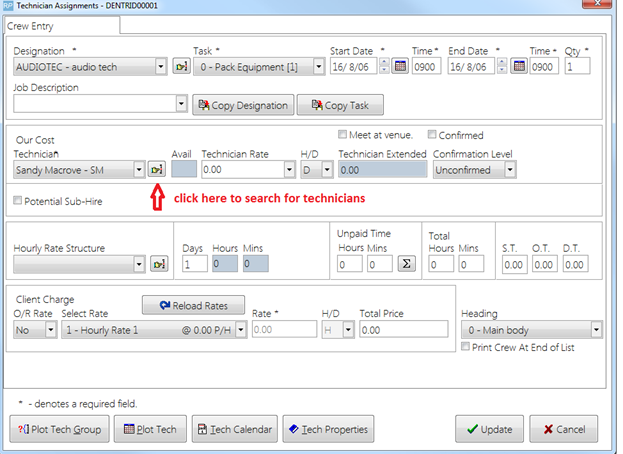
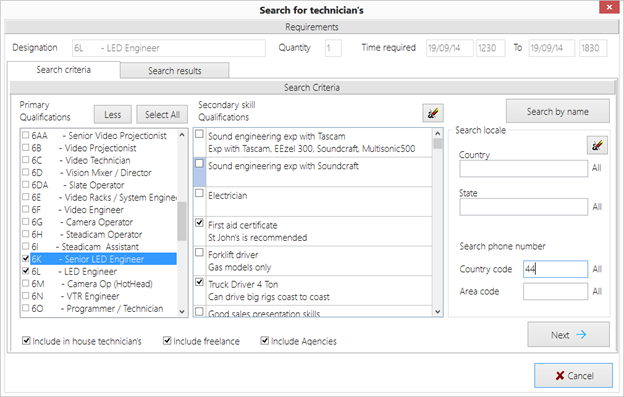 In the above example, all technicians (in house, freelance or agencies), who are qualified as Led Engineers or Senior Led Engineers and have either a first aid certificate or can drive a truck, who have a phone country code of 44 will be shown after the user clicks the “next” button.
- The “All” button on the right hand side of the “Primary qualifications” label, allows multiple qualifications to be searched for, the operator must have the security option enabled to select technicians who are not qualified before this button will appear on this window as shown on the window below.
- For skills that require certificates such as “first aid certificate”, the expiry date of the certificate is checked in the search and those certificates that have expired will not result in a match be-tween the technicians skill and the search requirements.
- To select multiple skills the operator may either click the checkbox on the left hand side or press the spacebar and the up and down arrow keys to move the highlight bar up and down.
- You may search for in house, freelance and agencies in the same search, you must select at least one of these checkboxes otherwise you will not be searching for any technicians.
- “Select all” button, this button checks all the primary qualifications listed in the window, this could result in a very long list of technicians. Once all primary qualifications have been select-ed, the button will change it’s name to “Unselect all” and as it’s name implies will un-check/unselect all the checkboxes.
- However you must have at least one primary skill selected to search.
- The “Less” button will clear all the primary skills from the list, except for the one original prima-ry skill that showed in the list when this window was opened.
- To start the search click on the “Next” button or click the “Search results” tab.
Search by Name, is an alternative to the search fields in on this window and will open the window as below. You may search by name and then come back to this window and select other criteria to search by and the results window will show both the technician you selected by name and the search results.
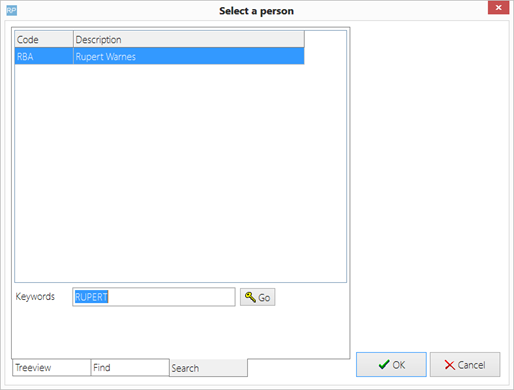
- Once the name is entered and the “Go” button clicked, the search window will list the person if the search was successful, then just click the “OK” button and the technician will be added to the search results window as below and the line checked (selected).
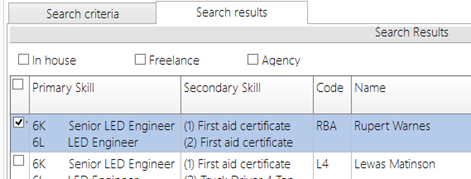
Search results tab
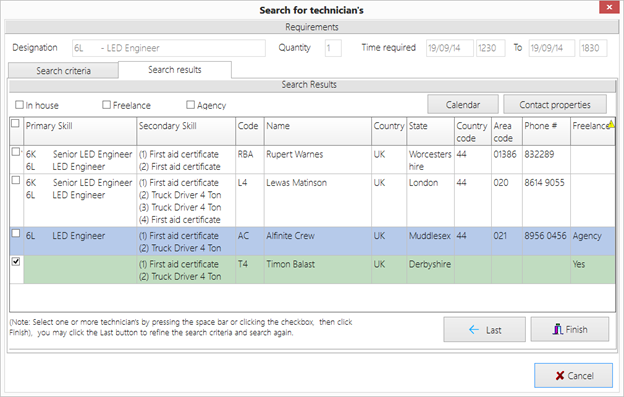
In the above example Timon Balast was selected by searching by name and a second search for “Led Engineers” and “Senior Led Engineers” who have either a first aid certificate or can drive a truck, plus had a country code of 44 was the search criteria.
- The results are listed with in house technician’s show first, followed by freelance technicians, followed by agency technicians.
- If the technician matches on multiple primary or secondary skills then these skills will be listed. In this example Lewas Matinson is qualified as both a Led Engineer and a Senior Led Engineer, plus can drive a truck and has a current first aid certificate. The certificate expiry date is checked against the time required “to” date, in this case the certificate must not expire before the 19th of Sept 2014 otherwise the first aid certificate will be ignored as a valid skill.
- To check availability in this window, click on the Calendar button, any previous tasks or as-signments will show up in the calendar.
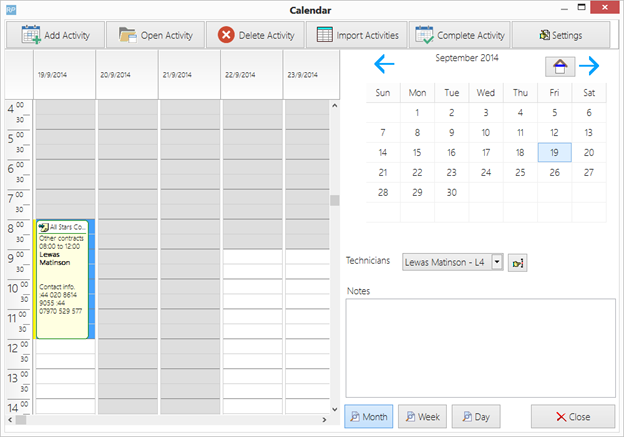
In the above example Lewas Matinson is already booked on a job up until 11:30am on the day required.
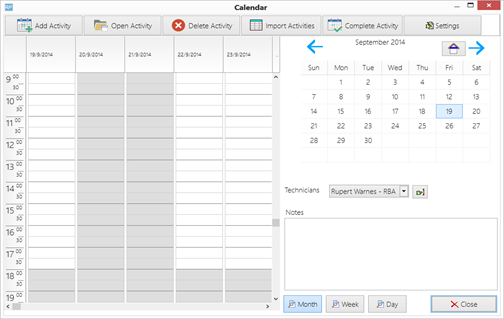
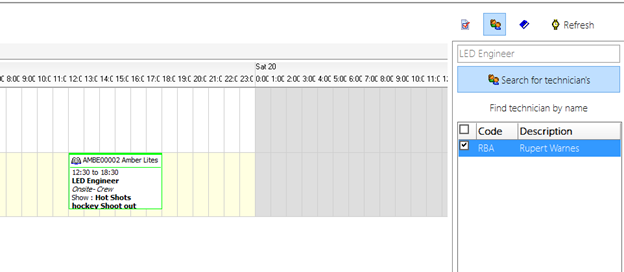
After inspecting Rupert Warnes calendar which is clear, the operator checks his name in the search box.
Clicking on the “contact properties” button will open the contact properties, from here an email can be sent to the technician by clicking on the button (in the red circle), to send emails as shown below.
The contact properties also displays the technicians phone numbers, rates of pay, previous jobs and pending jobs.
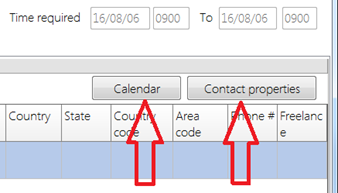
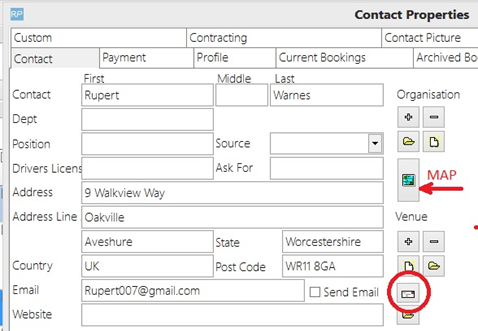
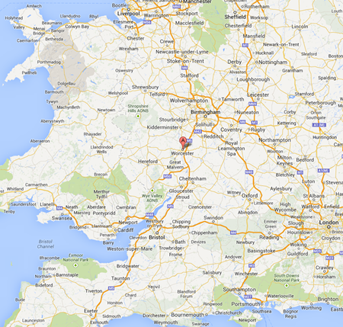
There is also a map button, shown above on the left hand side of the red arrow, this may be handy to select freelance or agency crew to see how far from the event/job site they are. Clicking the button will open a Google map as below.
Once selected and the “Finish” button is clicked, from the crew planner the technicians name may be dragged and dropped on to the unassigned crew task, this will assign the technician to the task.
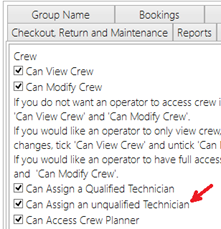
If Rupert Warnes is not qualified as a Led Engineer then the system will prompt the operator to confirm, if the operator does not have privilege to assign non qualified technicians then the action will be denied.
If the technician is an Agency then more than 1 of the technician may be assigned to a single task, for example if two Led engineers were required in the above window at the same time, then an agency type technician could have been assigned to the task.
If the list of technicians selected in the search window and therefore listed as above in the right hand panel, exceeds ten (10) technicians then the window will display an up and down arrow labeled “A” in per the screen shot below, these buttons will allow the operator to check or select the next ten technicians in the list or the previous 10 by using the up arrow.
Once the technicians have been selected, click the “technician calendar” button (labeled B) at the bottom right hand corner of the window to refresh the technician’s calendar display.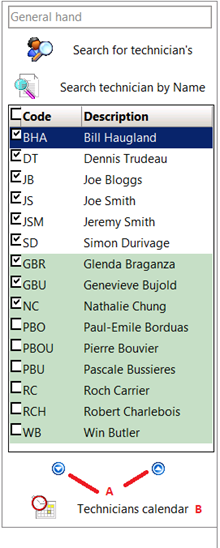
The technician search window may also be opened by clicking the button shown below in the red circle, from the technician assignments window, instead of the crew planner window.
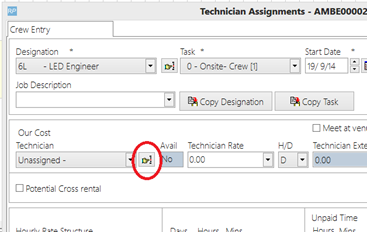
In this case only a single technician may be selected from the search window, if the technician is not qualified for the designation / primary skill, then the system will verify that the user wishes to assign an unqualified technicians to the job. If an Agency type technician is selected then more than 1 of the crew assignments may be saved, if the technician is not an agency and the quantity is more than 1 then the crew assignment will be split, this results in a single designation with the technician just assigned and another designation with no technician assigned yet.
Technician Contact Properties
The contact records for technicians is shown above, if the contact is a technician then either in house, freelance and / or Agency will be checked. Clicking the “new” button will add new primary skill / designations to the Primary skills grid and allow rates to be entered. These rates will be used as default when the technician is assigned to a designation / crew task, it then may be typed over accordingly.
If the technician is a freelancer or agency, then a purchase order may be generated when the technician is assigned to a designation / crew task, for this to occur a vendor code must be selected in this window using the button above the vendor for PO’s field. Using these three buttons you may create a new vendor, search for an existing vendor or open the vendor properties for the code already selected.
Region and Location
If your system is multi location enabled then these drop down boxes will be shown, in which case you can assign the location that the technician works, for example if the region was Europe then searches for crew in North America would not match this technician.
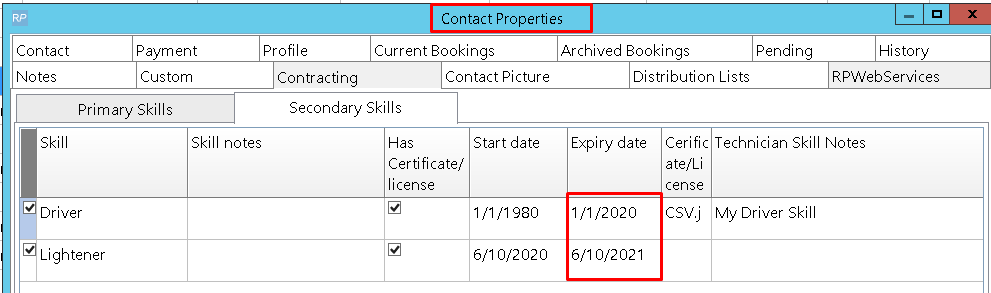
The Secondary Skills Tab
This tab allows secondary skills to be selected for the technician, as below.
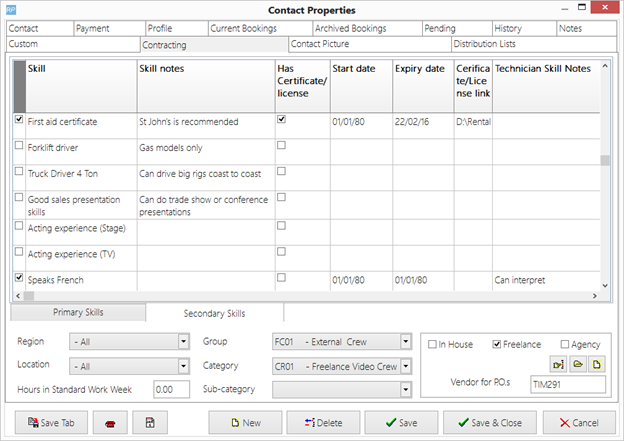
- To select a skill for the technician, check the box in the far left hand column, leave the box un-checked if the technician does not have the skill.
- If the skill requires a license/certificate, then clicking the “has certificate / license” checkbox, entering a start and expiry date and linking a certificate file will be required to select and save the line. You can link a certificate/license file by right clicking the grid and selecting the option from the pop up menu. There is also an option to open the attachment so you can view it.
- If an expiry date has past then the cell will be shown in yellow.
- The skill may have an expiry date but not require a license/certificate, the skill may require a li-cense but not require an expiry date.
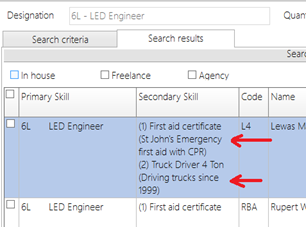
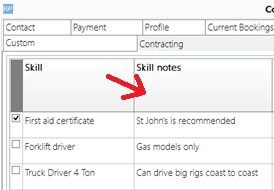
- Notes for each skill may be typed in, in the far right hand column, these notes are unique for the technician and the skill, they will display on the technician search window as shown below as indicated by the red arrow and enclosed in the brackets ( ).
The Secondary Skills Setup Window
This window is where new secondary skills can be added, modified or deleted.
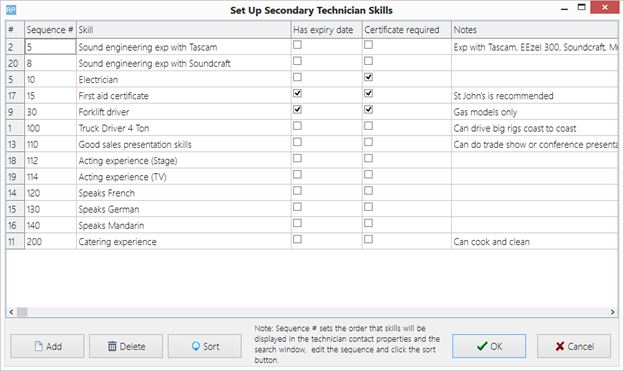
It is available from the setup menu -> parameters -> Crew Structure -> Parameter No. 3 Secondary Technician Skills.
From left to right :
- # is the identification number used to store the line in the SQL database, it is not shown to us-er’s in the system.
- Sequence #, this sets the order or sequence that the skills are listed in the technician contact properties and the search window, you may edit this number and resort the list by clicking on the resort button.
- Skill, this is the name of the skill that will appear in the technician contact properties and the search window.
- Has expiry date, if this is checked then when the skill is selected in the technician contact rec-ord, an expiry date will have to be entered to save the skill selected.
- Certificate required, If this is selected then when this skill is selected in a technician contact record the operator will be required to attach a certificate or license file.
- The skill may have require expiry date but not require a license/certificate, the skill may re-quire a license but not require an expiry date. In most cases if a license or certificate is re-quired then an expiry date will also be required, so in most cases you should check both these check boxes.
- Notes, these notes will display in the technician contact properties as below as indicated in the 3rd column by the red arrow.
Deleting Skills
•You may delete skills, the system will prompt for confirmation and if confirmed will delete the line from the list immediately, however the line will not be deleted from the database until the OK button is clicked, therefore if you make a mistake you may click the cancel button and the list will remain as it was when you opened this window.
•When a line is deleted from this list it is also deleted from the technician contact properties.
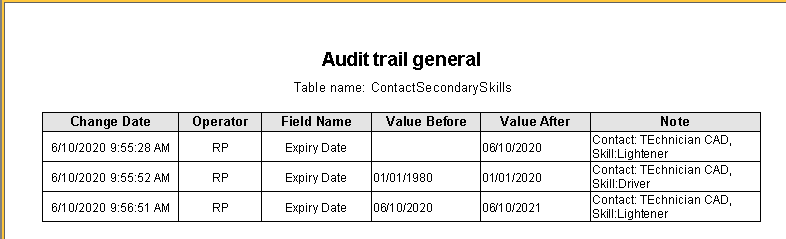
Audit Trail general
This Audit Trail General Report shows who changed an expiry date on technician secondary skill records and when the change was made.
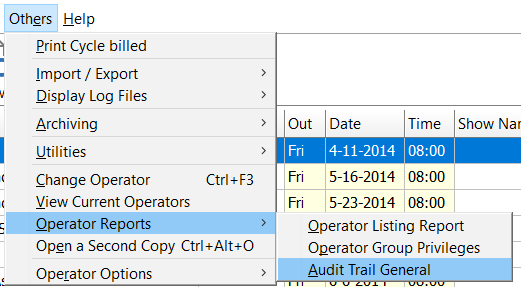
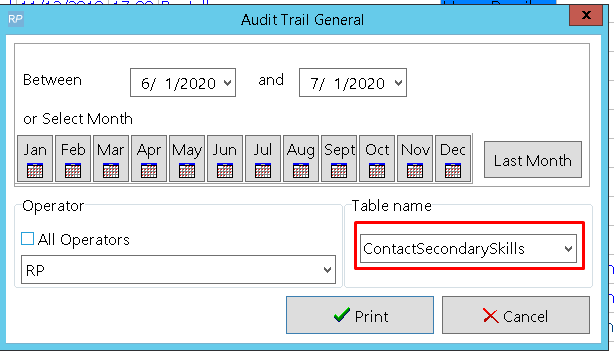
Running the report
First choose the date range for your report
Then select a particular operator or click ALL operators
Next enter the table name ContactSecondarySkills
Information stored in RentalPoint
Each Technician has a contact record which allows for a record of the technicians Secondary Skills
If you Add/Delete/Change Secondary skill Expiry Date, then tblAuditTrailGeneral will contain records of these actions
select * from tblAuditTrailGeneral

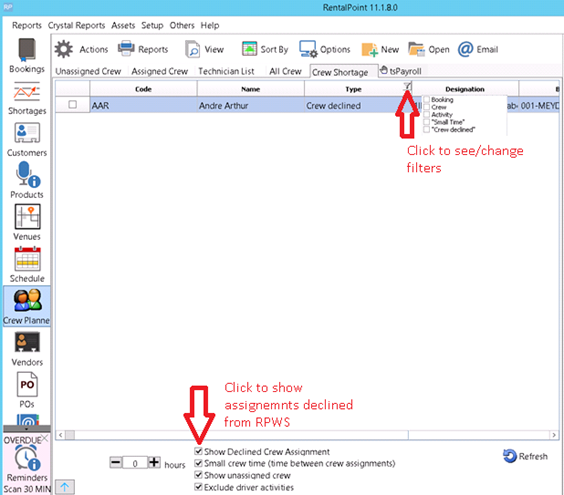
Show Declined Technician Assignments From RPWS
RentalPoint Web Services, or RPWS, is an online tool that you can use to view your upcoming assignments. You can accept or decline assignments, enter payroll hours, enter personal information such as primary and secondary skills, upload a customized avatar and view your schedule.
Configuring RPWS functionality is a detailed process outlined in a separate document, please contact Rentalpoint Support should require assistance with this process. For more information on using RPWS see this link How to Use RPWS PDF
- When a technician declines an assignment in RPWS, it will show in Crew Planner under the ‘Crew Shortage Tab’; however the ‘Show Declined Crew Assignment’ box must be checked on the grid.
- Change/View grid filters by clicking on “Type” column in right corner of header
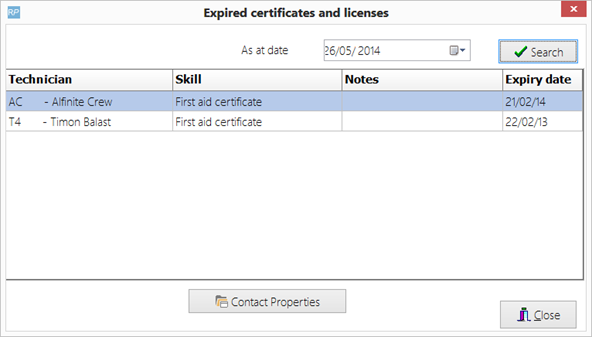
Expired certificates and Licenses Search window
This window shows any technicians whose certificates or licenses will expire soon, the default date is set 90 days plus.
Clicking on the “Contact Properties” button or double clicking the grid will open the technician properties window where you can inspect details and send emails.
This option is available from the contacts page and is shown on the reports menu.